This article is only applicable for MachForm Self-Hosted. If you're using MachForm Cloud, you can skip this.
To integrate Google Sheets with your forms, you’ll need to create your Google Client ID and Client Secret and save it within your MachForm settings page.
This setup is only needed once and should be completed by the main administrator of your MachForm account. It’s quite lengthy steps, unfortunately, but Google requires this, so a bit of patience is required :-)
This setup only needed for MachForm Self-Hosted. If you’re using MachForm Cloud, you don’t need to do any of this setup, since we’ve done it from our side.
Here are step-by-step instructions to create your Google Client ID and Client Secret:
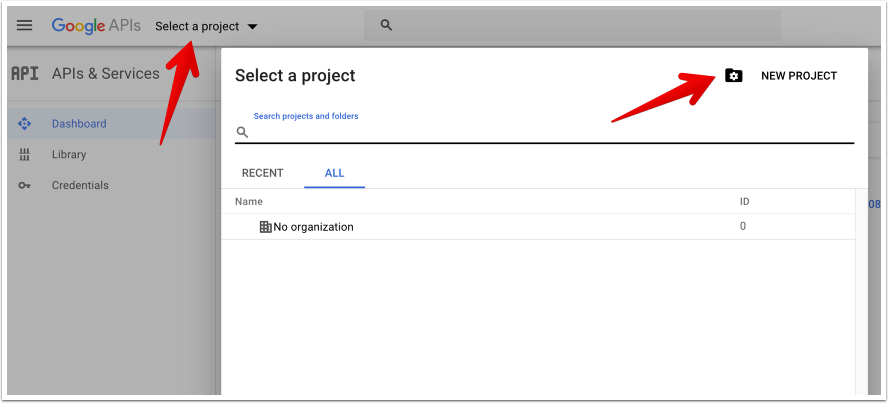
1. Login to your Google account and go to the Google API Console page.
2. Click the Projects menu on the top and then click the New Project button
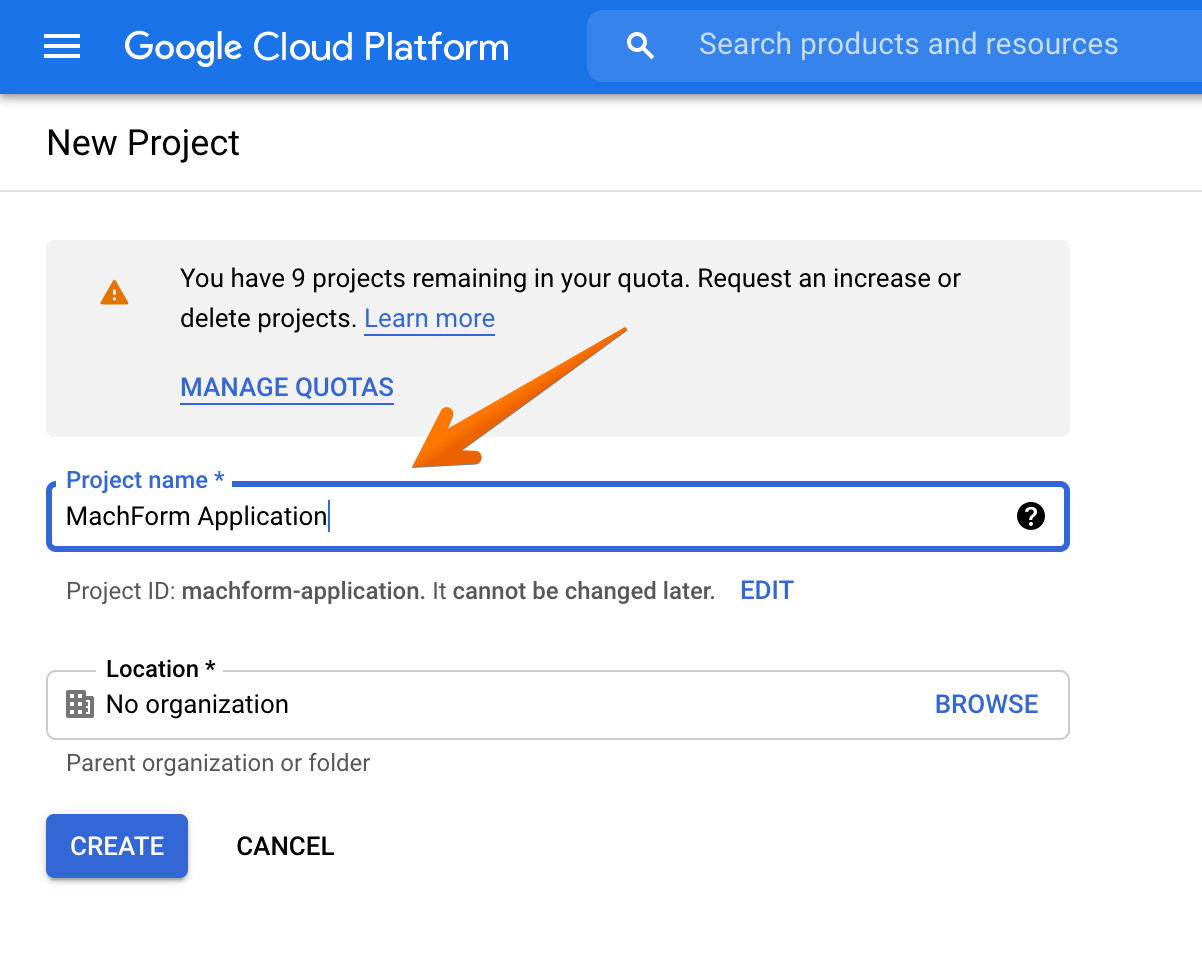
3. Give your project a name (any name is fine)
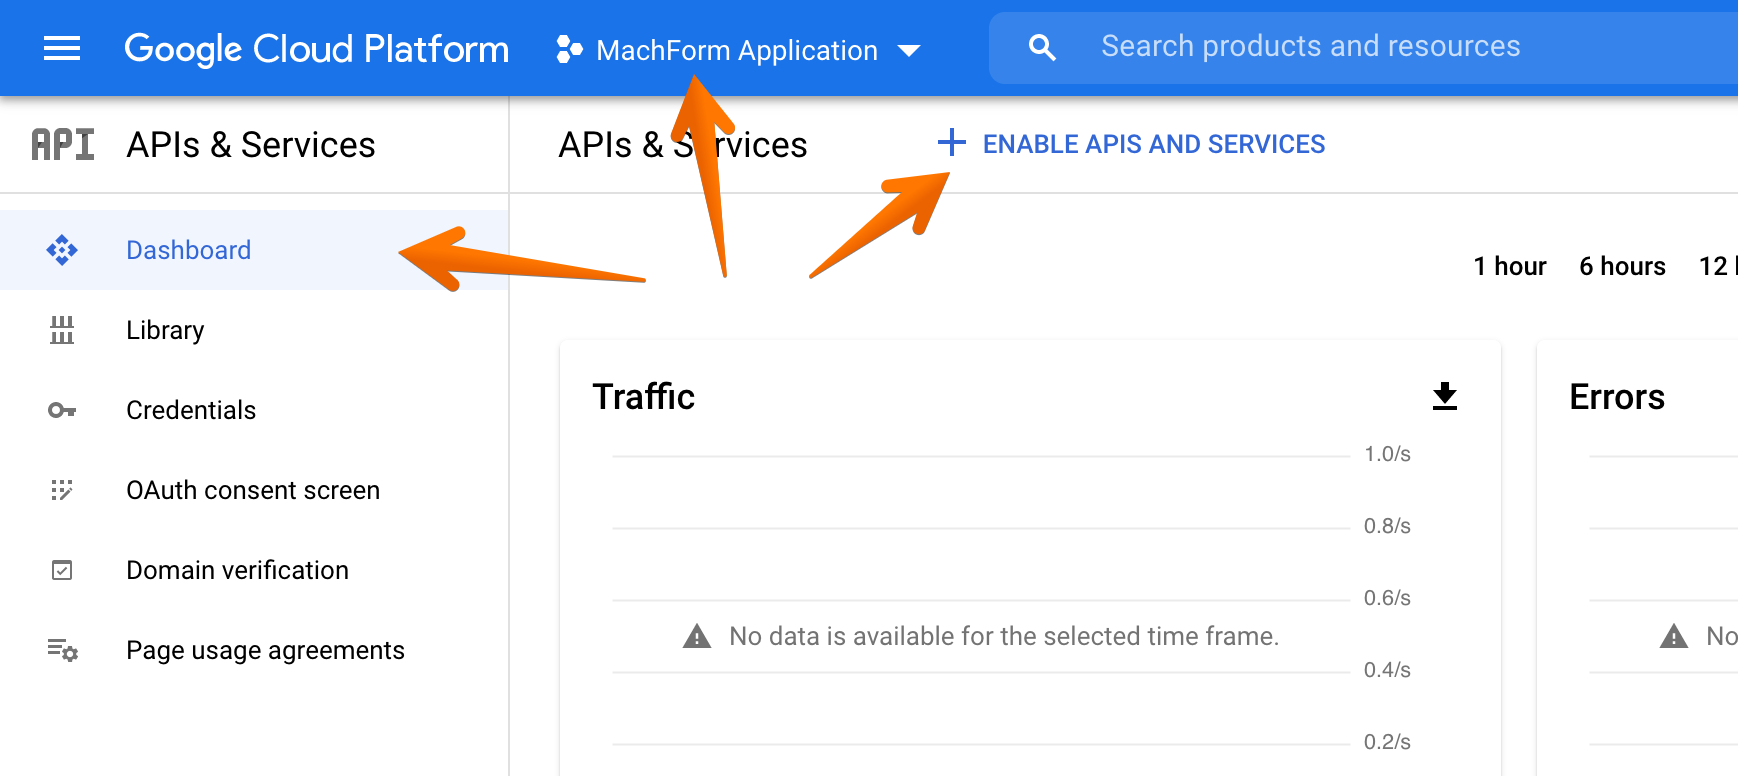
4. Once you’ve created your project, make sure to select your project and click Enable APIs and Services. We'll need to enable both Google Sheets API and Google Calendar API.
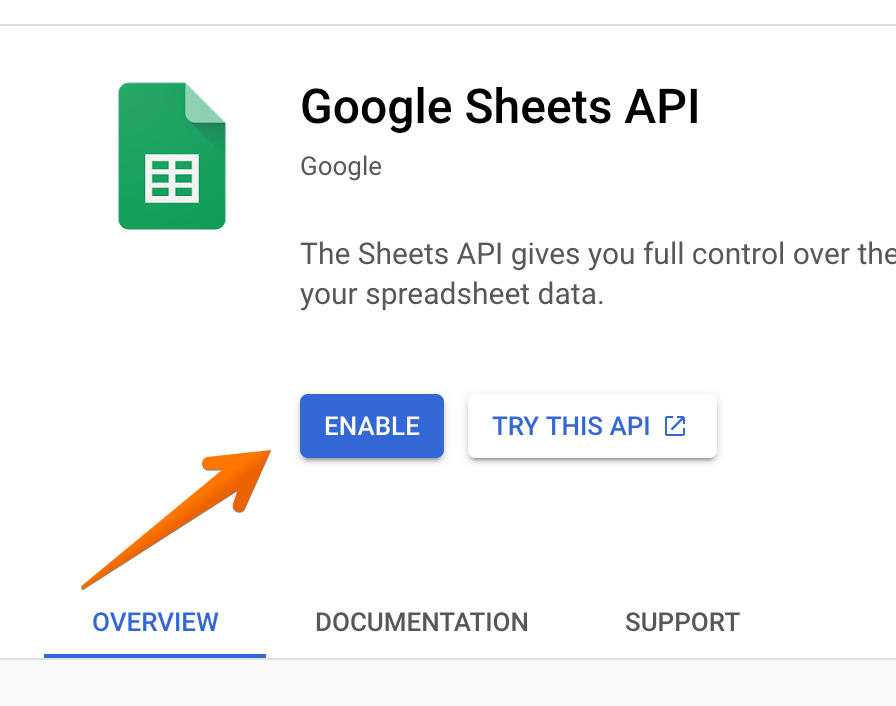
5. Search for Google Sheets API and click on the result.
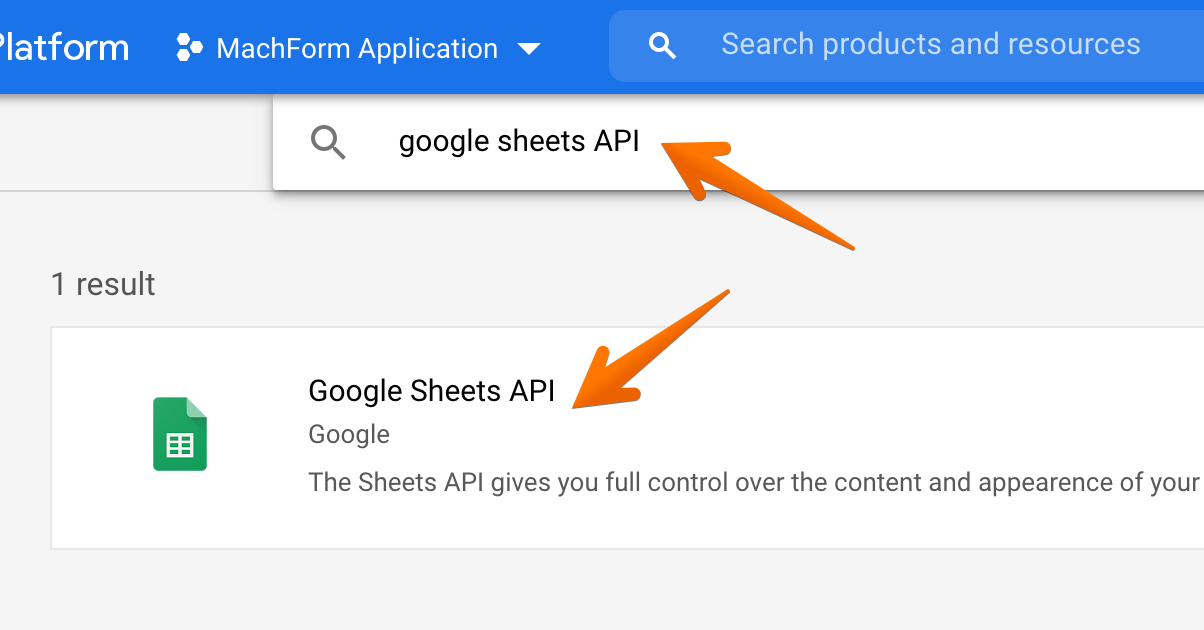
6. Click the Enable button
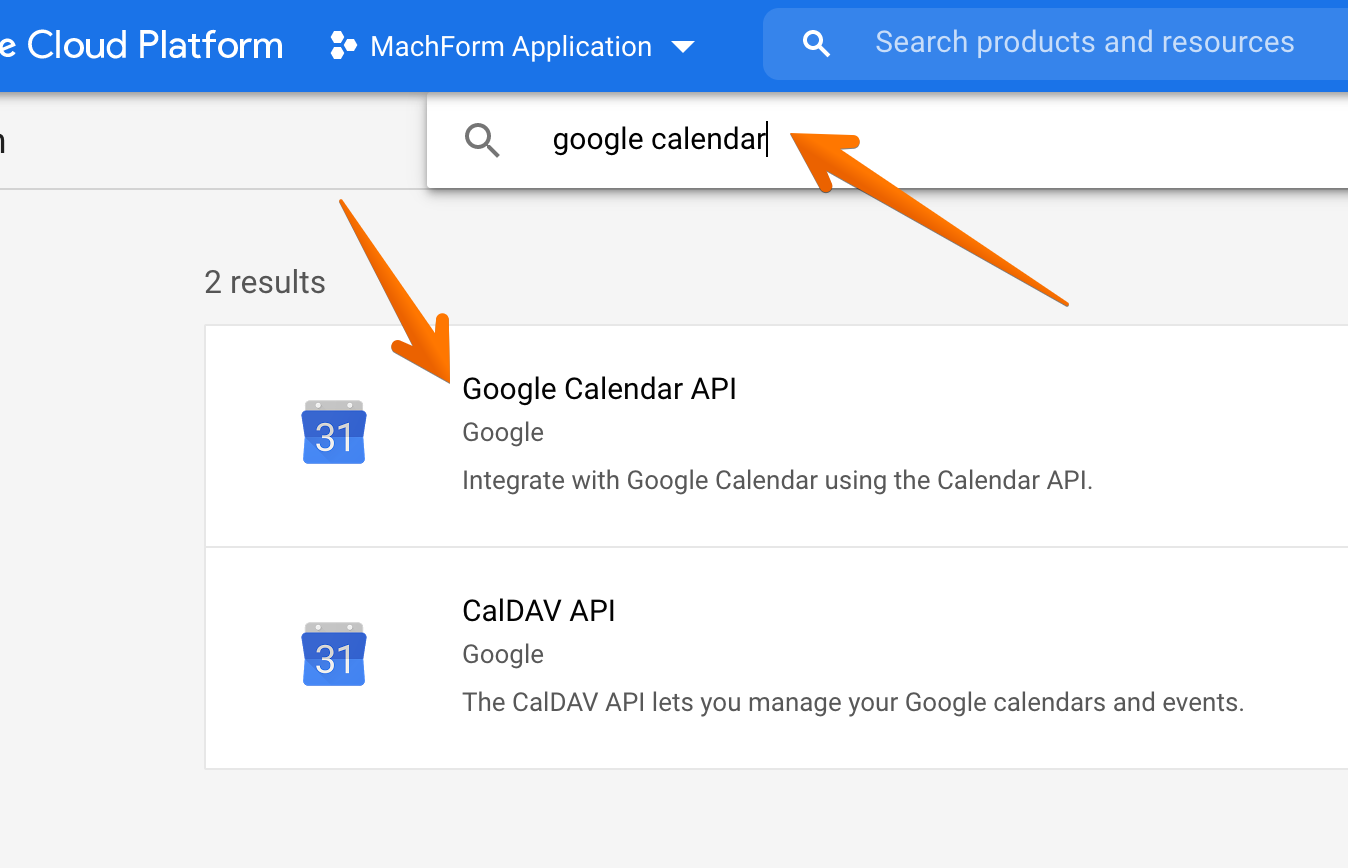
7. Search for Google Calendar API and click on the result.
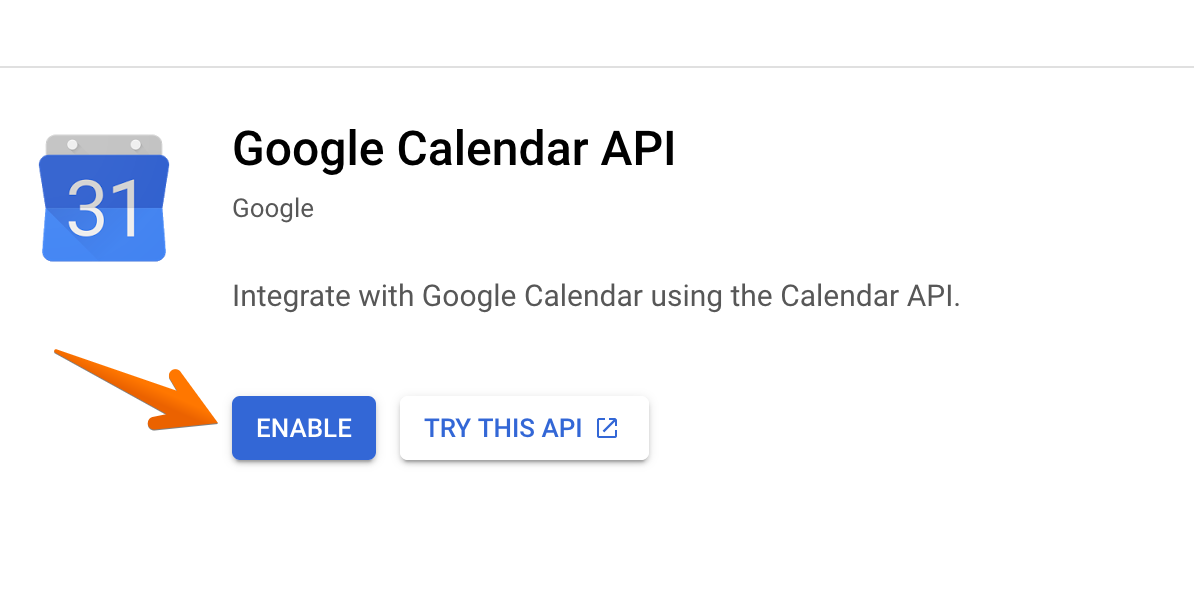
8. Click the Enable button
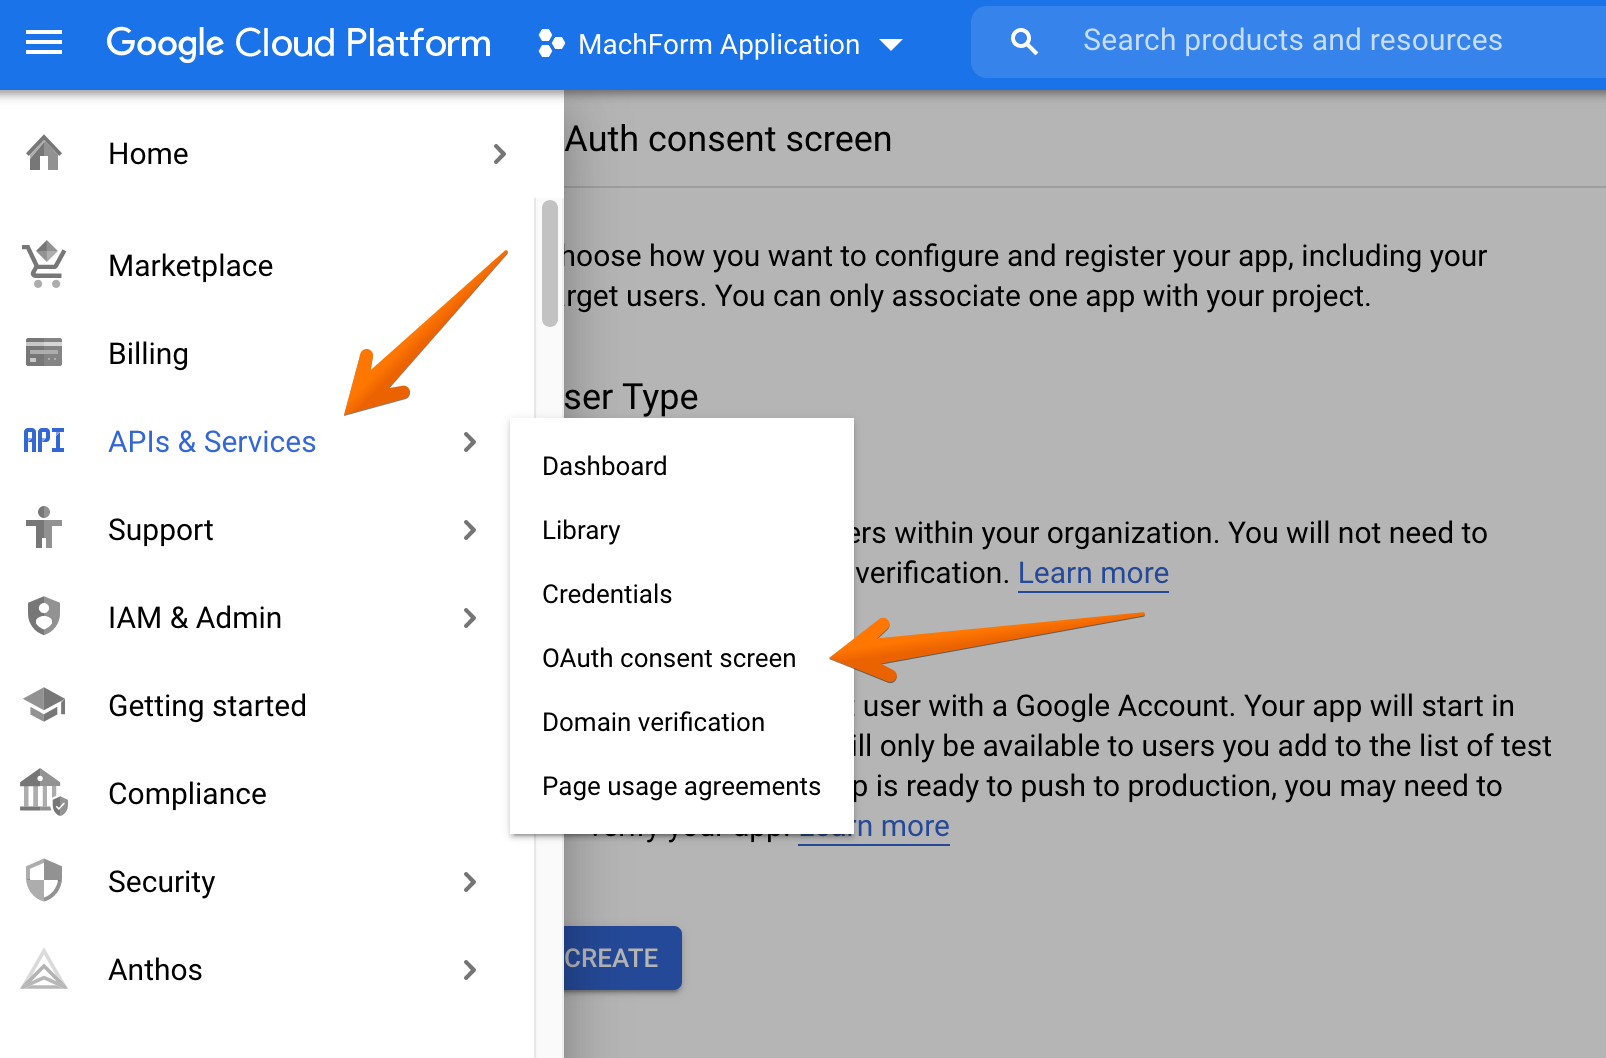
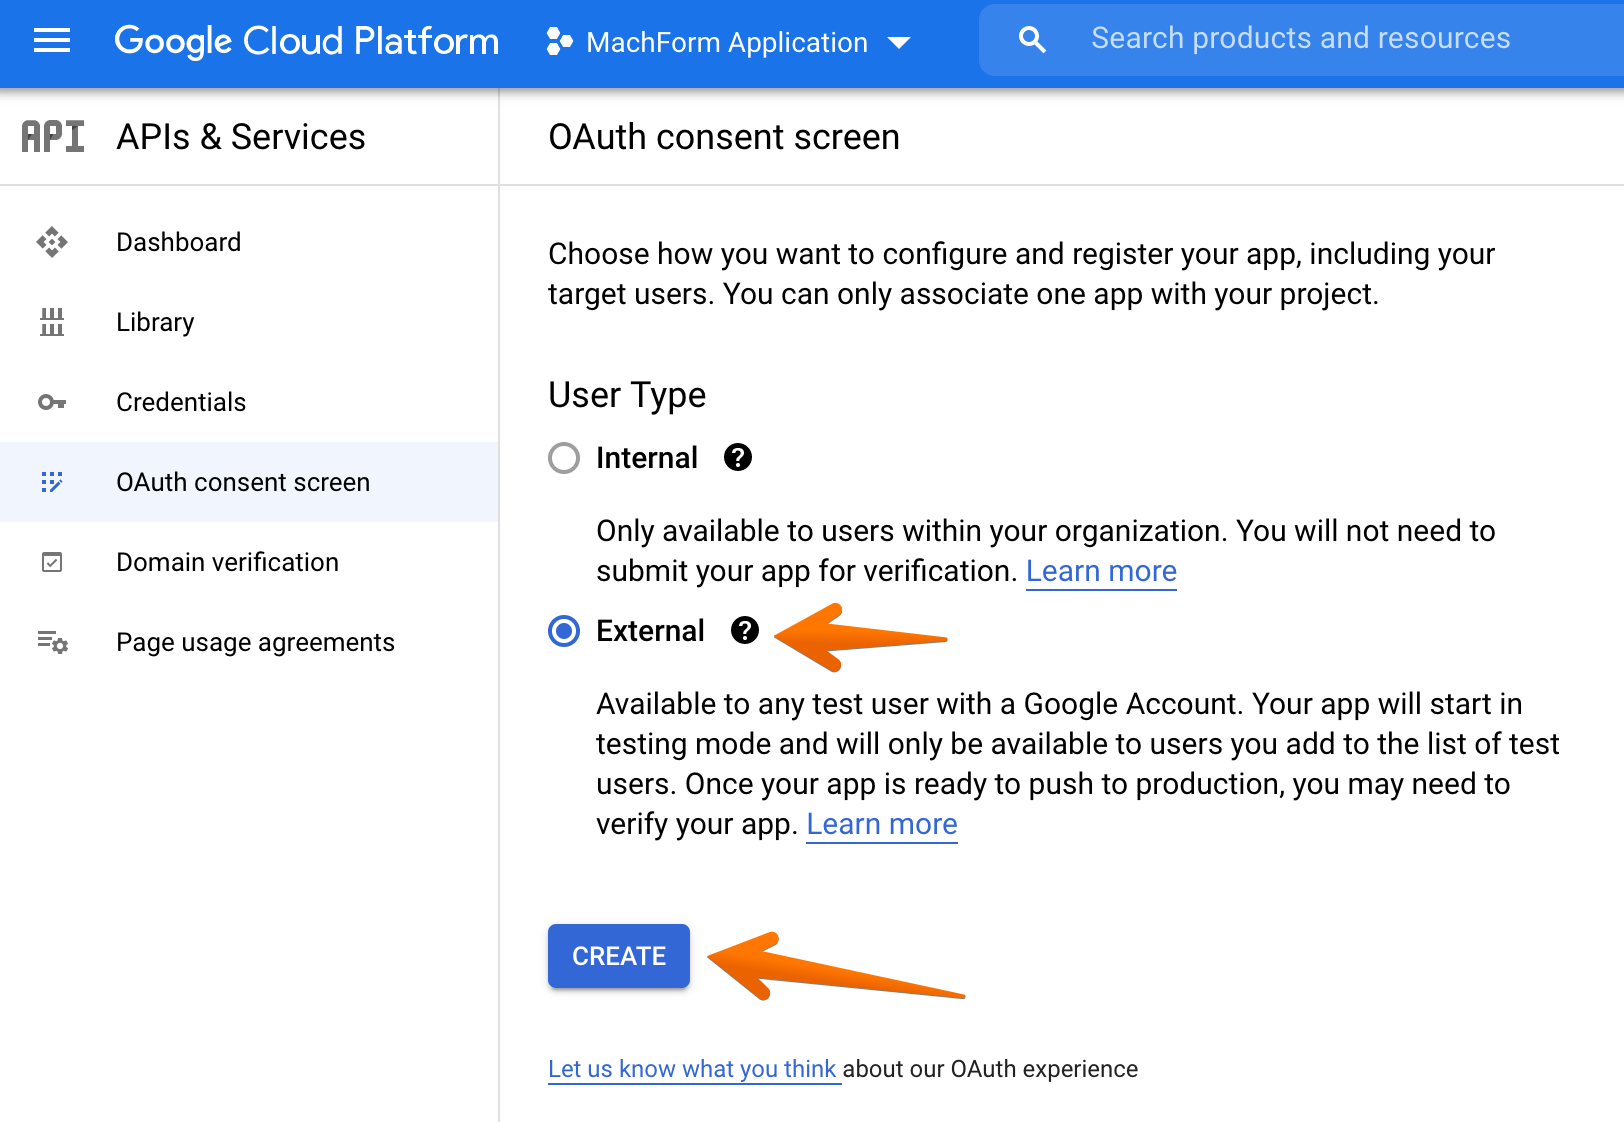
9. Select OAuth consent screen under the API Console dashboard page
10. You'll be prompted to choose the User Type. If you're using G Suite account, choose Internal, otherwise choose External. In this guide, we're choosing the External user type.
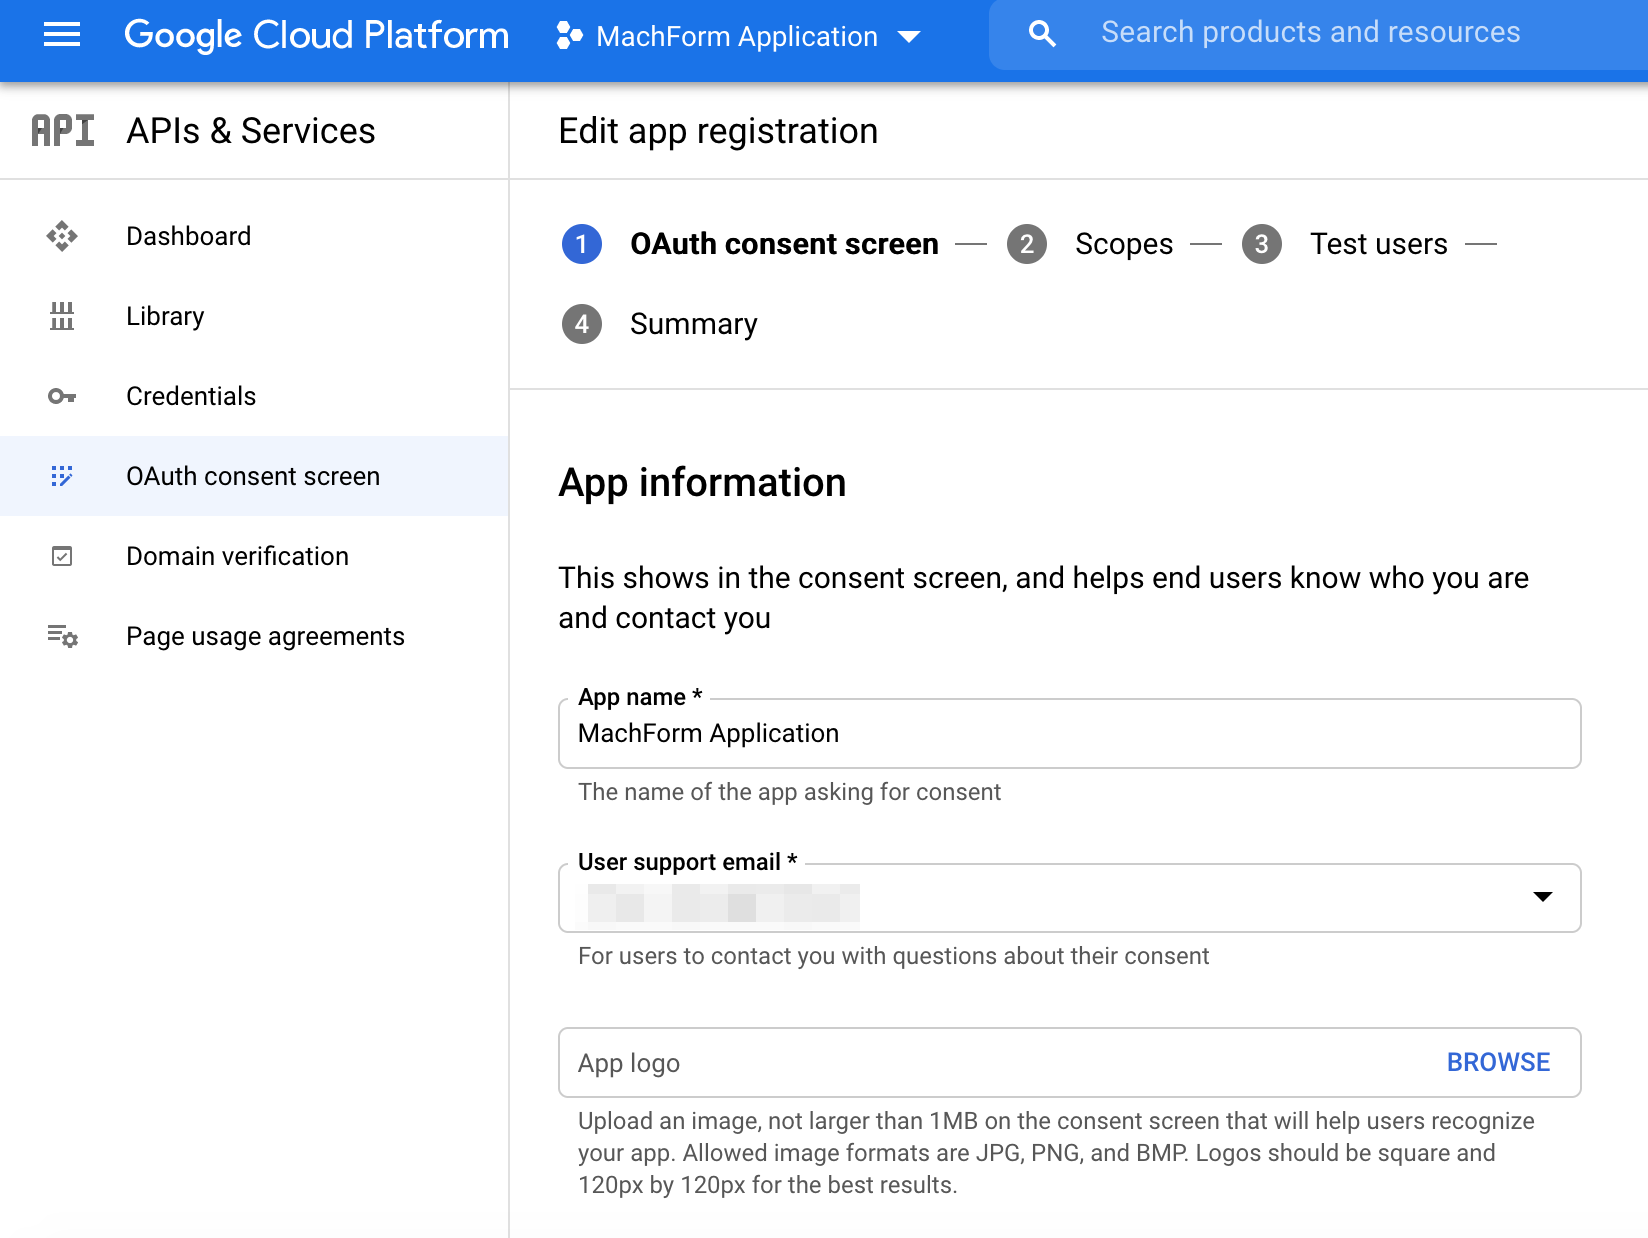
11. Fill all the information required by Google and complete the whole app registration form. Make sure you've added your authorized domain within the app registration form as well.
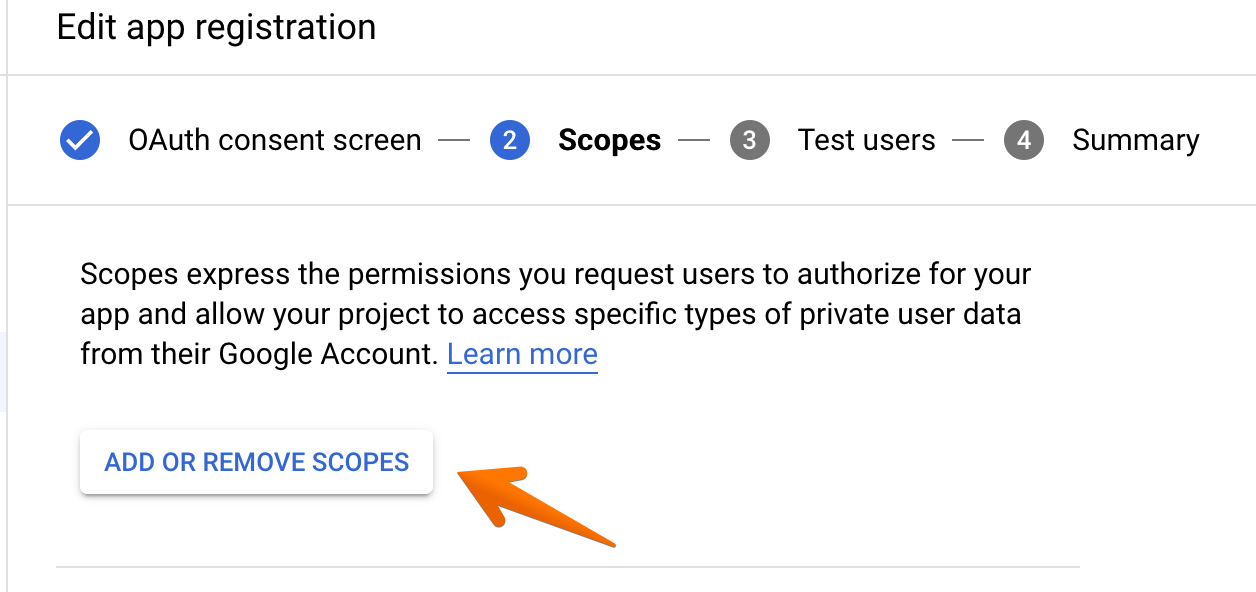
12. Once you've completed the first page, go to the next page and click Add or Remove Scopes button.
13. Choose Google Sheets API and Google Calendar API.

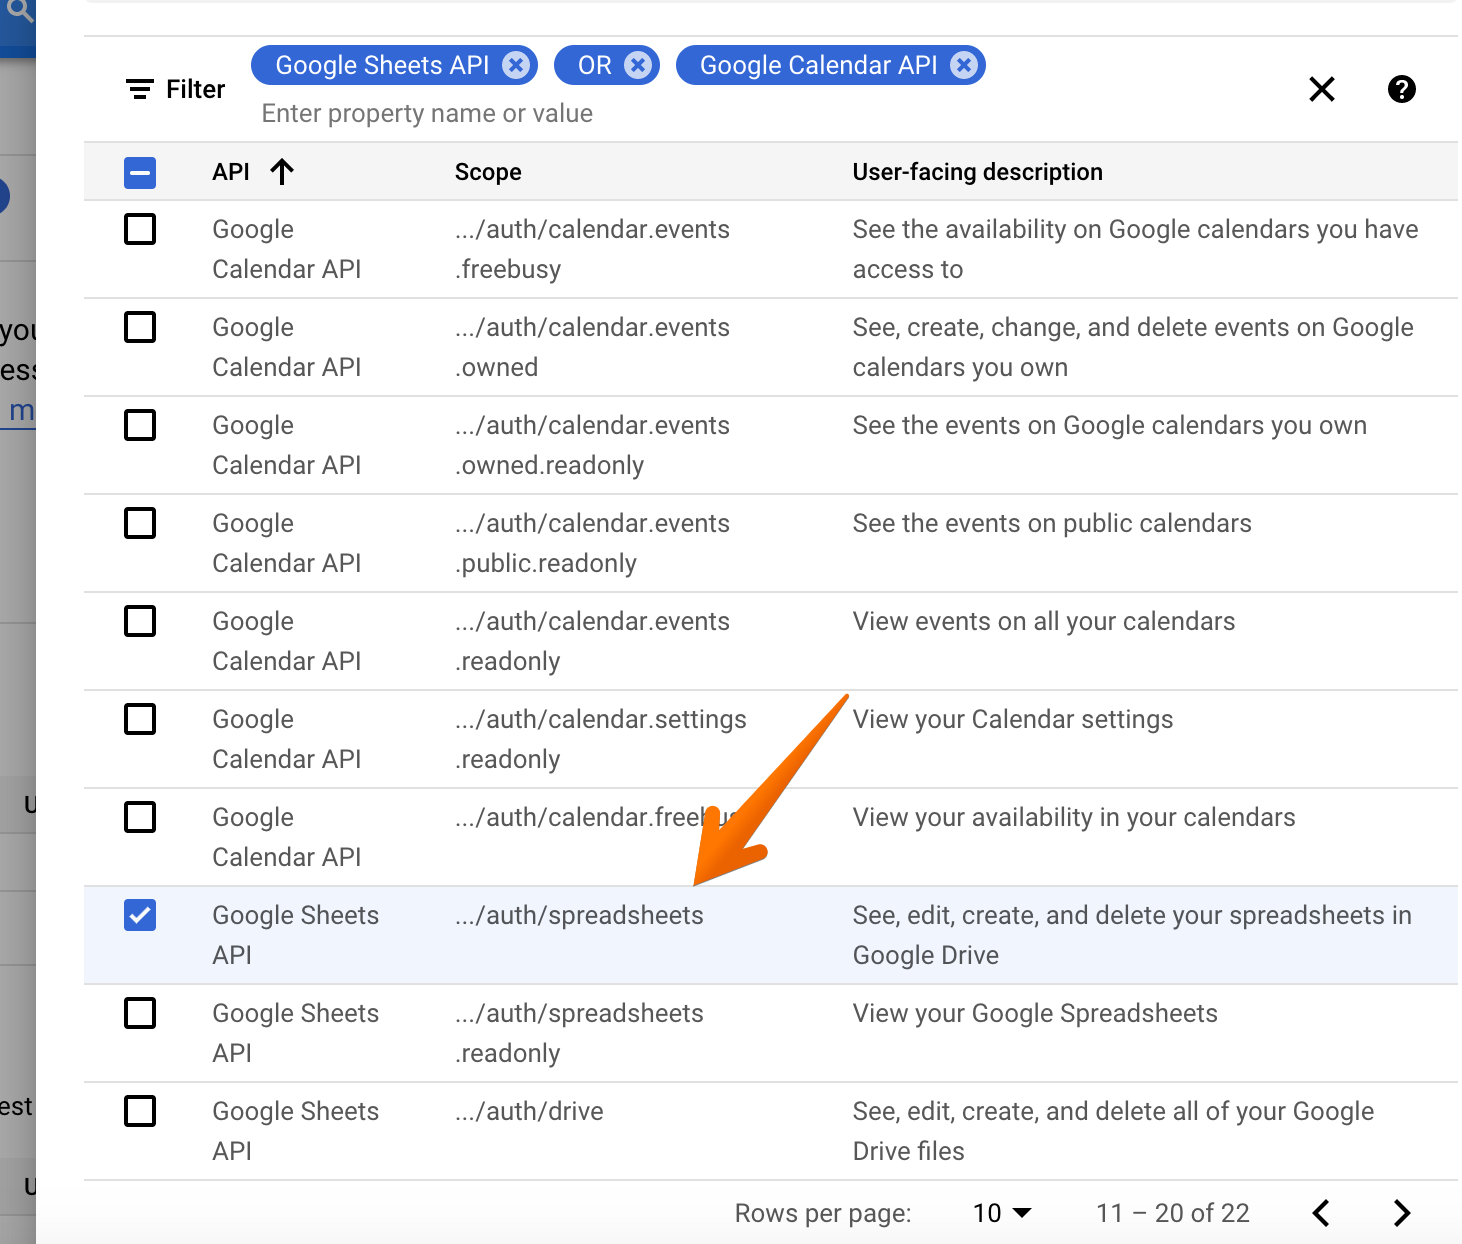
14. Once you've added those scopes, click Save and Continue.

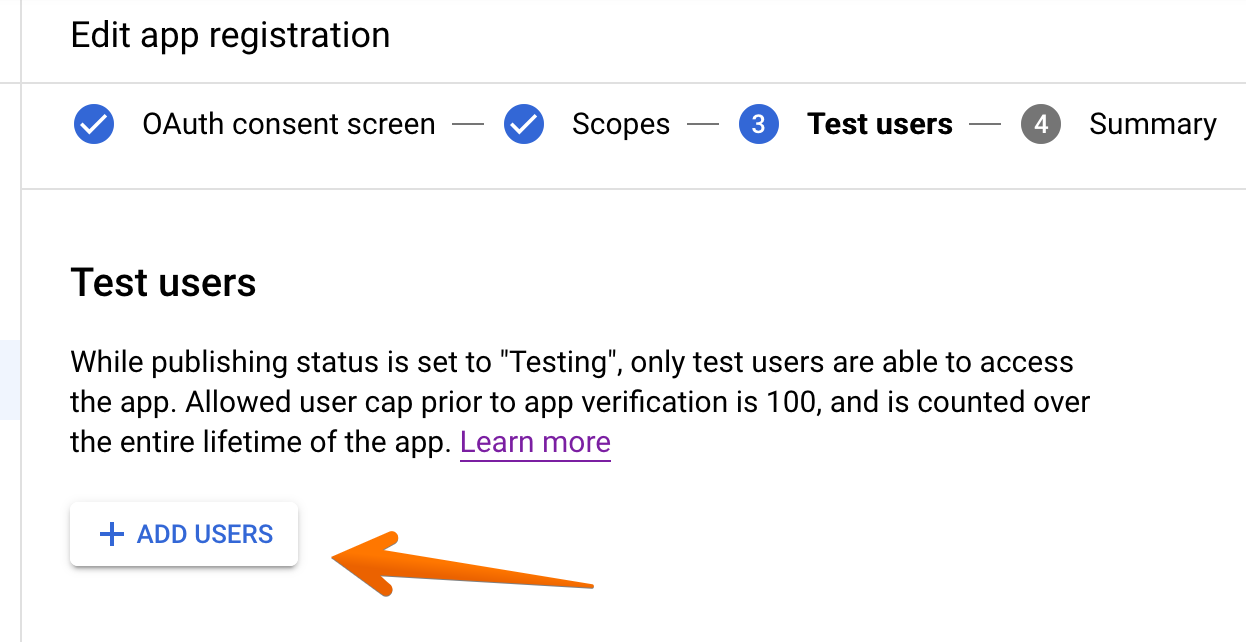
15. Add test users. You can use these users to test your integration before going live.
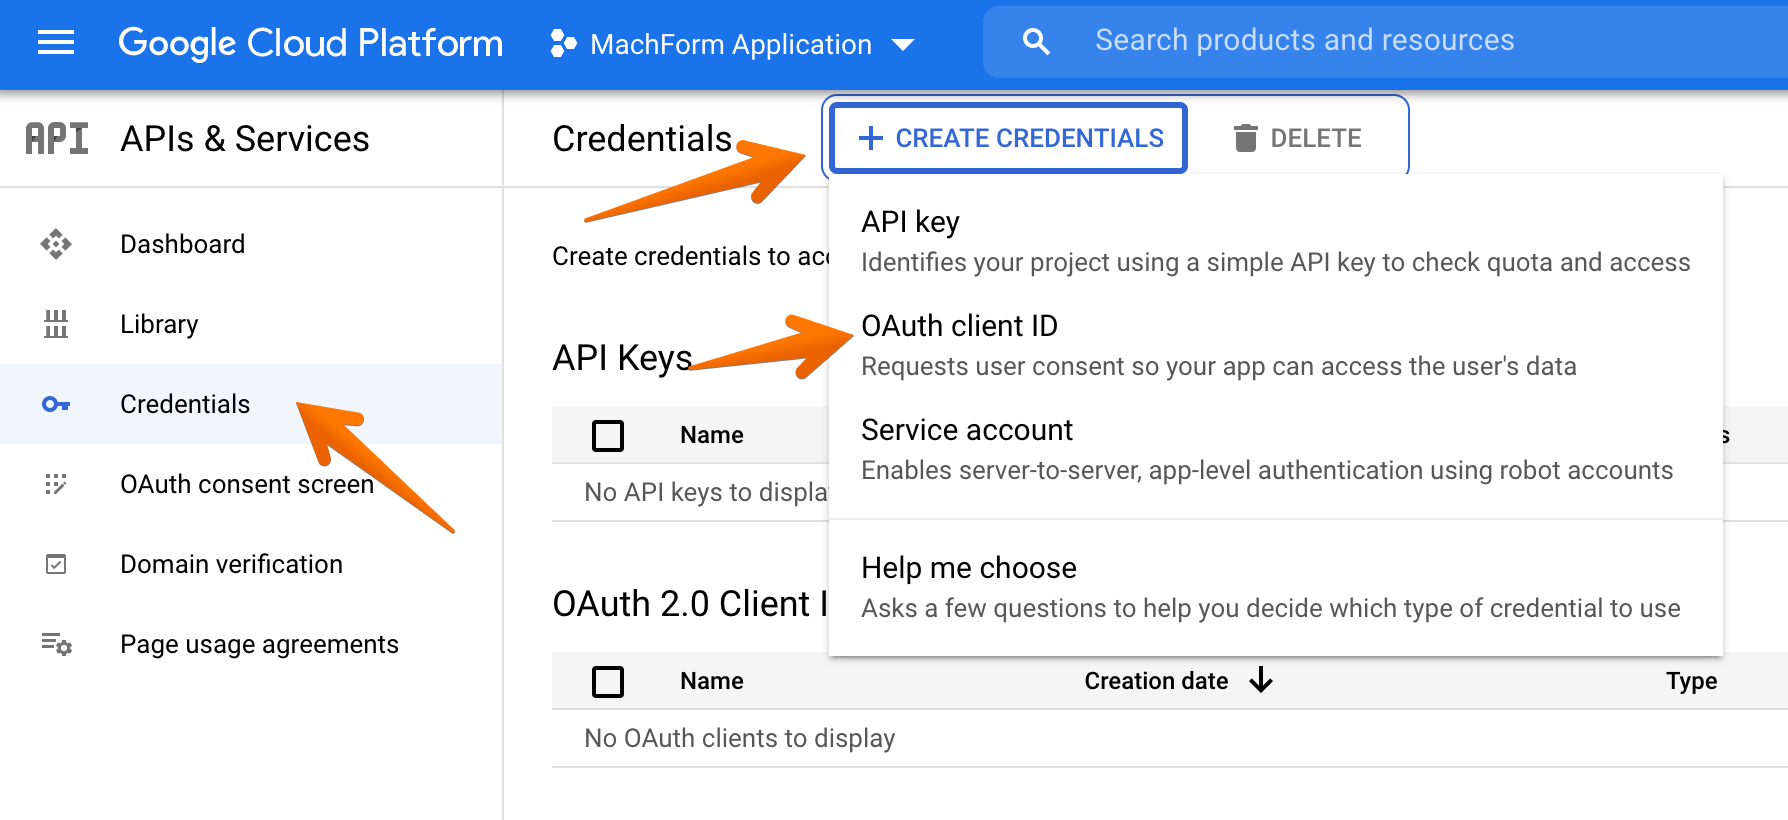
16. Complete the form, go to the dashboard and click the Credentials -> Create Credentials -> OAuth Client ID button.
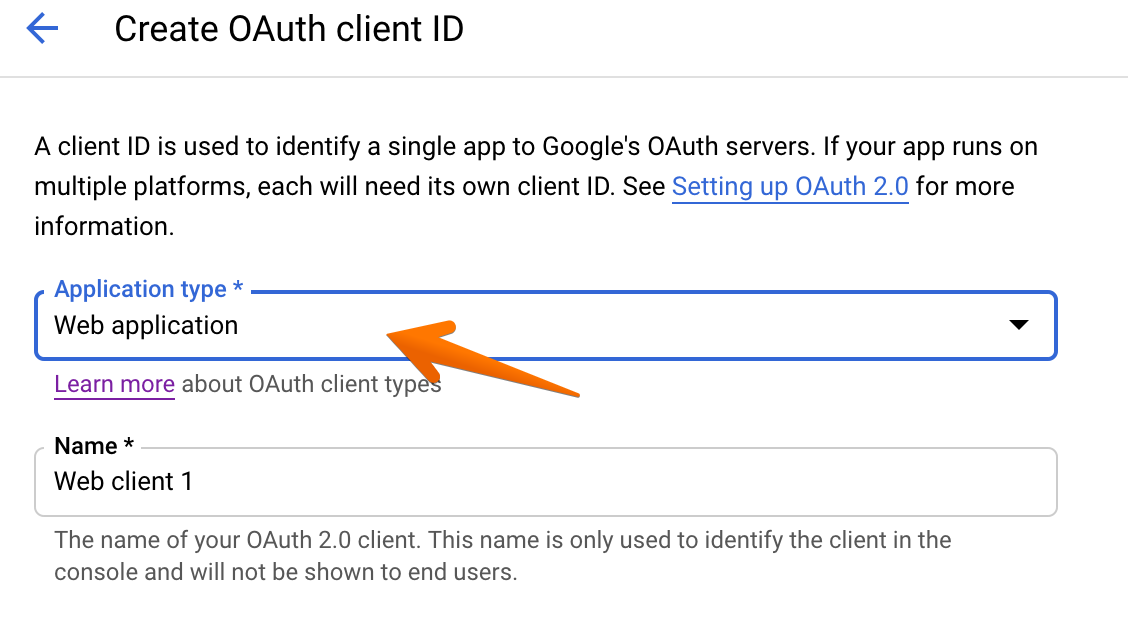
17. Choose "web application" as the application type and provide a name.
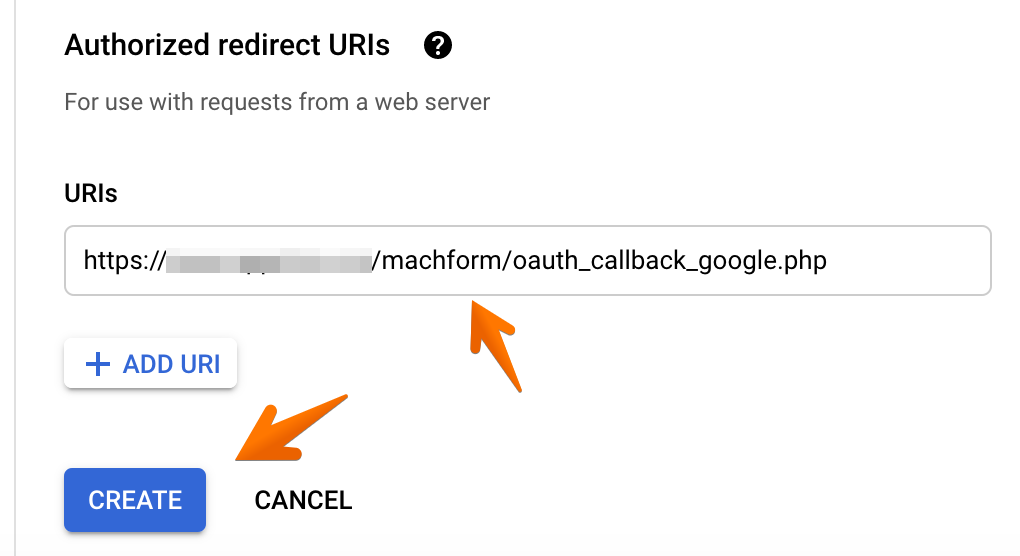
18. Click the ADD URI button under the Authorized redirect URIs section.

19. Fill the Authorized Redirect URIs with the URL provided from your MachForm and click the Create button.
The URL should be something like:
http://www.yourdomain.com/machform/oauth_callback_google.php
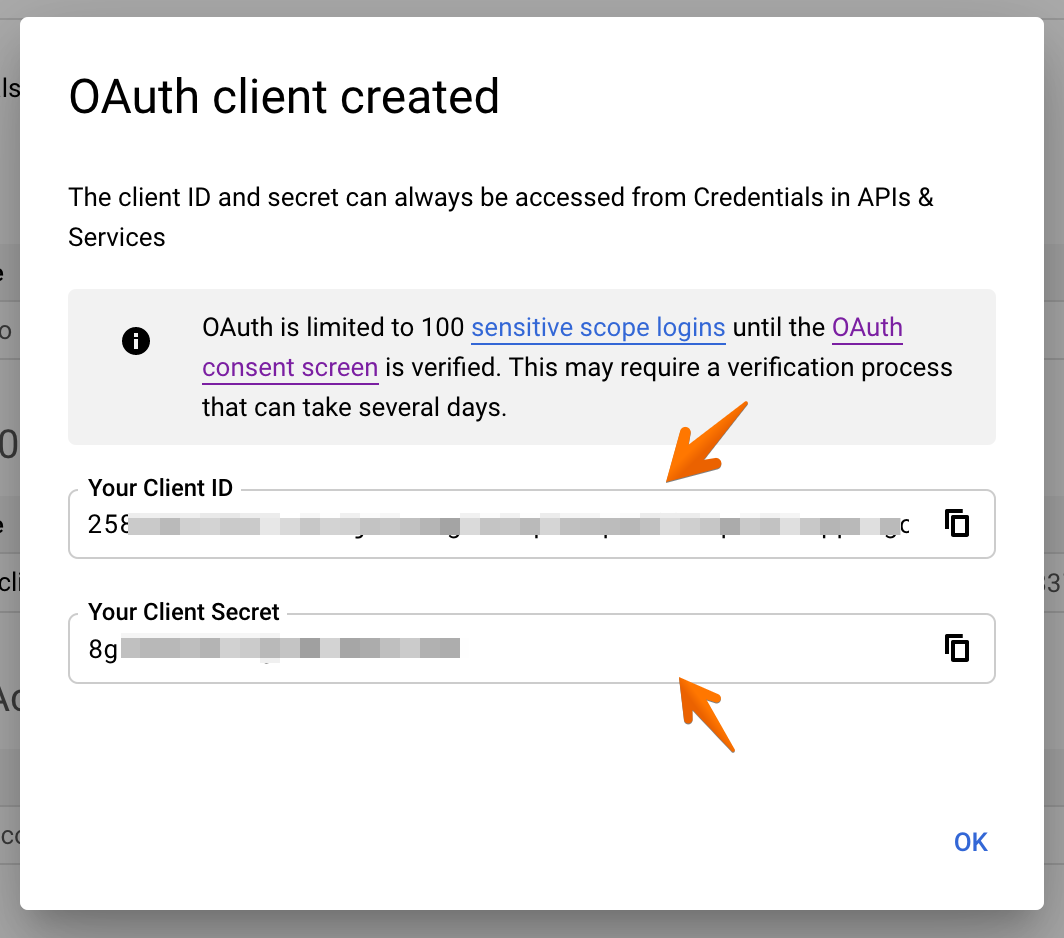
20. On the page that appears, copy the Client ID and Client Secret to your clipboard.
21. Login to your MachForm Panel, go to Settings page and click advanced options under Miscellaneous Settings. Then paste your Client ID and Client Secret.
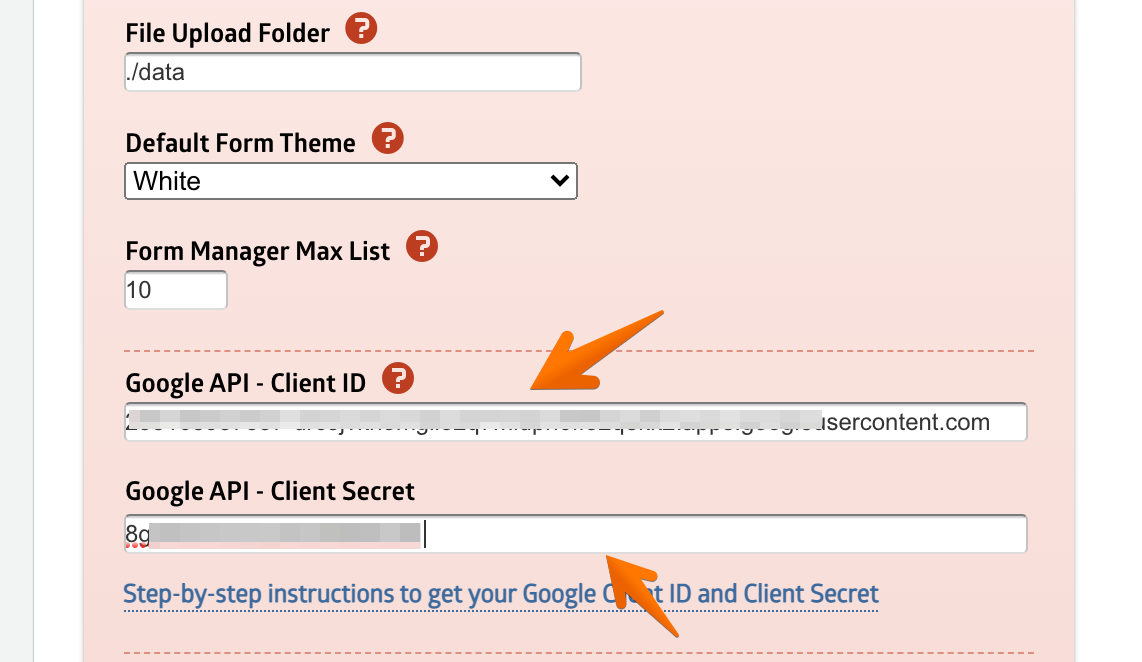
Save the Settings page and you've successfully completed the setup!