Important note: Apple's documentation for Apple Pay on the Web describes their process of "merchant validation", which Stripe handles for you behind the scenes. You do not need to create an Apple Merchant ID, CSR, etc., as described in their documentation, and should instead just follow all steps within this page.
Depends on the type of MachForm you're using (MachForm Cloud or MachForm Self-Hosted), make sure to follow all the steps below.
MachForm Cloud
If you're using MachForm Cloud, you'll only need to verify your domain from your Stripe dashboard.
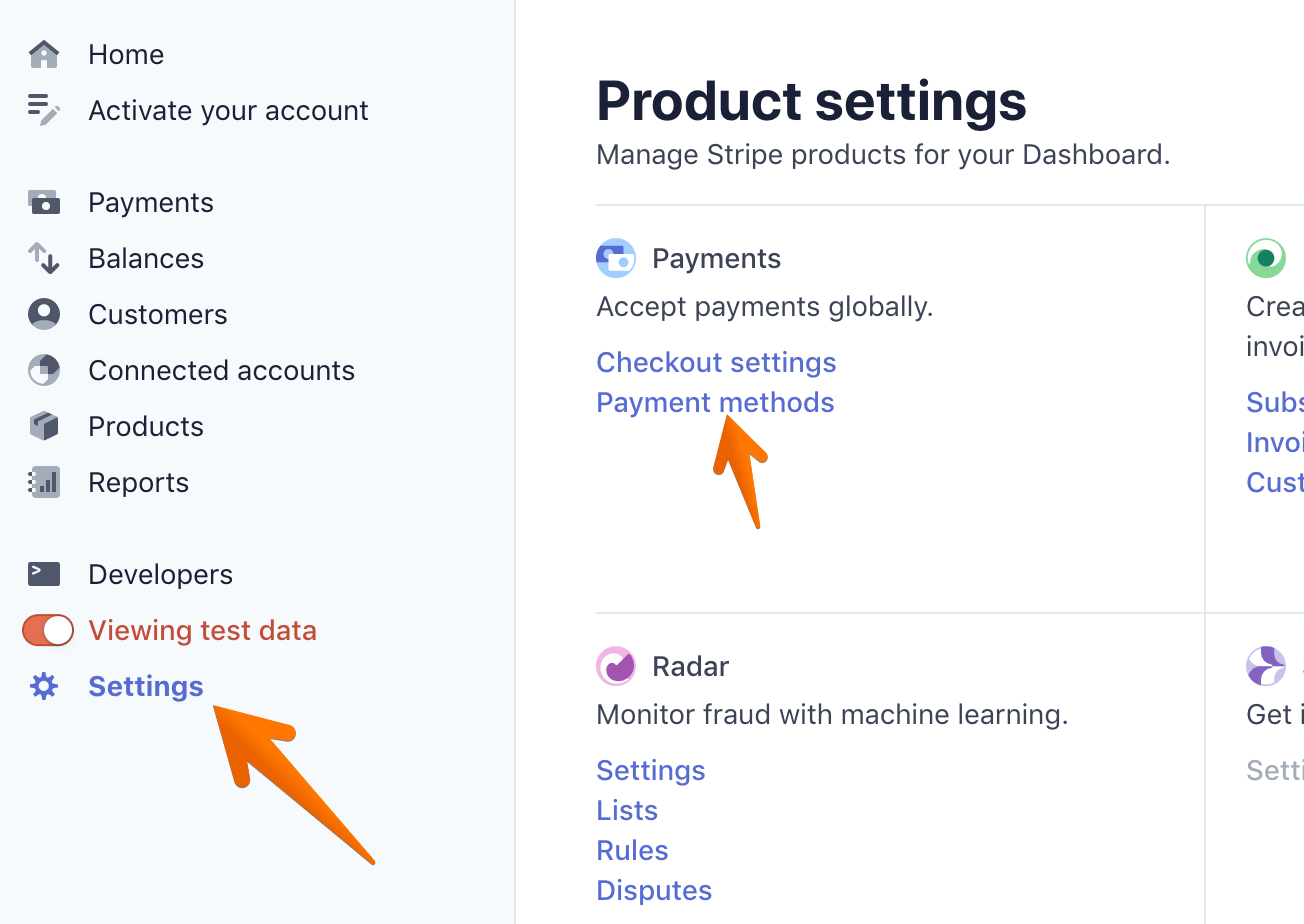
1. Login to your Stripe dashboard, click Settings -> Payment Method
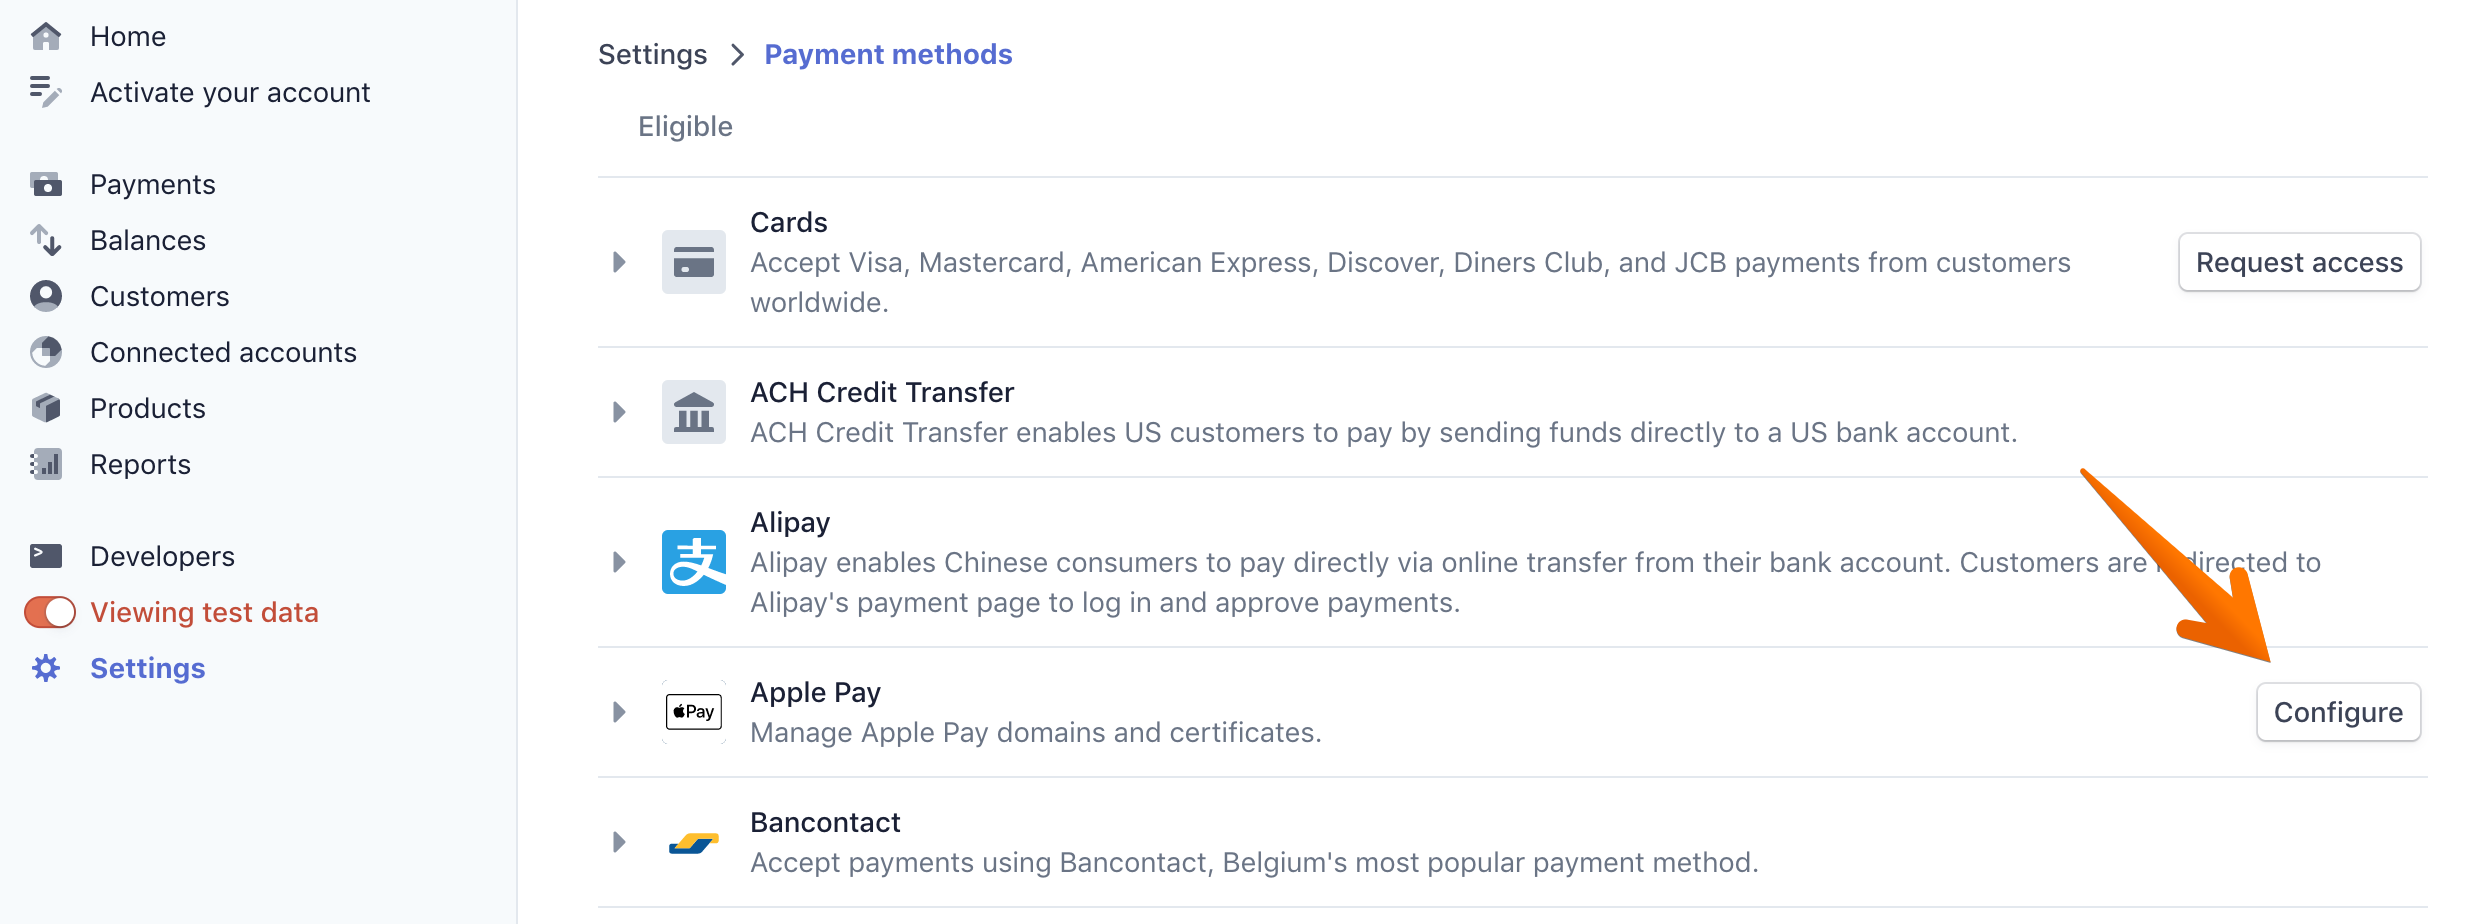
2. Click the configure button next to the Apple Pay section.
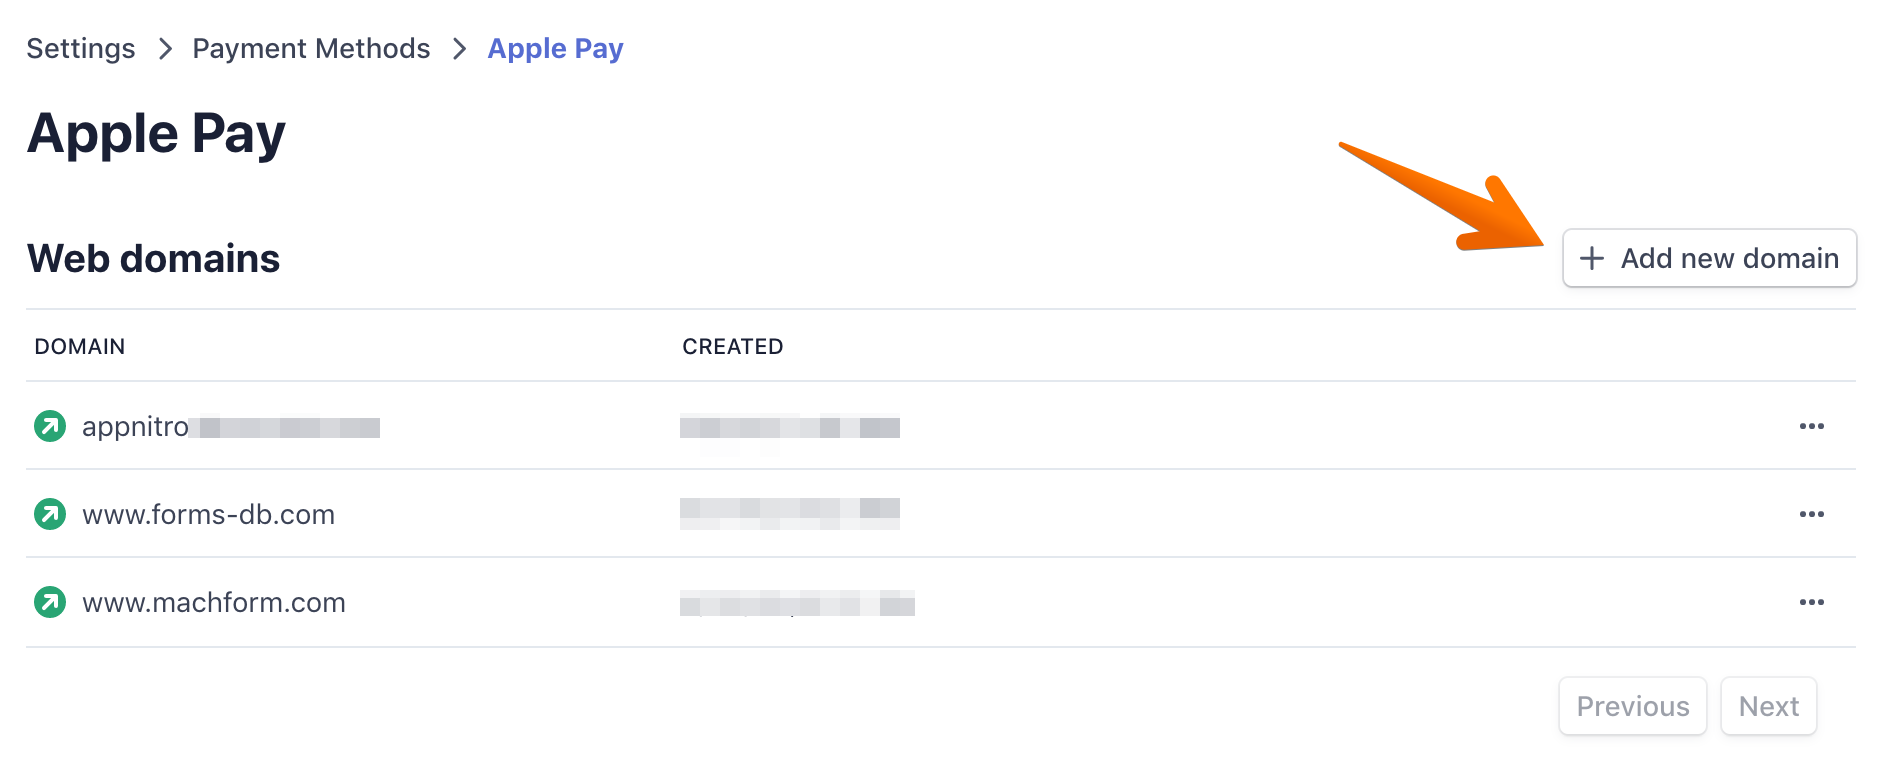
3. Add your subdomain. Click the Add new domain button.

If you don't see the Add new domain button or can't click on it, youll need to click the View Apples Terms of Service button first and accept the Terms of Service first. When you click the Add new domain button, you'll see this pop up form:

4. Type in your cloud subdomain (leave out the https:// part). Your cloud subdomain should be something like xyz.forms-db.com (replace 'xyz' with your current subdomain name.
5. Don't click the Download verification file as you won't need it.
6. Click the Add button
And that's it, your MachForm Cloud domain should be listed there and verified.
MachForm Self-Hosted
If you're using MachForm Self-Hosted, you'll need to upload a domain verification file to your server and then verify the domain from Stripe dashboard.
1. Download this domain association file and host it at /.well-known/apple-developer-merchantid-domain-association on your site.
For example, if you're registering https://www.example.com, make that file available at https://www.example.com/.well-known/apple-developer-merchantid-domain-association
2. Login to your Stripe dashboard, click Settings -> Payment Method

3. Click the configure button next to the Apple Pay section.

4. Add your subdomain. Click the Add new domain button.
If you don't see the Add new domain button or can't click on it, youll need to click the View Apples Terms of Service button first and accept the Terms of Service first. When you click the Add new domain button, you'll see this pop up form:
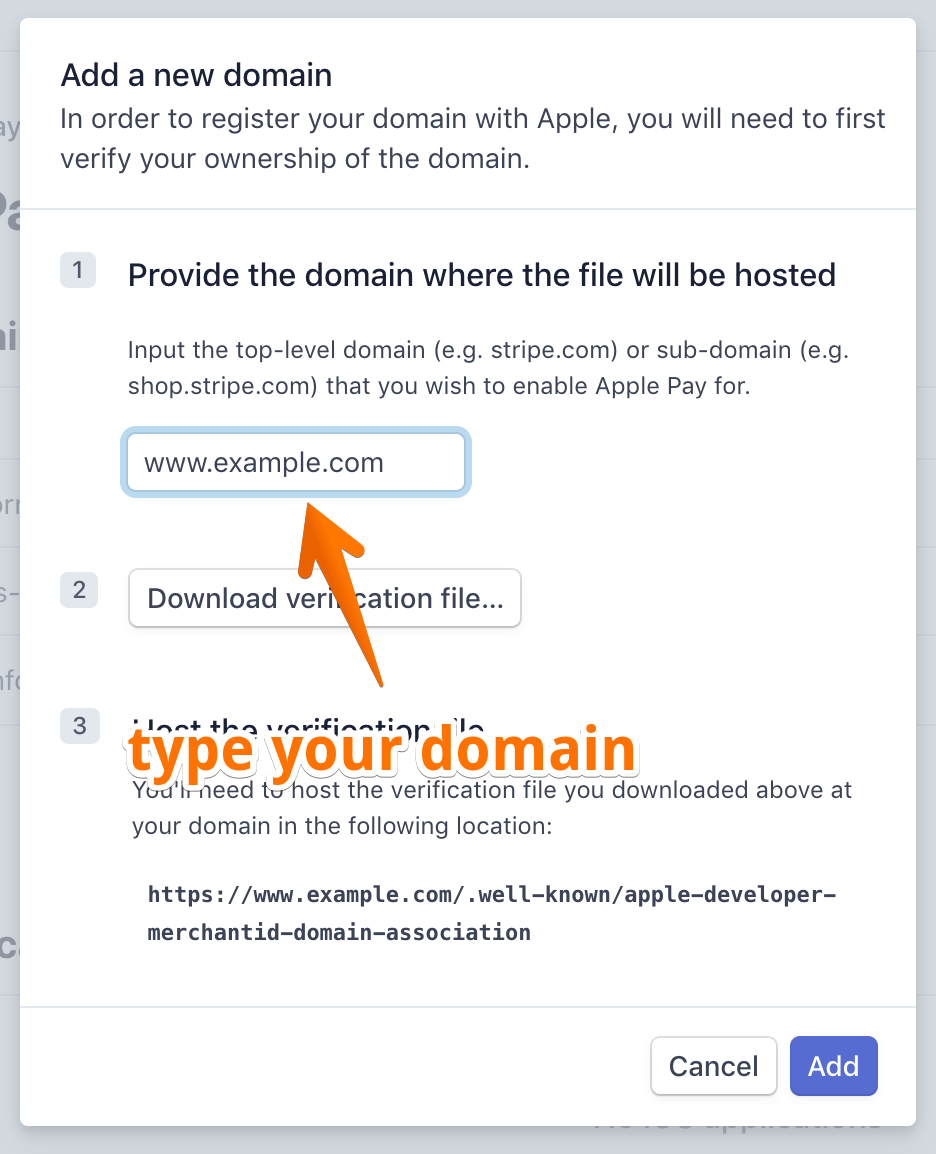
5. Type in your domain or subdomain (leave out the https:// part).
6. Don't click the Download verification file as you won't need it any longer.
7. Click the Add button
And that's it, your MachForm Self-Hosted domain should be listed there and verified.