Quite often, you would like to create a form that accepts online payment (either credit card or PayPal) but also able to accept check/cash payment, based on your clients' preference.
MachForm currently only allows one payment method for each form, so how would you do this?
It's quite easy actually: you can use the Skip-Page logic. First, make sure that you've configured your form with one of the online payment methods (Stripe, Braintree, PayPal, Authorize.net) and then follow the steps below to support check/cash payment:
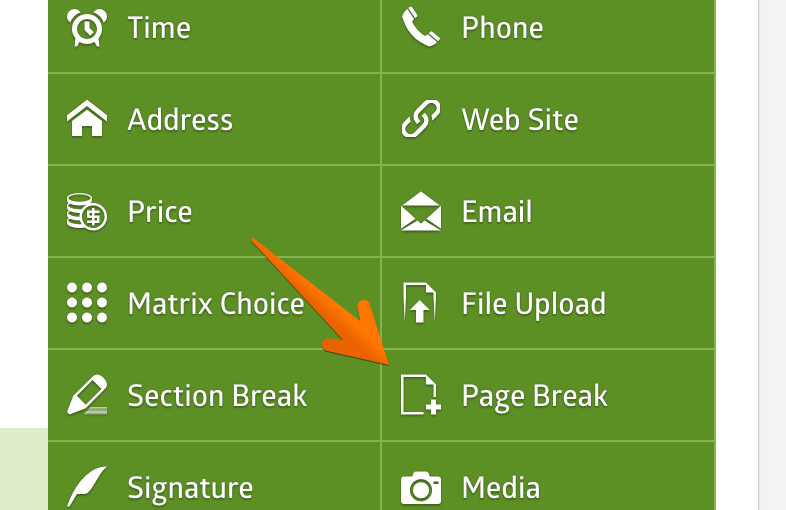
Add a Page Break to your form
To be able using the skip-page logic, your form needs to have at least two pages. If your form already consists of multiple pages, you can skip this step. Otherwise, add a Page Break field at the end of your form.
Add a Multiple Choice field
Add a Multiple Choice field into your newly created page (or if you already have multiple pages, add it to the last page). Change the multiple choice label and choices to this:
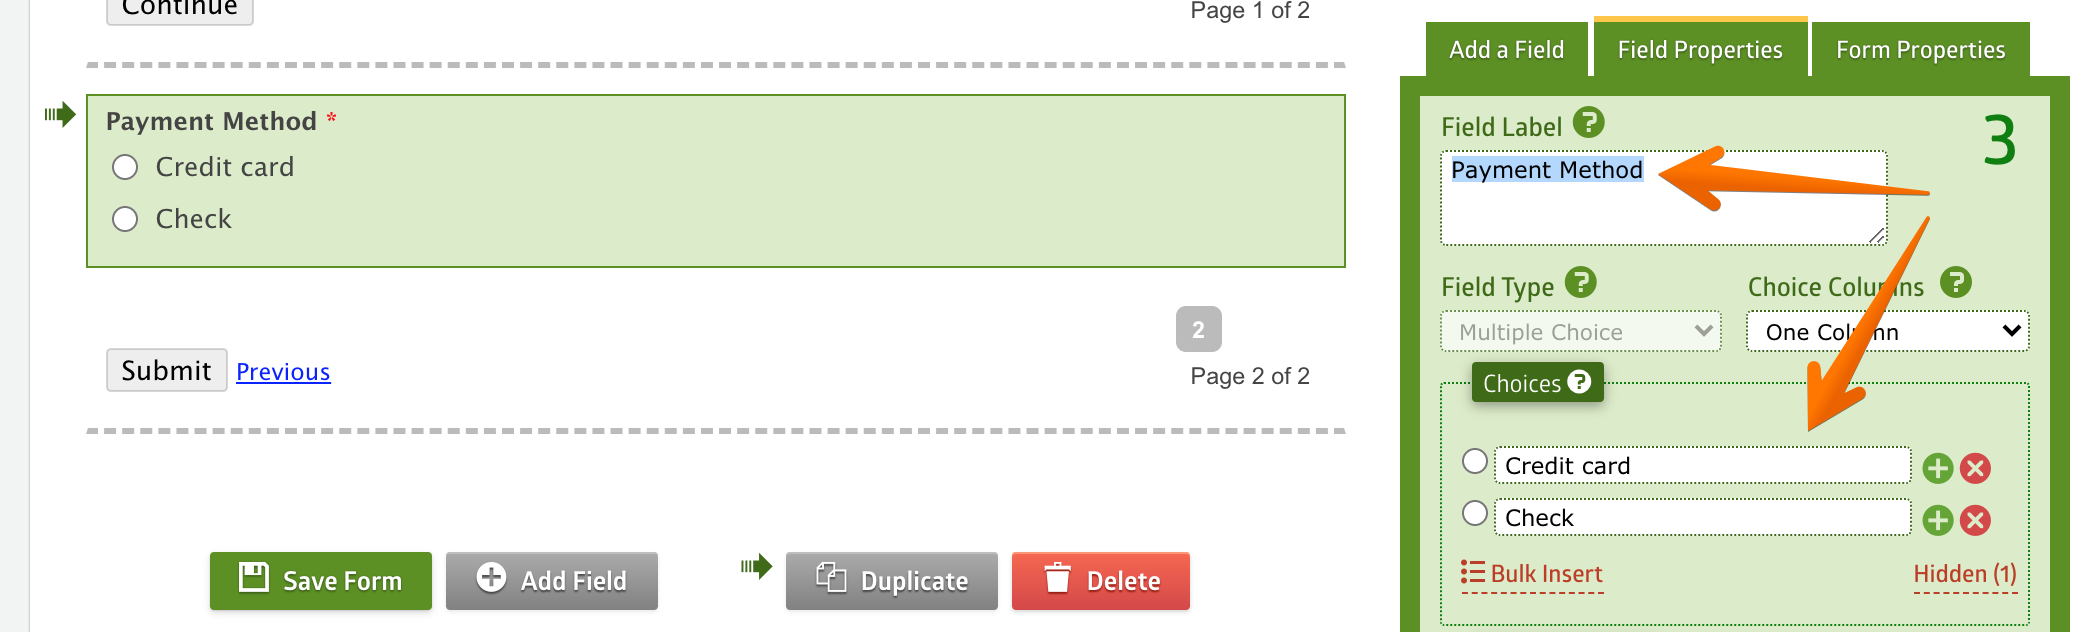
Save your form once you've added the multiple choice field.
Enable skip-page logic
After you've saved your form, go to Form Manager and click the Logic icon.

Check the Enable Rules to Skip Page option. This will enable skip-page logic on your form.
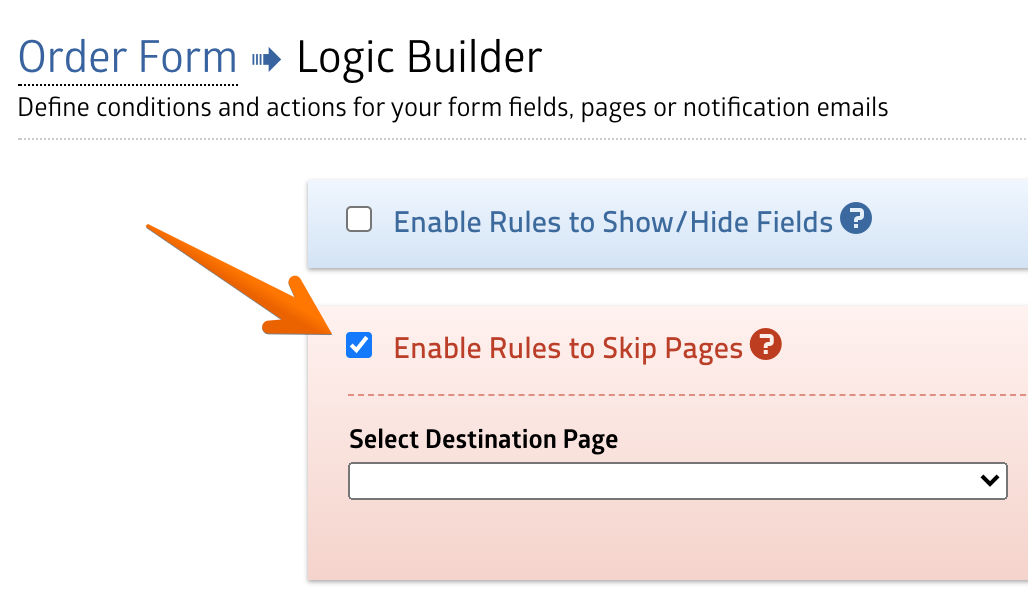
Add a logic rule
Click the Select Destination Page drop-down and choose Success Page.
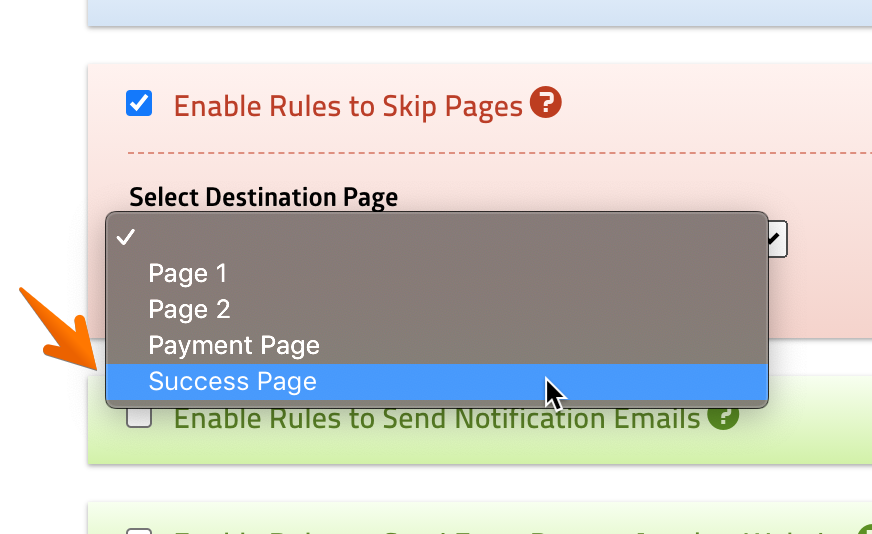
A logic rule will be displayed. Adjust the rule and select the Payment Method field as the rule condition, like this:
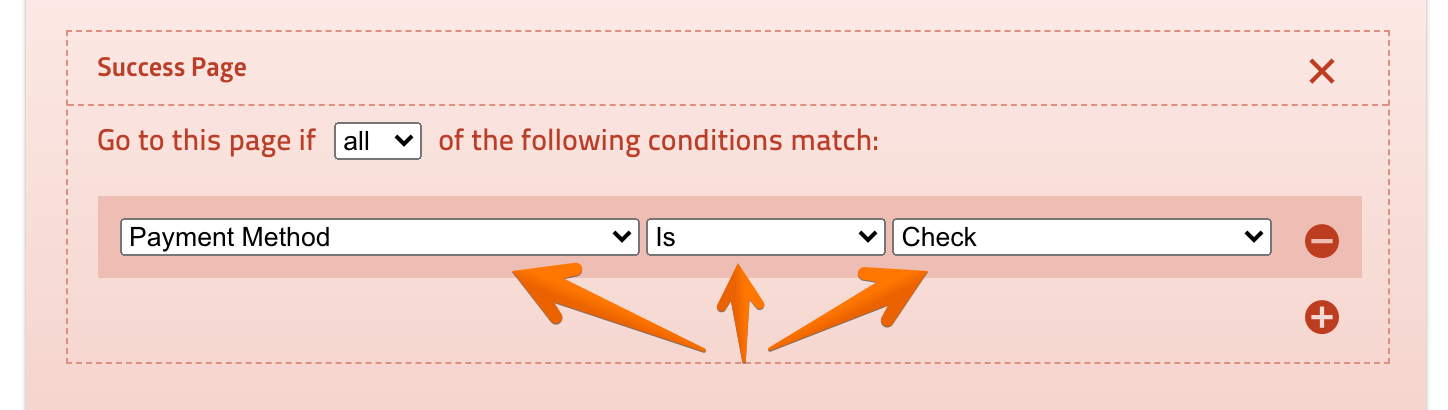
Save the logic rule by clicking the Save Settings button at the top right corner of the page.
Test your form
At this point, you've basically completed the whole skip-page logic setup. Test your form by choosing check or credit card as the payment method.
When you select the credit card option, the form should display the payment page. When you select check, the form should skip the payment page and display a success message instead. Congratulations! :-)
Customizing success message
After you've tested your form, you'll realize that the form will display the same success message, regardless of the selected payment method.
We need to display a different success message when the client selects the check option, right? It should be a message that contains further information regarding the check payment option.
Go to your Logic page again and select Enable Rules to Display Success Page. Adjust the rule to be like this:
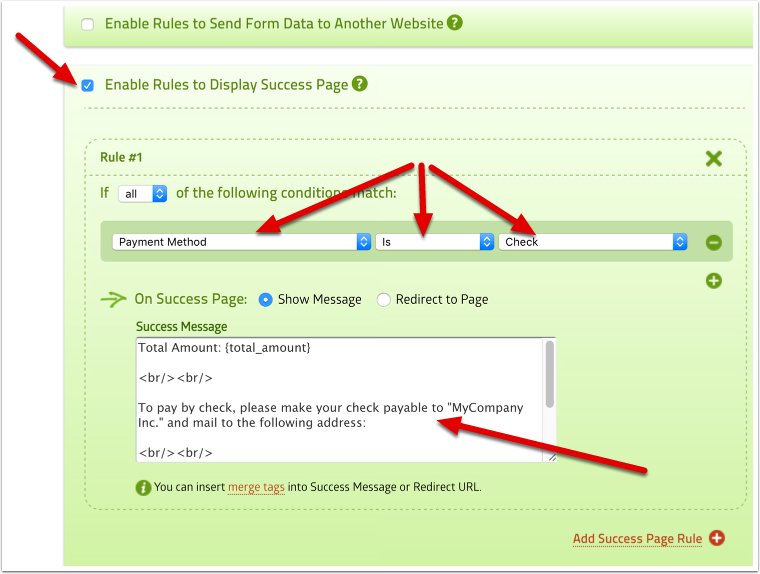
Paste this sample message template into the Success Message as shown above:
Total Amount: {total_amount}<br/><br/>To pay by check, please make your check payable to "MyCompany Inc." and mail to the following address:<br/><br/>MyCompany Inc.<br/>2721 Queen Street<br/> Rochester, NY 14606<br/>The success message accepts HTML format, and the <br/> tag above is a line break. You can always customize the message, of course.
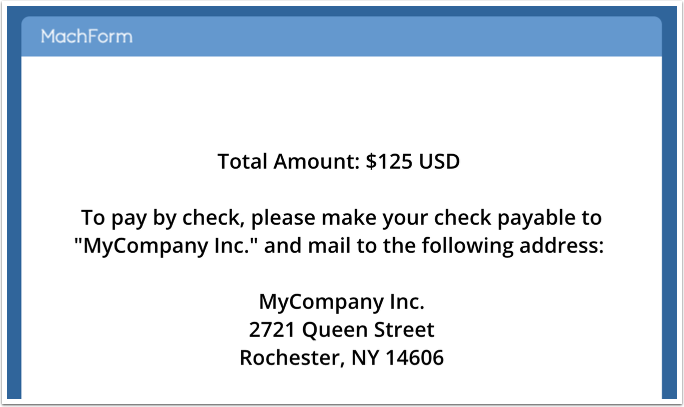
Save the rule by clicking the Save Settings button and test your form. The result should be like this:
Customizing email receipt
Going further, you can also customize the email receipt content being sent to the client, with a specific message regarding the check payment. You can use the Logic page as well for this.
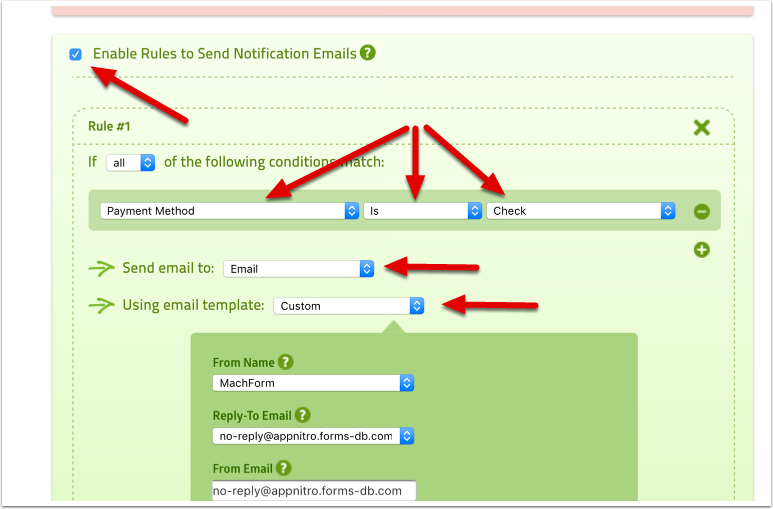
First, make sure you've added an Email field type into your form. Then go to your Logic page and select Enable Rules to Send Notification Email.
Adjust the rule settings to be like this:
Adjust the Email Content message like this:
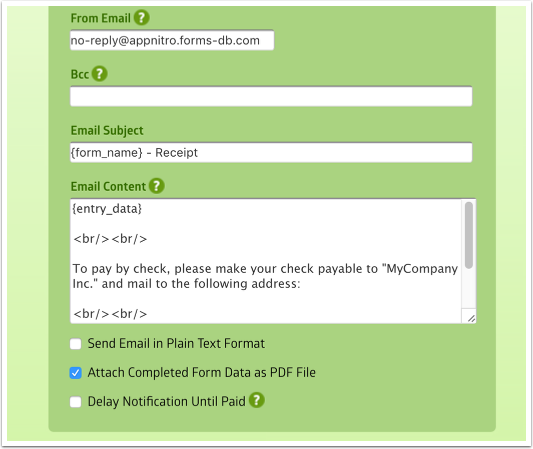
Paste this sample email content template as shown above:
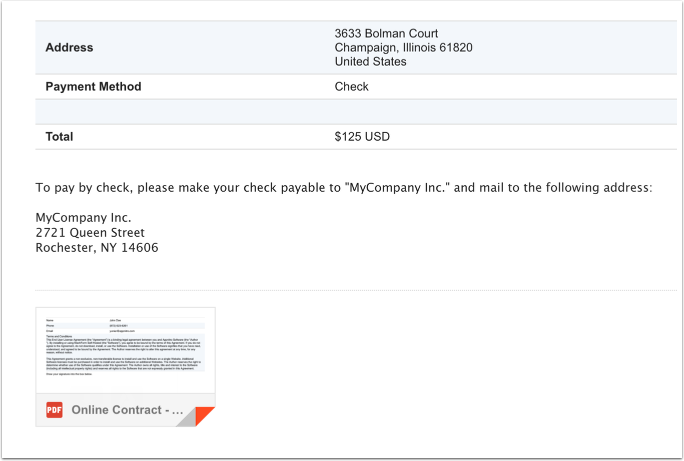
{entry_data}<br/><br/>To pay by check, please make your check payable to "MyCompany Inc." and mail to the following address:<br/><br/>MyCompany Inc.<br/>2721 Queen Street<br/> Rochester, NY 14606<br/>The email content template accepts HTML format, and the <br/> tag above is a line break. Customize the message as needed.
Save the rule by clicking the Save Settings button and test your form. The resulting email should be like this:
Summary
If you've gone this far, congratulations! You've created a very powerful form that contain multiple logics :-)