Overview
MachForm supports Single Sign-On (SSO) using the SAML 2.0 protocol, allowing your users to log in securely with your organization's Identity Provider (IdP). This simplifies account management, improves security, and provides a seamless login experience.
MachForm specifically supports the following popular Identity Providers:
Microsoft Entra ID (Azure AD)
Google Workspace SSO
Okta
OneLogin
In addition, MachForm can also integrate with any other IdP that supports SAML 2.0, giving you flexibility to use the provider that best fits your organization.
This guide will walk you step-by-step through the process of configuring SSO in MachForm using SAML 2.0
Availability
Single Sign-On (SSO) is available for:
MachForm Self-Hosted – Unlimited License
MachForm Cloud – Enterprise & Enterprise Plus plan
Step 1: Collect Service Provider Metadata from MachForm
1. Log in to your MachForm Admin Panel.
2. Navigate to Settings and check the Enable Single Sign-On (SSO) option.
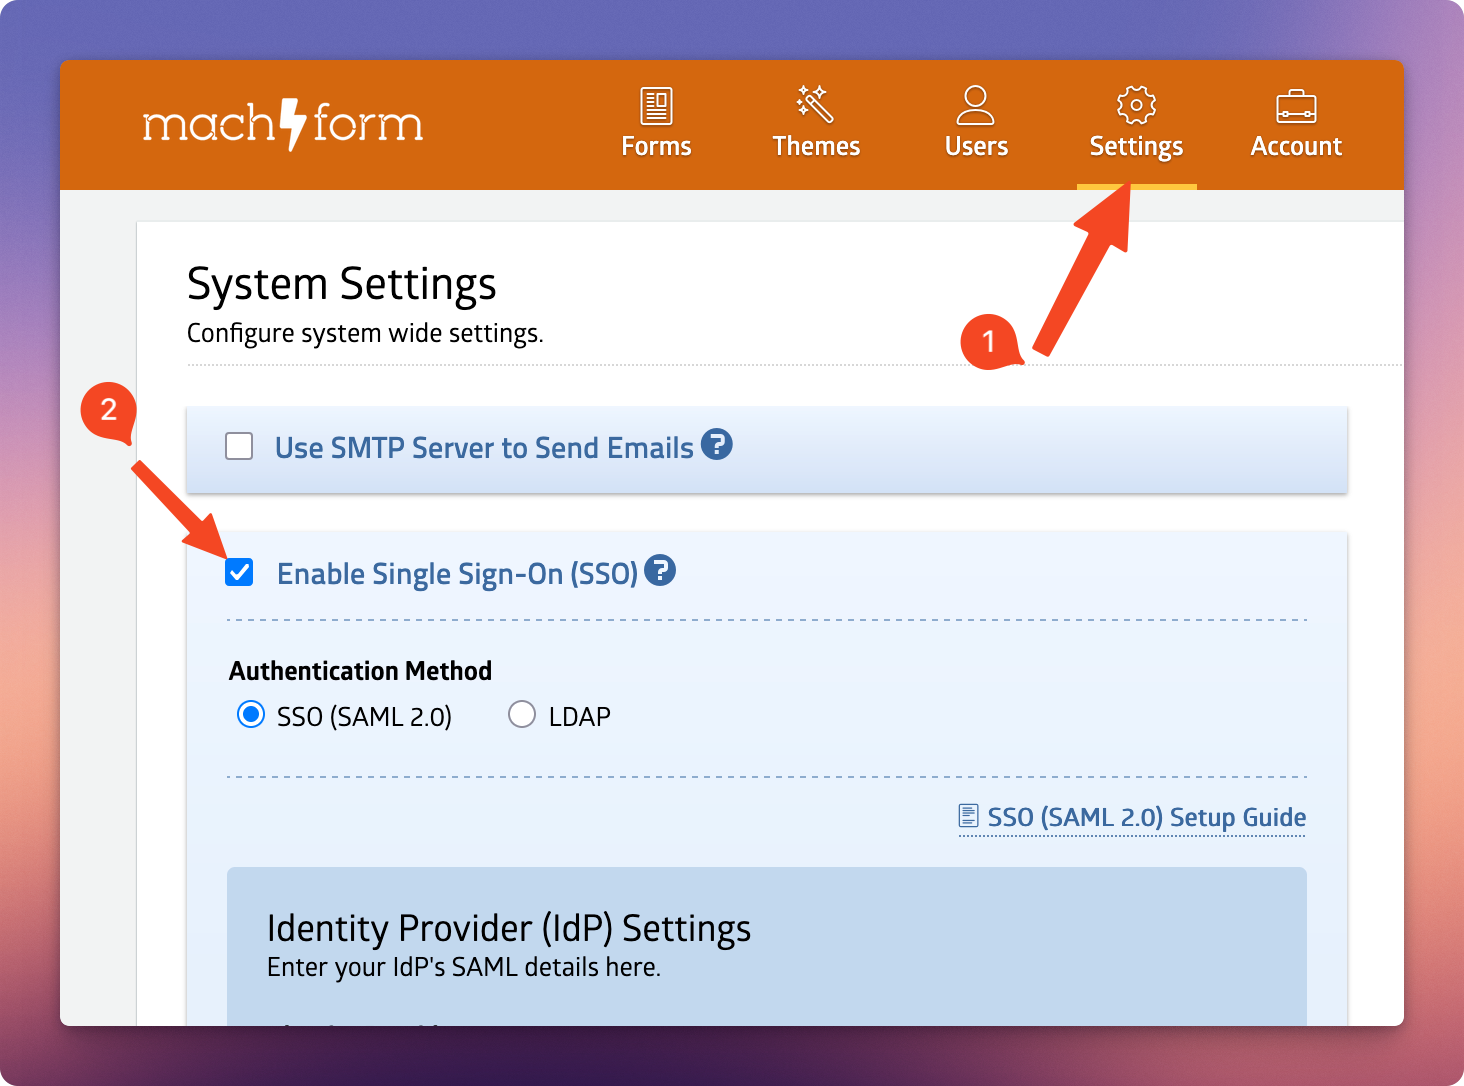
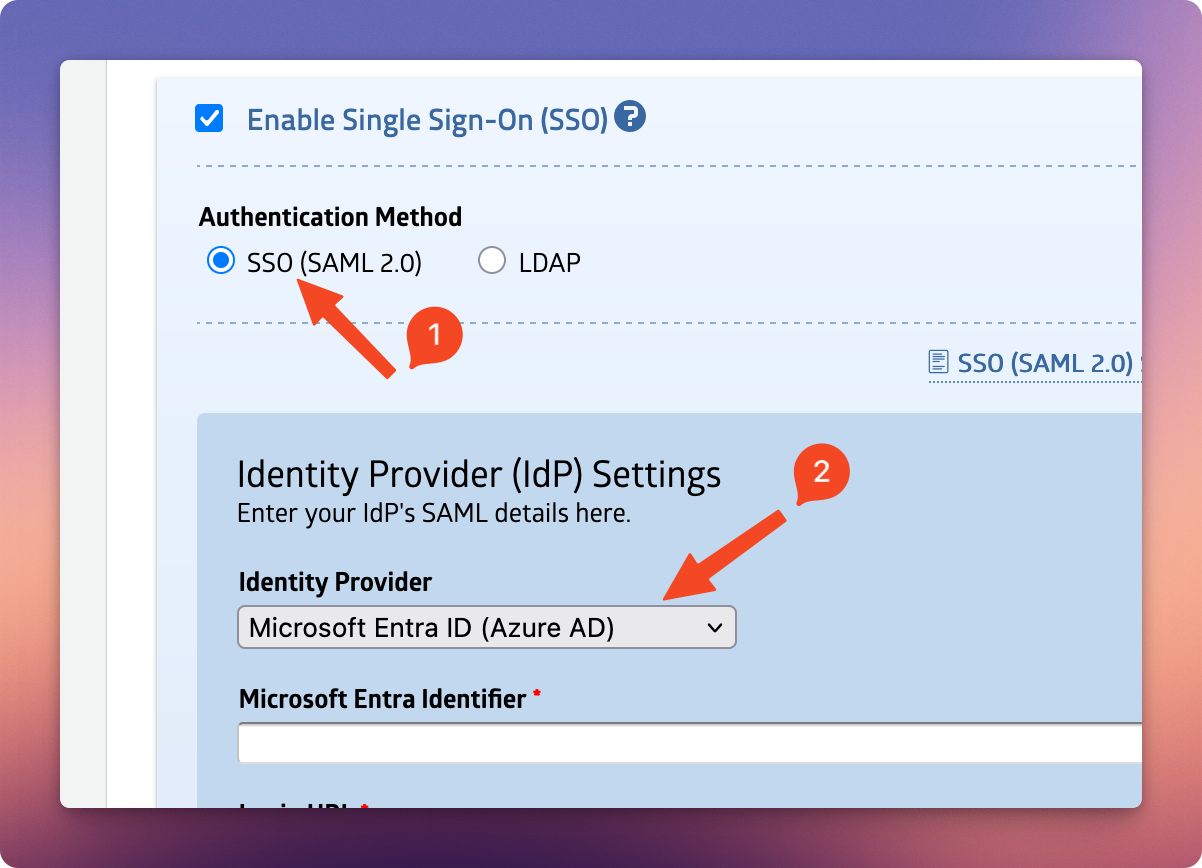
3. Select SSO (SAML 2.0) for the Authentication Method, and then choose your Identity Provider.
4. Under the Service Provider Metadata section, copy the following details:
Entity ID
Assertion Consumer Service (ACS) URL
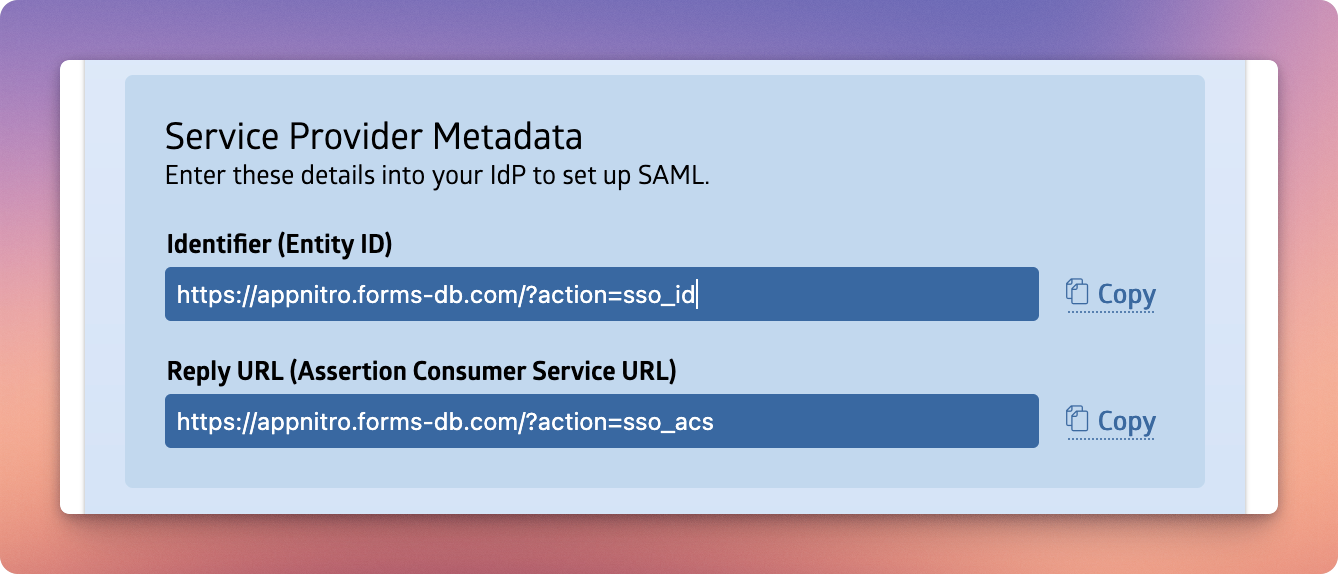
You will need to enter these values into your Identity Provider's (IdP) configuration later.
Step 2: Configure Your Identity Provider
The exact steps will vary depending on which IdP you use (Microsoft Entra ID, Google Workspace, Okta, OneLogin, etc.), but the general process is the same:
Log in to your IdP's admin console.
Create a new SAML application (sometimes called "Enterprise Application" or "Custom SAML App").
When prompted, enter the MachForm Service Provider Metadata information you collected earlier:
Entity ID
Assertion Consumer Service (ACS) URL
For detailed step-by-step instructions for specific IdPs, see the following pages:
Step 3: Collect IdP Information
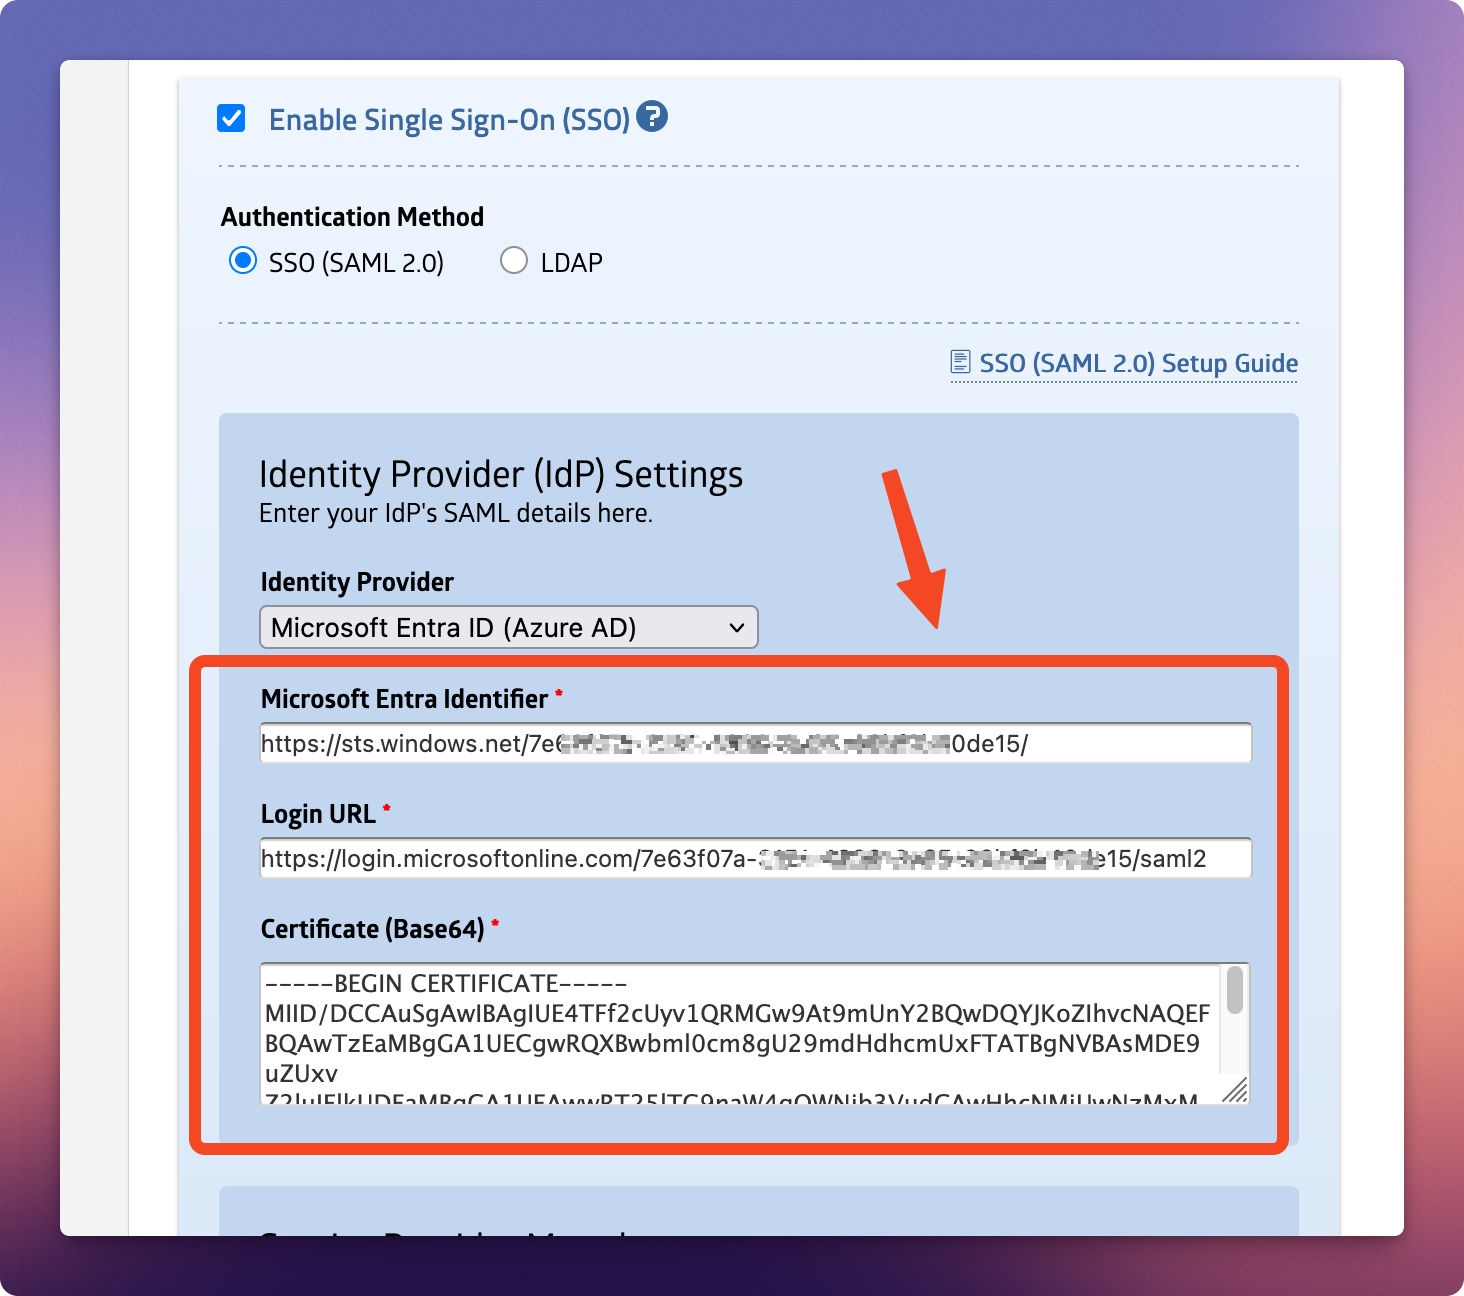
From your IdP's configuration page (Step 2), copy the following values:
Entity ID (IdP Identifier)
Login URL (SSO URL)
X.509 Certificate
Different Identity Providers (IdPs) may use slightly different terms for the same SAML fields.
Step 4: Configure MachForm with IdP Information
Under the Identity Provider (IdP) Settings section, enter the values you collected from your IdP and click the Save Settings button when finished.
Step 5: Test the Integration
Open a new browser window in incognito/private mode and go to your MachForm Admin Panel login page. You should see an option to log in using SSO. Test your login, and you'll be redirected to MachForm after successful authentication.
And that's it! You've successfully configured MachForm with SSO.
Notes
Supported Features
MachForm SAML integration currently supports the following features:
SP-initiated SSO
IdP-initiated SSO
Just-in-Time (JIT) provisioning
Just-in-Time (JIT) Provisioning
JIT provisioning allows MachForm to automatically create a new user account the first time a user signs in through SSO. The following SAML attributes may be used for JIT provisioning:
displayName
fullName
name
http://schemas.microsoft.com/identity/claims/displayname
urn:oid:2.16.840.1.113730.3.1.241
urn:oid:2.5.4.3
At least one of the attributes listed above must be mapped in order for JIT provisioning to function properly.
NameID Requirement
Ensure that your Identity Provider (IdP) is configured to include the user's email address in the NameID element of the SAML assertion.