This guide describes the procedures for installing the MachForm Self-Hosted edition on a web server. MachForm Self-Hosted allows organizations to retain full control over their data collection infrastructure by deploying the software within their own environment.
Before performing a manual installation, note that MachForm offers a Free Installation Service. If you prefer not to configure the server environment manually, MachForm support can complete the installation within two business days.
Prerequisites
Before beginning the installation, ensure you have the following:
Web Server Access: Ability to upload files to your server via FTP or a file manager.
Database Access: Permissions to create and manage databases on your host.
Installation Package: The machform.zip archive file.
Step 1: Create the Database
The MachForm installer does not automatically provision a database. You must create a database manually using your hosting control panel (e.g., cPanel, phpMyAdmin) or command-line tools prior to installation.
Create a new empty database.
Create a database user and grant them all privileges (create, read, write, delete) for the new database.
Record the following connection details, as they are required for the configuration file:
Database Name
Database Username
Database User Password
Database Hostname (typically localhost, but this may vary depending on your hosting provider)
Step 2: Configure the config.php file
You must configure the application to communicate with your database before uploading files to the server.
Locate the machform.zip archive on your local machine and extract it.
Navigate to the extracted machform directory.
Open the file named config.php in a text editor.
Edit the database connection variables with the values recorded in Step 1.
Configuration Parameters
The config.php file contains specific variables that control the database connection. Ensure the values inside the single quotes match your database setup exactly.
Parameter | Description |
MF_DB_NAME | The name of the database created for MachForm. |
MF_DB_USER | The username authorized to access the database. |
MF_DB_PASSWORD | The password associated with the database user. |
MF_DB_HOST | The hostname or IP address of the database server. |
Example Configuration:
JavaScriptdefine('MF_DB_NAME', 'machdb');
define('MF_DB_USER', 'machuser');
define('MF_DB_PASSWORD', 'g27xTuwys1sh28sdj28');
define('MF_DB_HOST', 'localhost');
Step 3: Upload Files and Set Permissions
Once the configuration file is updated, deploy the application to your web server and ensure the file system permissions allow the application to write data.
Upload the entire machform folder (including the modified config.php) to the public root directory of your website (e.g., public_html or www).
Locate the data folder inside the machform directory.
Configure the data folder permission.
Linux/Unix: Apply chmod 755 permission to the folder.
FTP Clients (FileZilla, SmartFTP, etc.): Right-click the data folder, select Properties or File Attributes, and ensure the permission is set to Writable (or numeric value 755).
The data folder must be writable by the web server process so MachForm can save uploaded files
Step 4: Run the Installer Script
The installer script initializes the database tables and registers your license.
Open a web browser.
Navigate to the installer URL: http://<your-domain>/machform/installer.php.
Replace <your-domain> with your actual website domain.
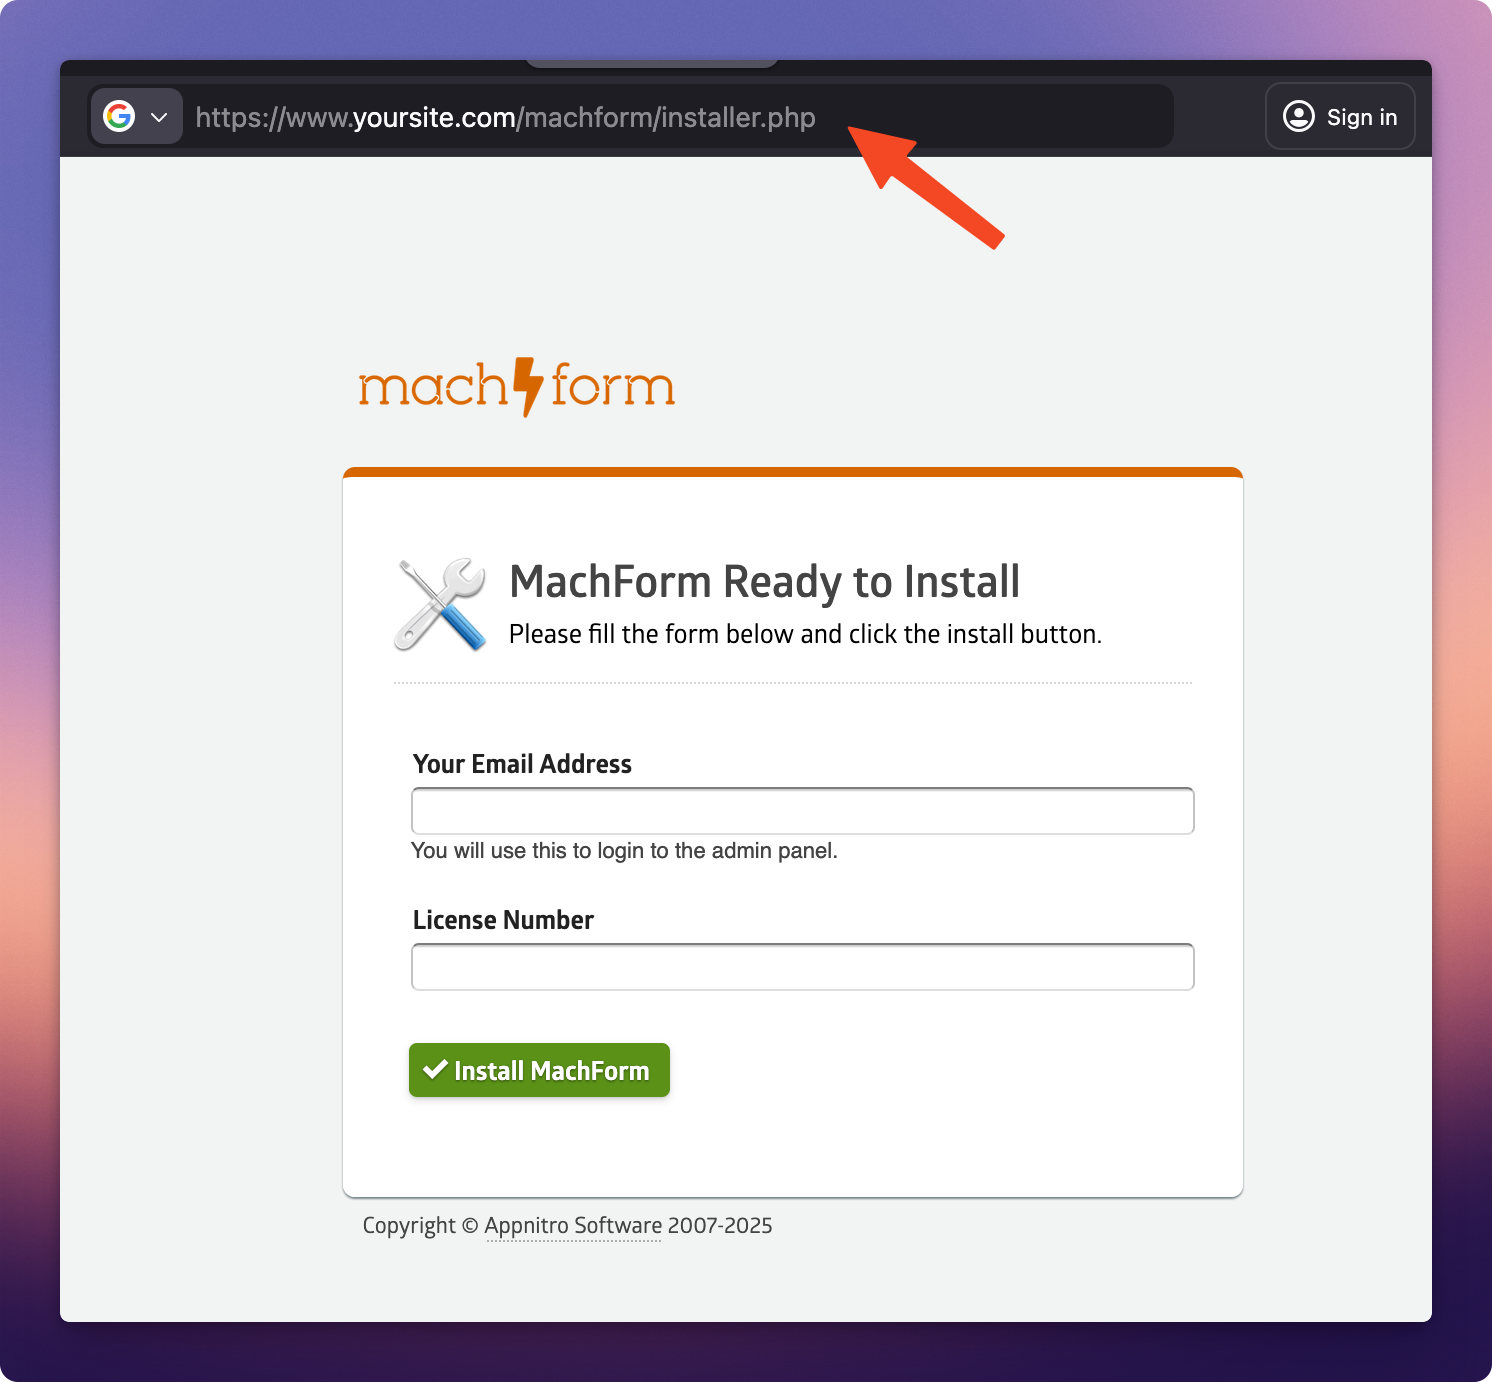
Enter your Email Address and License Number in the respective fields.
Click Install MachForm button to execute the setup script.
Installation Success and Default Credentials
Upon successful completion, the installer displays a confirmation screen containing your default login information.
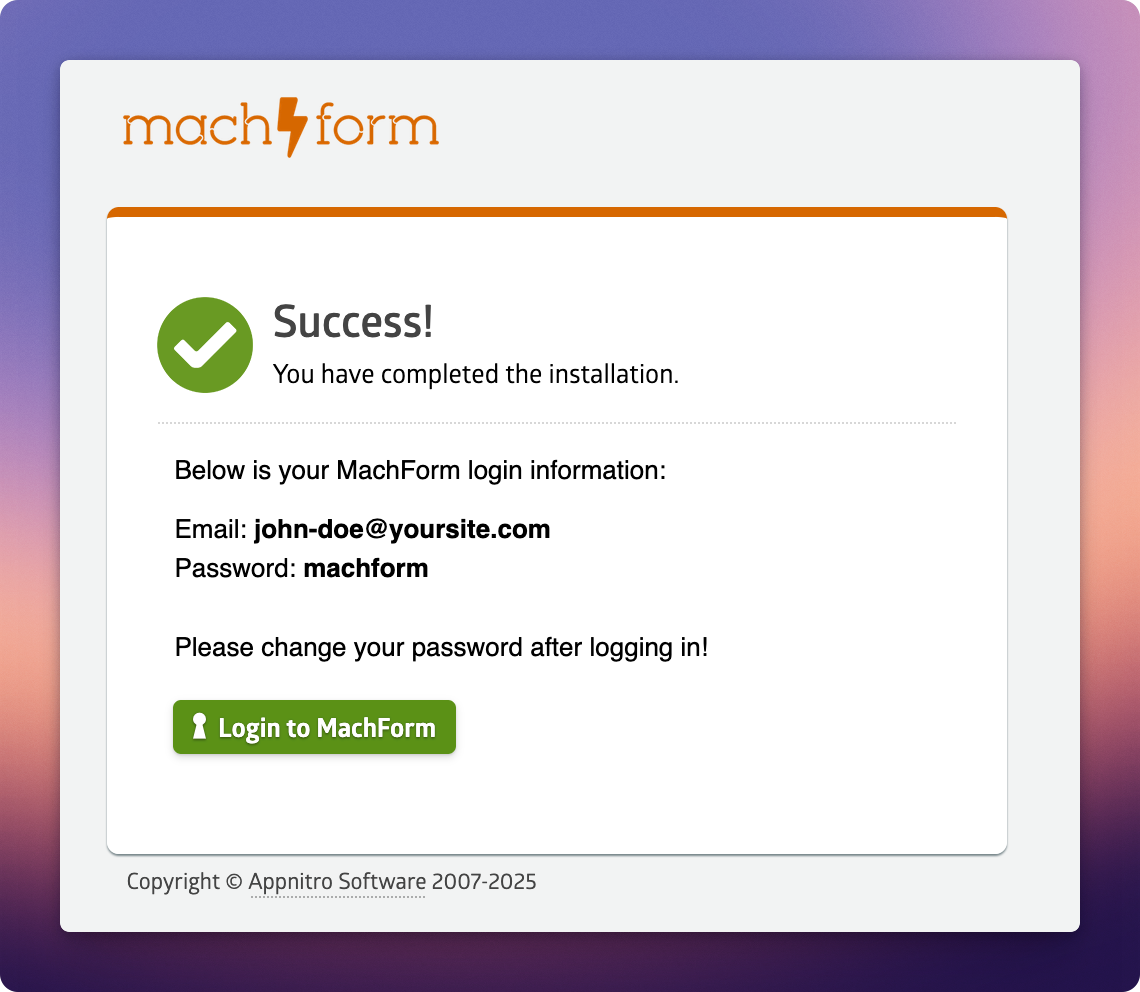
Default Login Credentials:
Email: The email address provided during installation.
Password: machform
Initial Login
Click the Login to MachForm button to access the admin panel.
Log in using the default credentials listed above.
Security Action: Immediately navigate to the My Account section and change your password to secure the installation.