In some cases, you might need to send a receipt or copy of the form data to the user who filled the form. Fortunately, it's very easy to do this with MachForm.
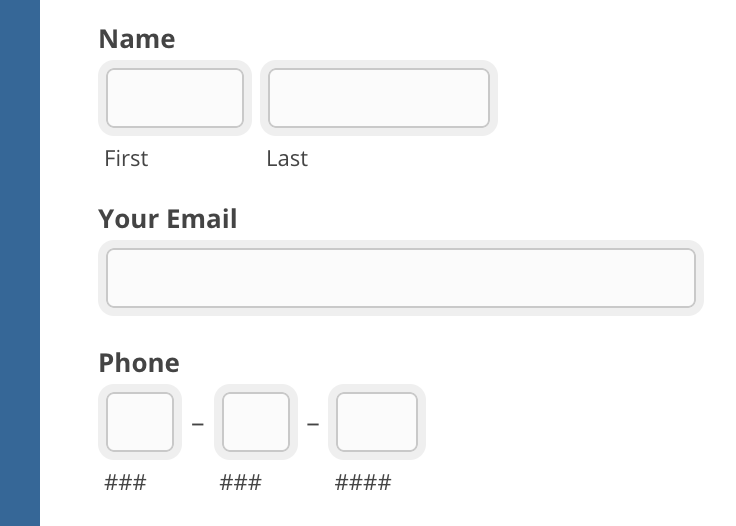
First, you'll need to add an Email field type into your form.
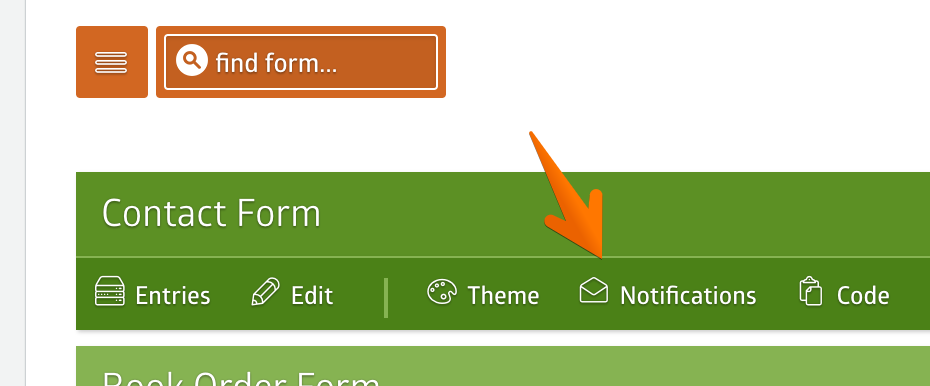
Then go to your form Notifications setting page.
Turn on the Send Confirmation Email to User checkbox and select the email field under the User Email Address dropdown. The auto-responder will be sent to the email address entered by the user into this field.
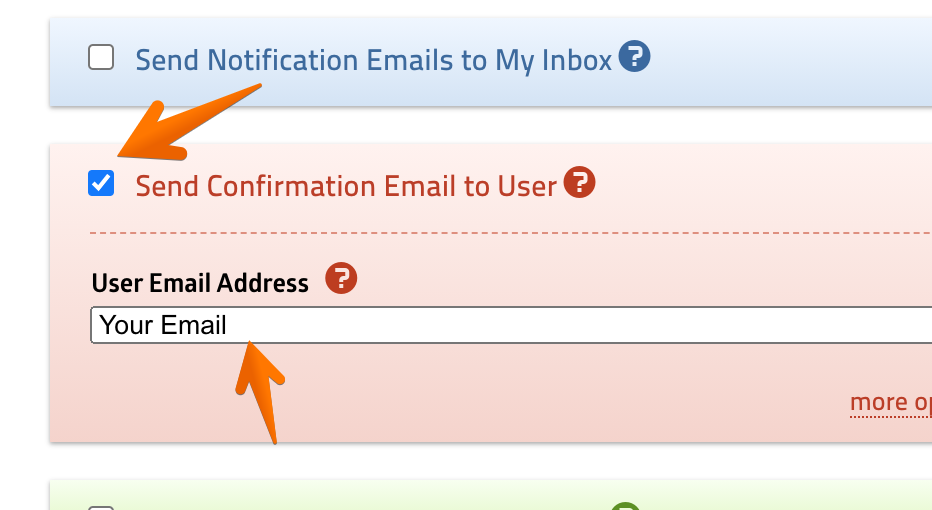
Click the Save Settings button, and you should be good to go. Test by submitting your form to see the result.
Customizing Auto-Responder Email
The above steps will configure the auto-responder email using default settings. There are a lot of options you can adjust to customize the auto-responder email.
Click more options, and you'll see the complete email options.
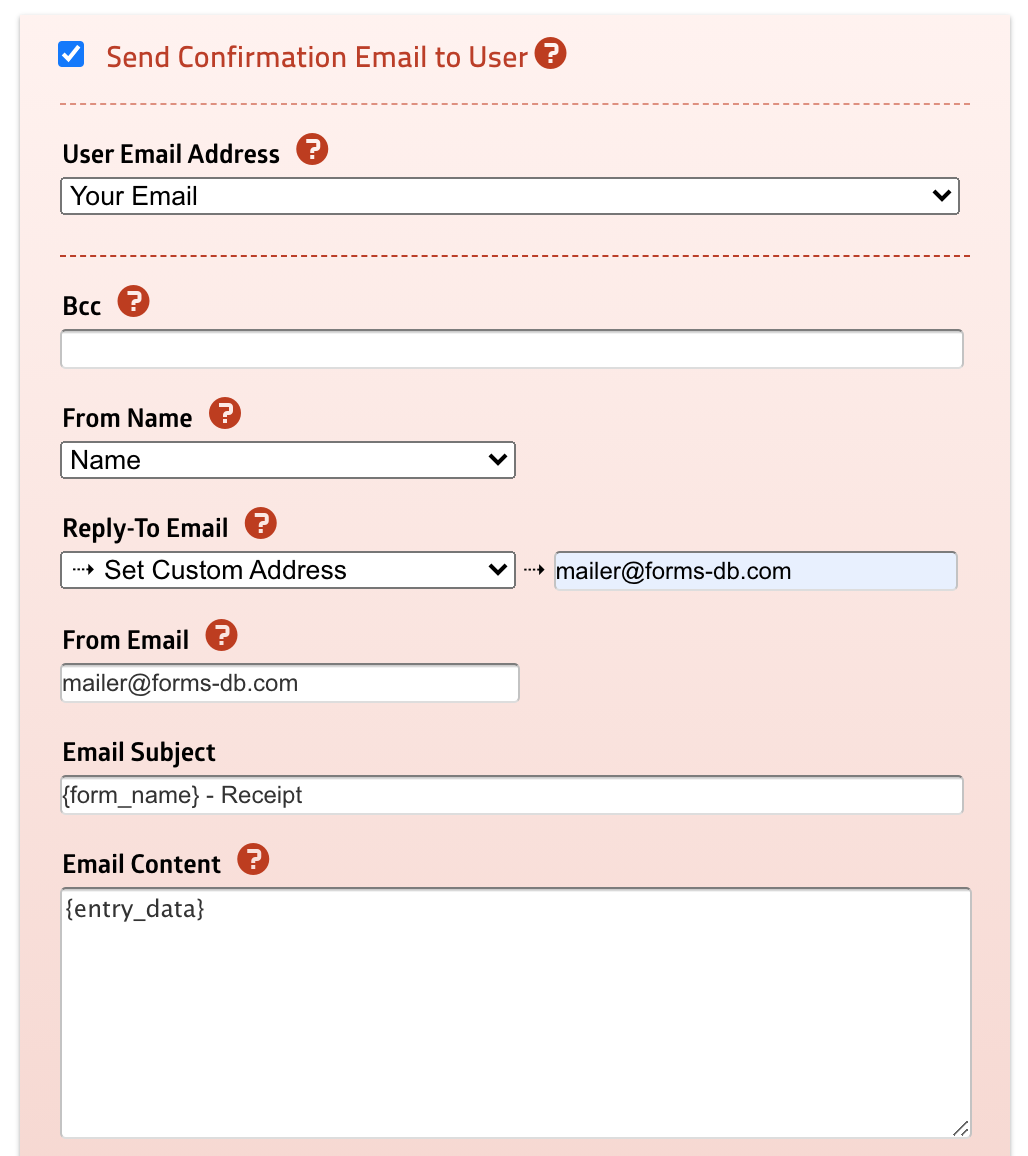
The most important option is the From Email setting.
If you're using MachForm Self-Hosted, it's very important to use an email address originating from the same domain as your MachForm location to ensure email delivery.
If you're using MachForm Cloud, it depends on your current plan. If you're on the Small Business or Enterprise plan, you'll be able to customize the From Email setting with any email address.