So you’ve created your form. Now what?
“How do I send this form to my client?” you might ask.
Getting the Link to Your Form
After creating and saving a new form, it is fully functional. The form is able to accept entries immediately. All you need to do is to click the “View” icon on your form manager.

Your form will be opened into a new window, and the address bar within your browser will display something like this:
<strong>https://www.example.com/machform/view.php?id=10283</strong>You can simply copy that link and send it to your clients. They will be able to fill in the form using the link.
The only problem with the above approach is the fact that the link looks a bit technical and contain random numbers. How do we change this?
Embedding the Form into Your Own Page
The best way to publish your form is by embedding it into your own website page. This way, the form will blend seamlessly with your whole website design, and your client will be able to access it using the same URL as your web page.
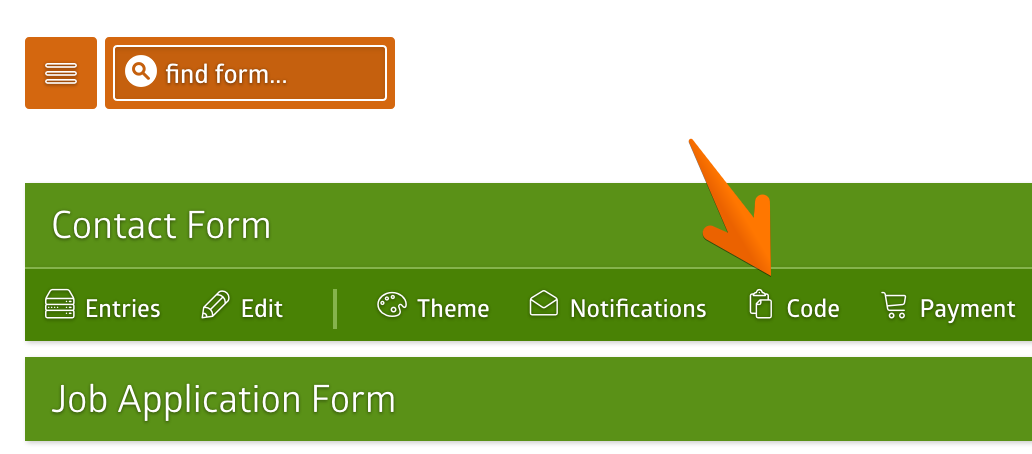
The first thing to do is to get your form code. On your form manager, click the “Code” icon.
A page containing your form code will be displayed
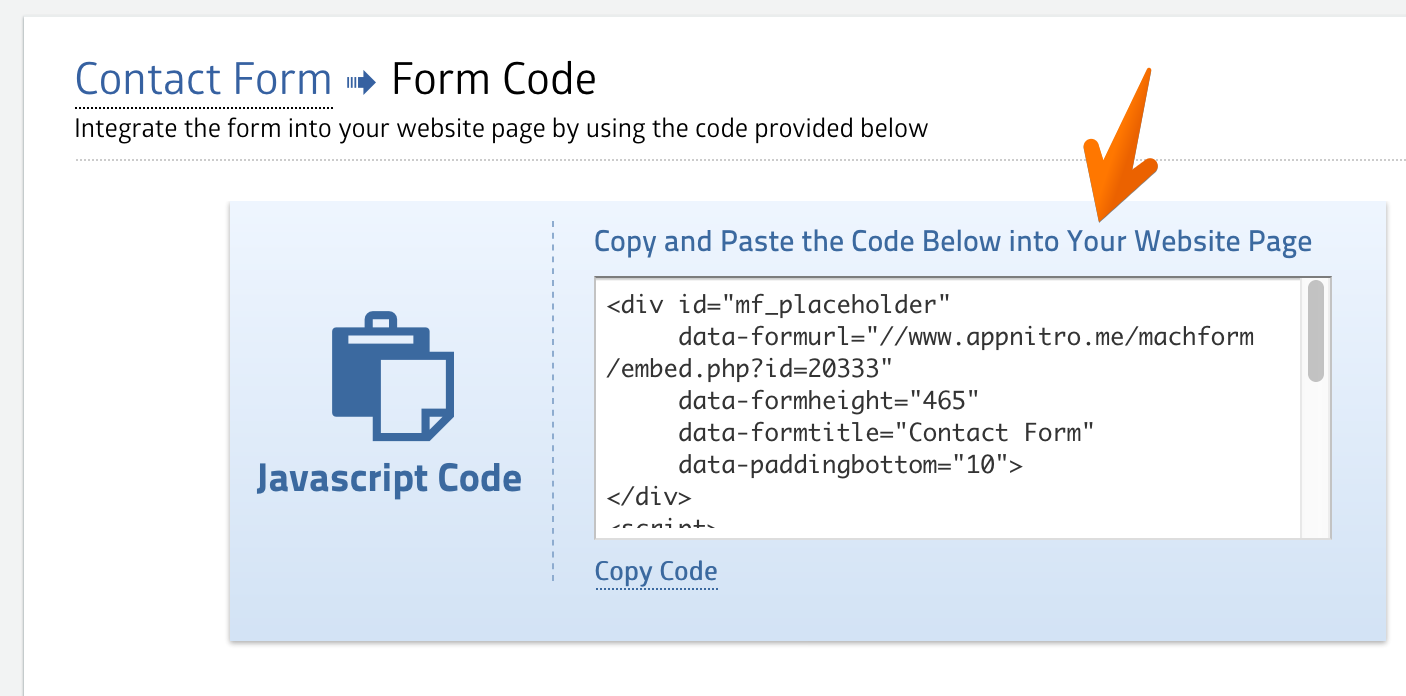
Copy all the code there. Make sure not to miss any characters.
Next - let's say you are using WordPress for your website - you can create a new page or edit an existing page.
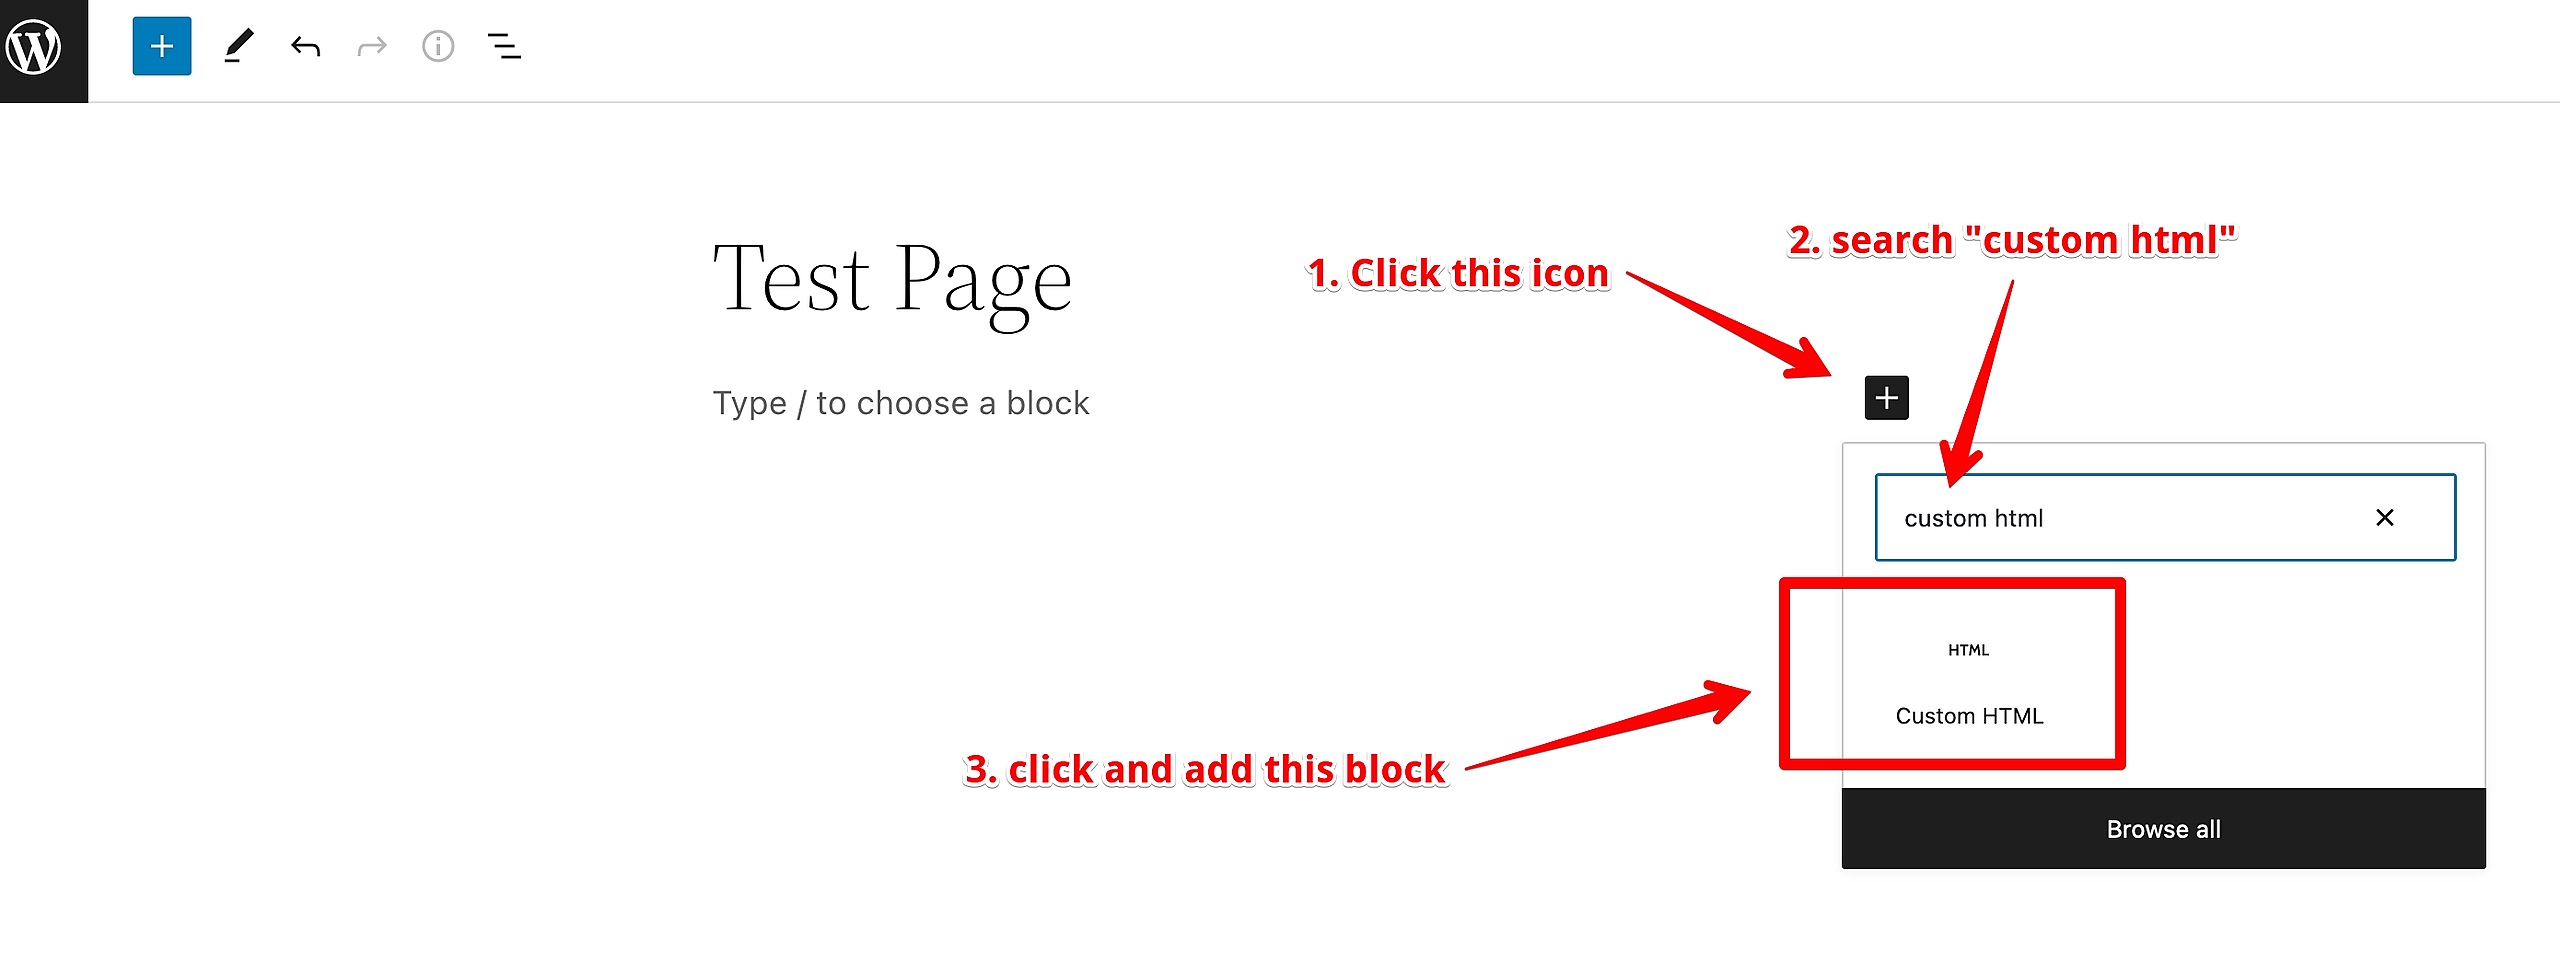
Click the “+” icon to add a block to your page and search the Custom HTML block.
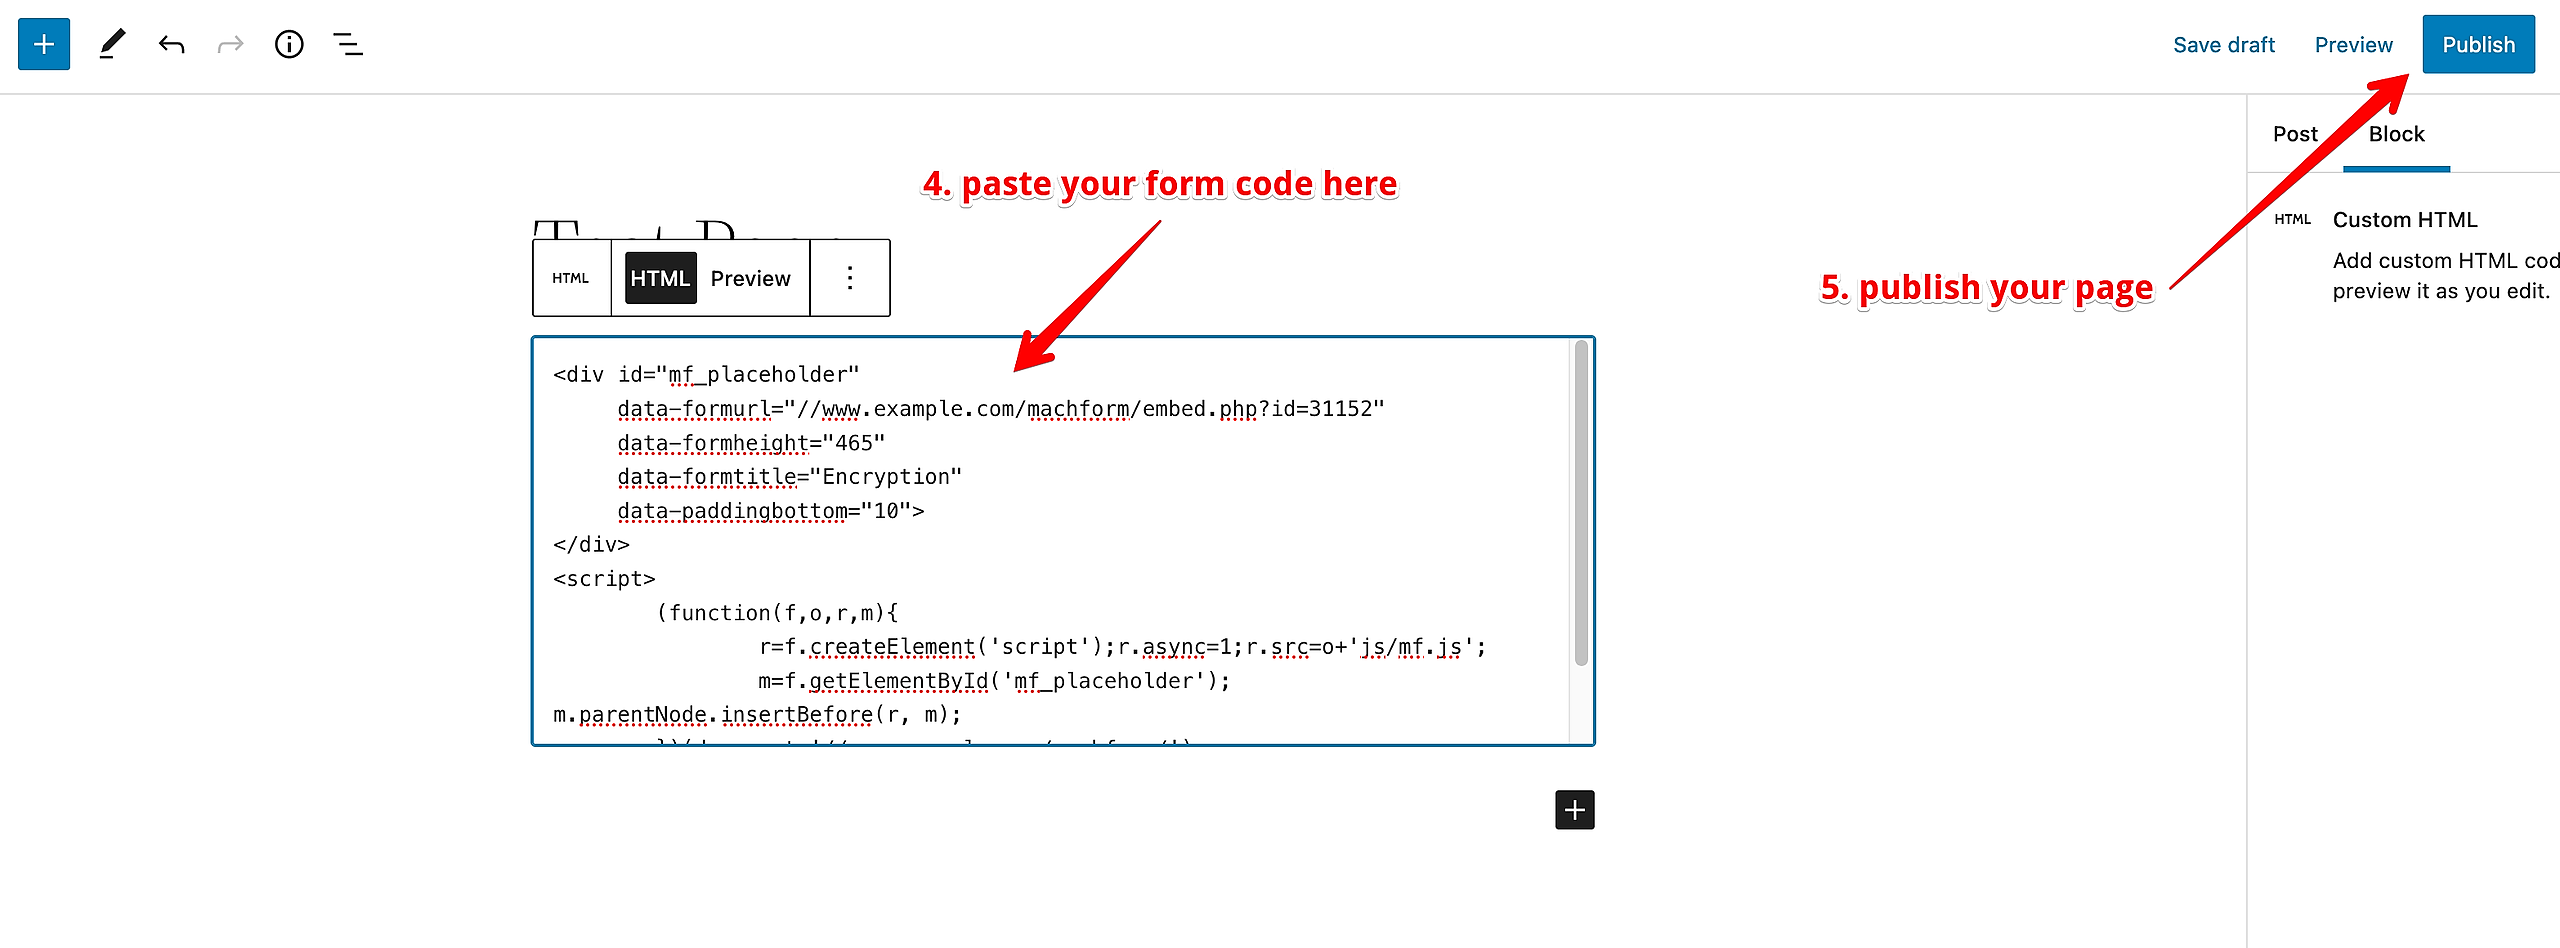
Paste your form code to the Custom HTML block and then Publish the page. Your form is now ready and has been published into your page.
Congratulations! You have published your form :)
When you embed the form into your page, the form is intended to integrate into your existing web page seamlessly; thus the form’s background, border, and logo header won’t be displayed.