In this article, we’ll show you how to integrate your form with MailChimp. Basically, using MachForm Notification feature you’ll be able to call any MailChimp API to do the tasks you need.
Some common integrations are:
Add a new subscriber to an audience of your choosing
Unsubscribe an email address from an audience of your choosing
Edit the email address, merge fields, and interest groups for an audience member
Create a new draft campaign to send
Delete a campaign
Find your MailChimp API Key
The first thing you need to do before proceeding with the integration is to generate/find your MailChimp API Key.
Login to your MailChimp panel, click Profile ⇢ Account ⇢ Extras ⇢ API Keys and then copy your existing API Key or click the Create a Key button.
More detailed instruction (video) also available on MailChimp help page.
Your MailChimp API Key should be something like this:
1644b44d50bcc02f6f789aaf324f82ec-us4
Find your MailChimp URL (API Endpoint)
The next thing you need is your MailChimp URL (API Endpoint). MachForm will be using this URL to submit your form data to your MailChimp account.
The generic format for your MailChimp URL is like this:
https://XXX.api.mailchimp.com/3.0/
where XXX should be replaced with the portion after the dash in your API Key. e.g. “us1”, “us2”, “uk1”, etc. A solid example – say your API Key is 1644b44d50bcc02f6f789aaf324f82ec-us4.
Then your MailChimp URL would be:
https://us4.api.mailchimp.com/3.0/
We’ll be using the above URL as the base part of any other URLs, since each task will have its own specific URL.
Adding a new subscriber to an Audience of your choosing
Let say you have a simple form with only one email field:

and you would like to add the email address entered by your users into your MailChimp audience named Subscriber List.
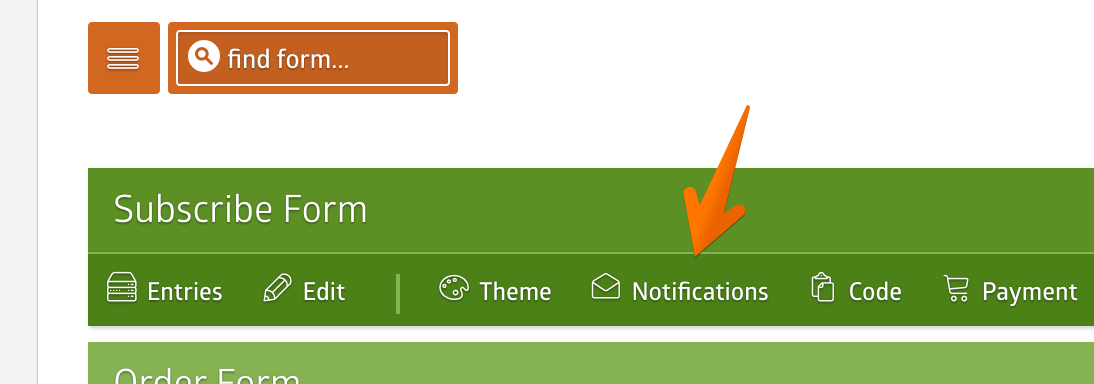
Simply go to your MachForm panel and click Notifications menu.
Click Send Form Data to Another Website option and then enter this URL into the Website URL:
https://us4.api.mailchimp.com/3.0/lists/72726e7e3a
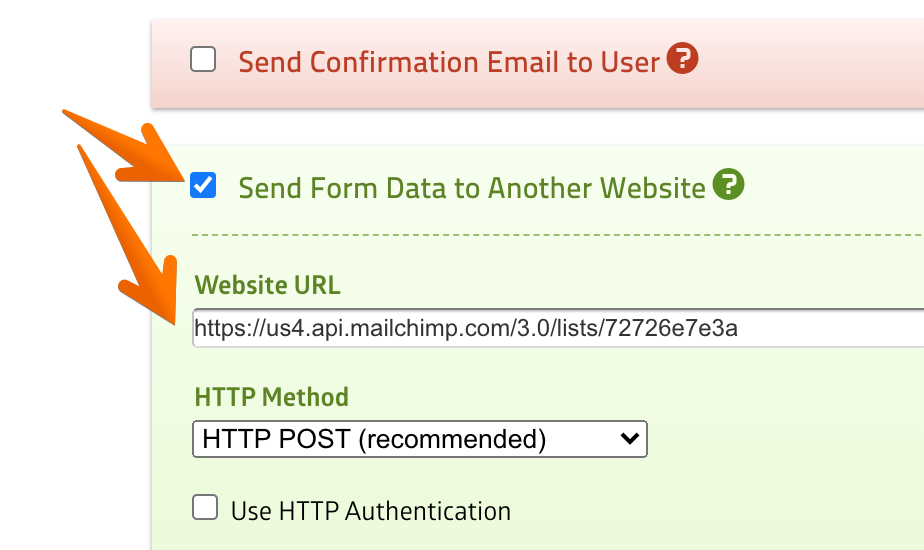
Note that the URL above is basically using your MailChimp URL, with the addition of lists/72726e7e3a at the end of it. Make sure to use your own MailChimp URL and replace the 72726e7e3a with your own Audience ID.
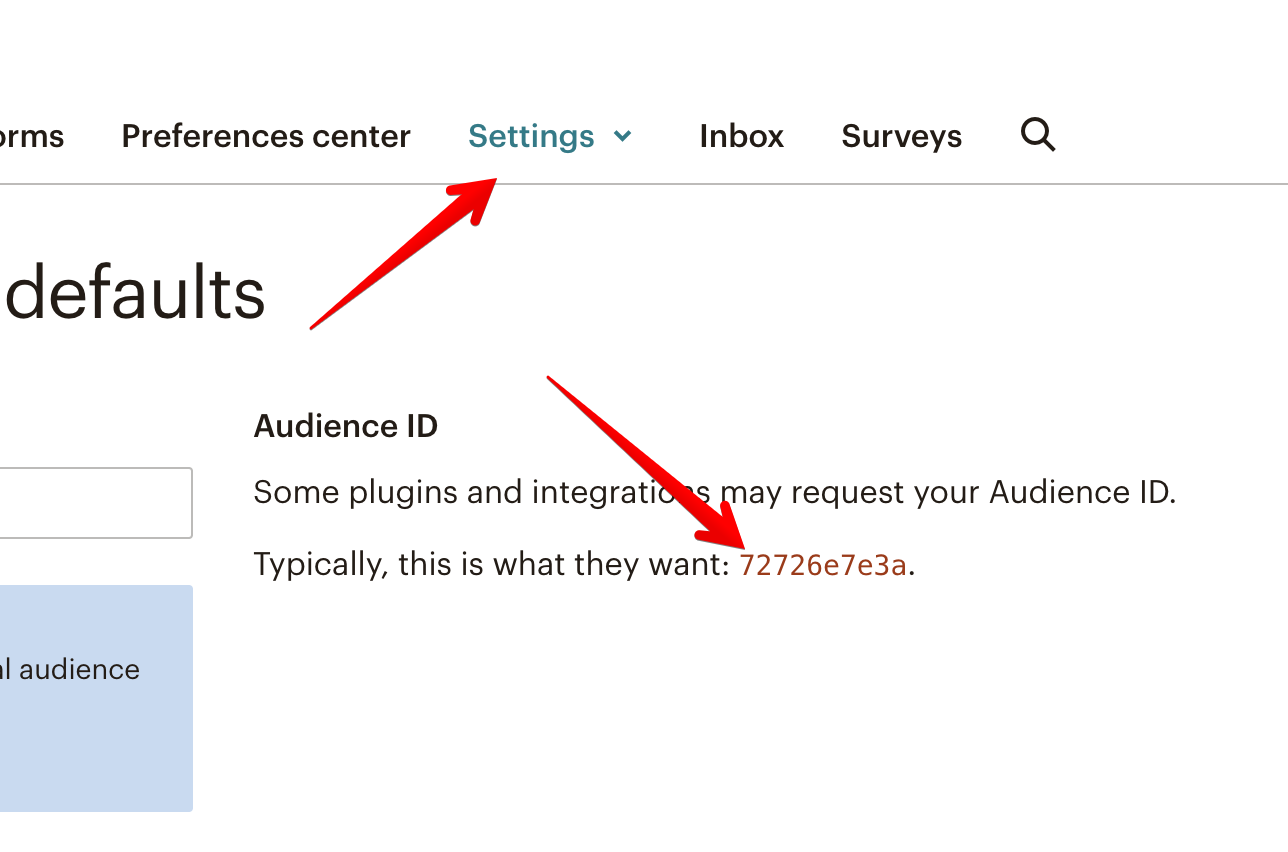
To get your Audience ID, go to your Audience Dashboard, click Manage audiences ⇢ View audiences.
Select your audience and then click click Settings ⇢ Audience name and Defaults and you’ll find your Audience ID:
Check the Use Custom HTTP Headers and paste this code:
{ "Authorization": "apikey 1644b44d50bcc02f6f789aaf324f82ec-us4", "Content-Type": "application/json", "User-Agent": "MachForm Webhook"}like this:
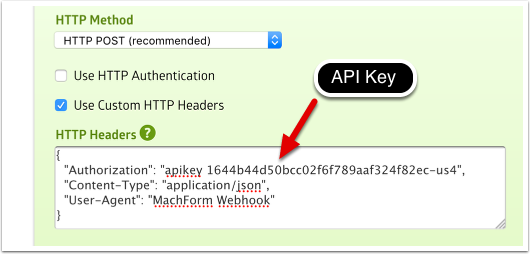
replace the above API Key with your own API Key. Then select Send Raw Data and paste this code:
{"members": [{ "email_address": "{element_2}", "status": "subscribed" }], "update_existing": true}like this:
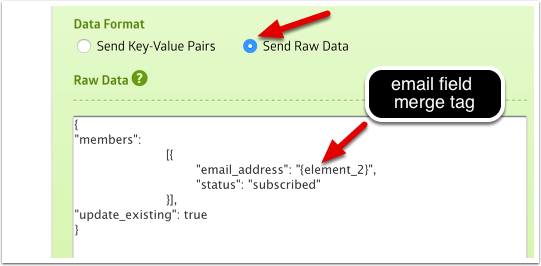
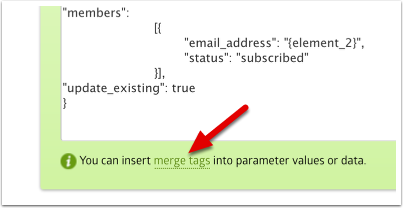
replace the {element_2} with your own email field merge tag. To get the merge tag of the email field on your form, simply click the merge tags link at the bottom of the page.
and that’s it. Save the settings and test by submitting your form. The email address will be automatically added to the audience you choose on your MailChimp account.