Overview
In September 2025, Microsoft will remove support for basic authentication when using the Office 365 SMTP server. This means you can no longer use the standard username and password authentication with MachForm.
To connect to the Microsoft Office 365 SMTP server, you’ll need to use the new authentication method (OAuth), which involves creating an app in the Microsoft Azure Portal and then configuring MachForm to use that app.
This setup only needs to be done once and should be completed by the main administrator of your MachForm account. The steps are quite lengthy, unfortunately, but since Microsoft requires this, a bit of patience is necessary. :-)
This manual will guide you through the step-by-step process of configuring your MachForm application to use the Microsoft 365 SMTP server with OAuth.
Step-by-Step Configuration
Step 1: Create an App in Microsoft Azure Portal
1. Log in to Azure Portal
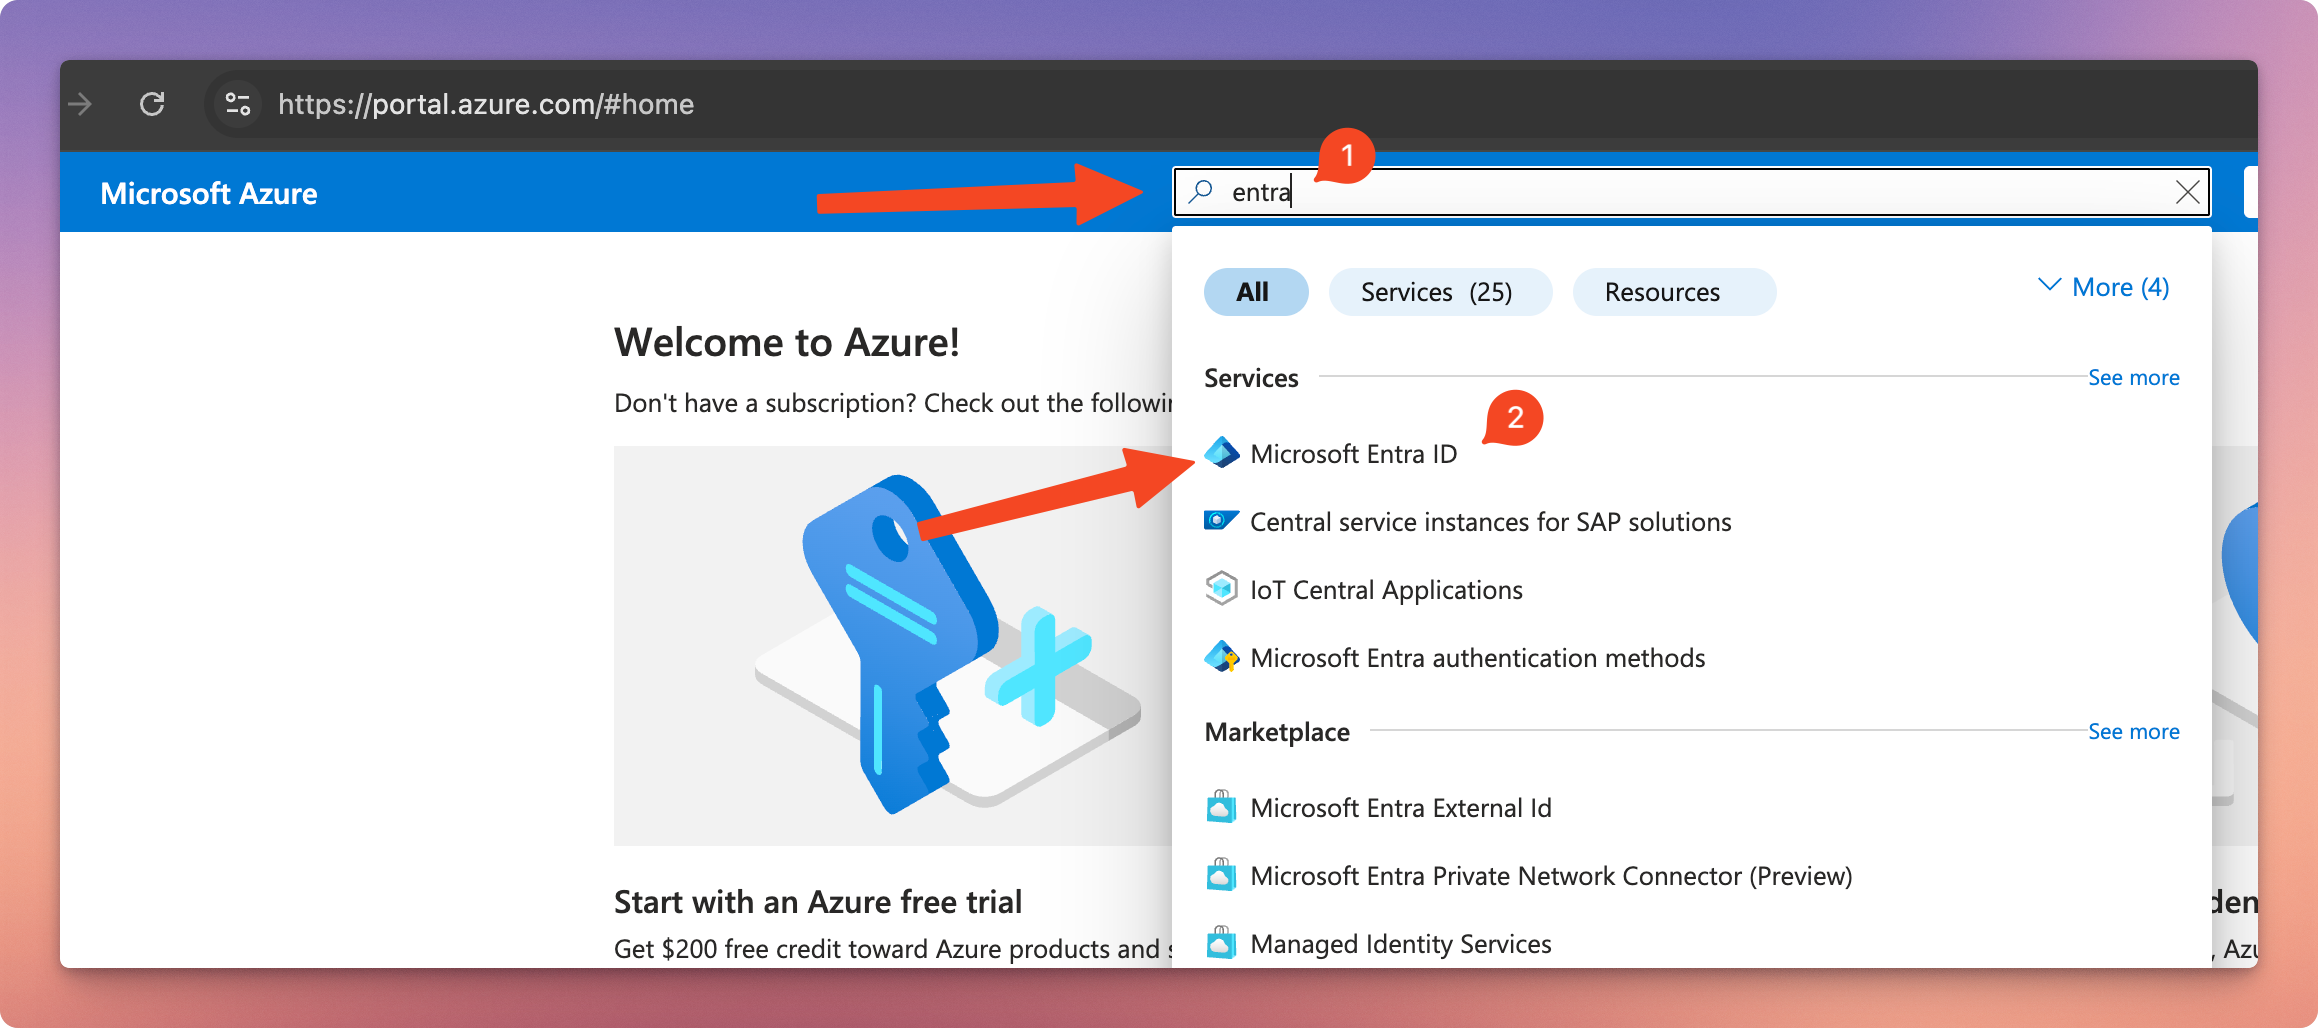
Visit portal.azure.com and log in with your Microsoft 365 administrator account.
2. Create a New App Registration:
In the search bar at the top, type "entra" and click on "Microsoft Entra ID".
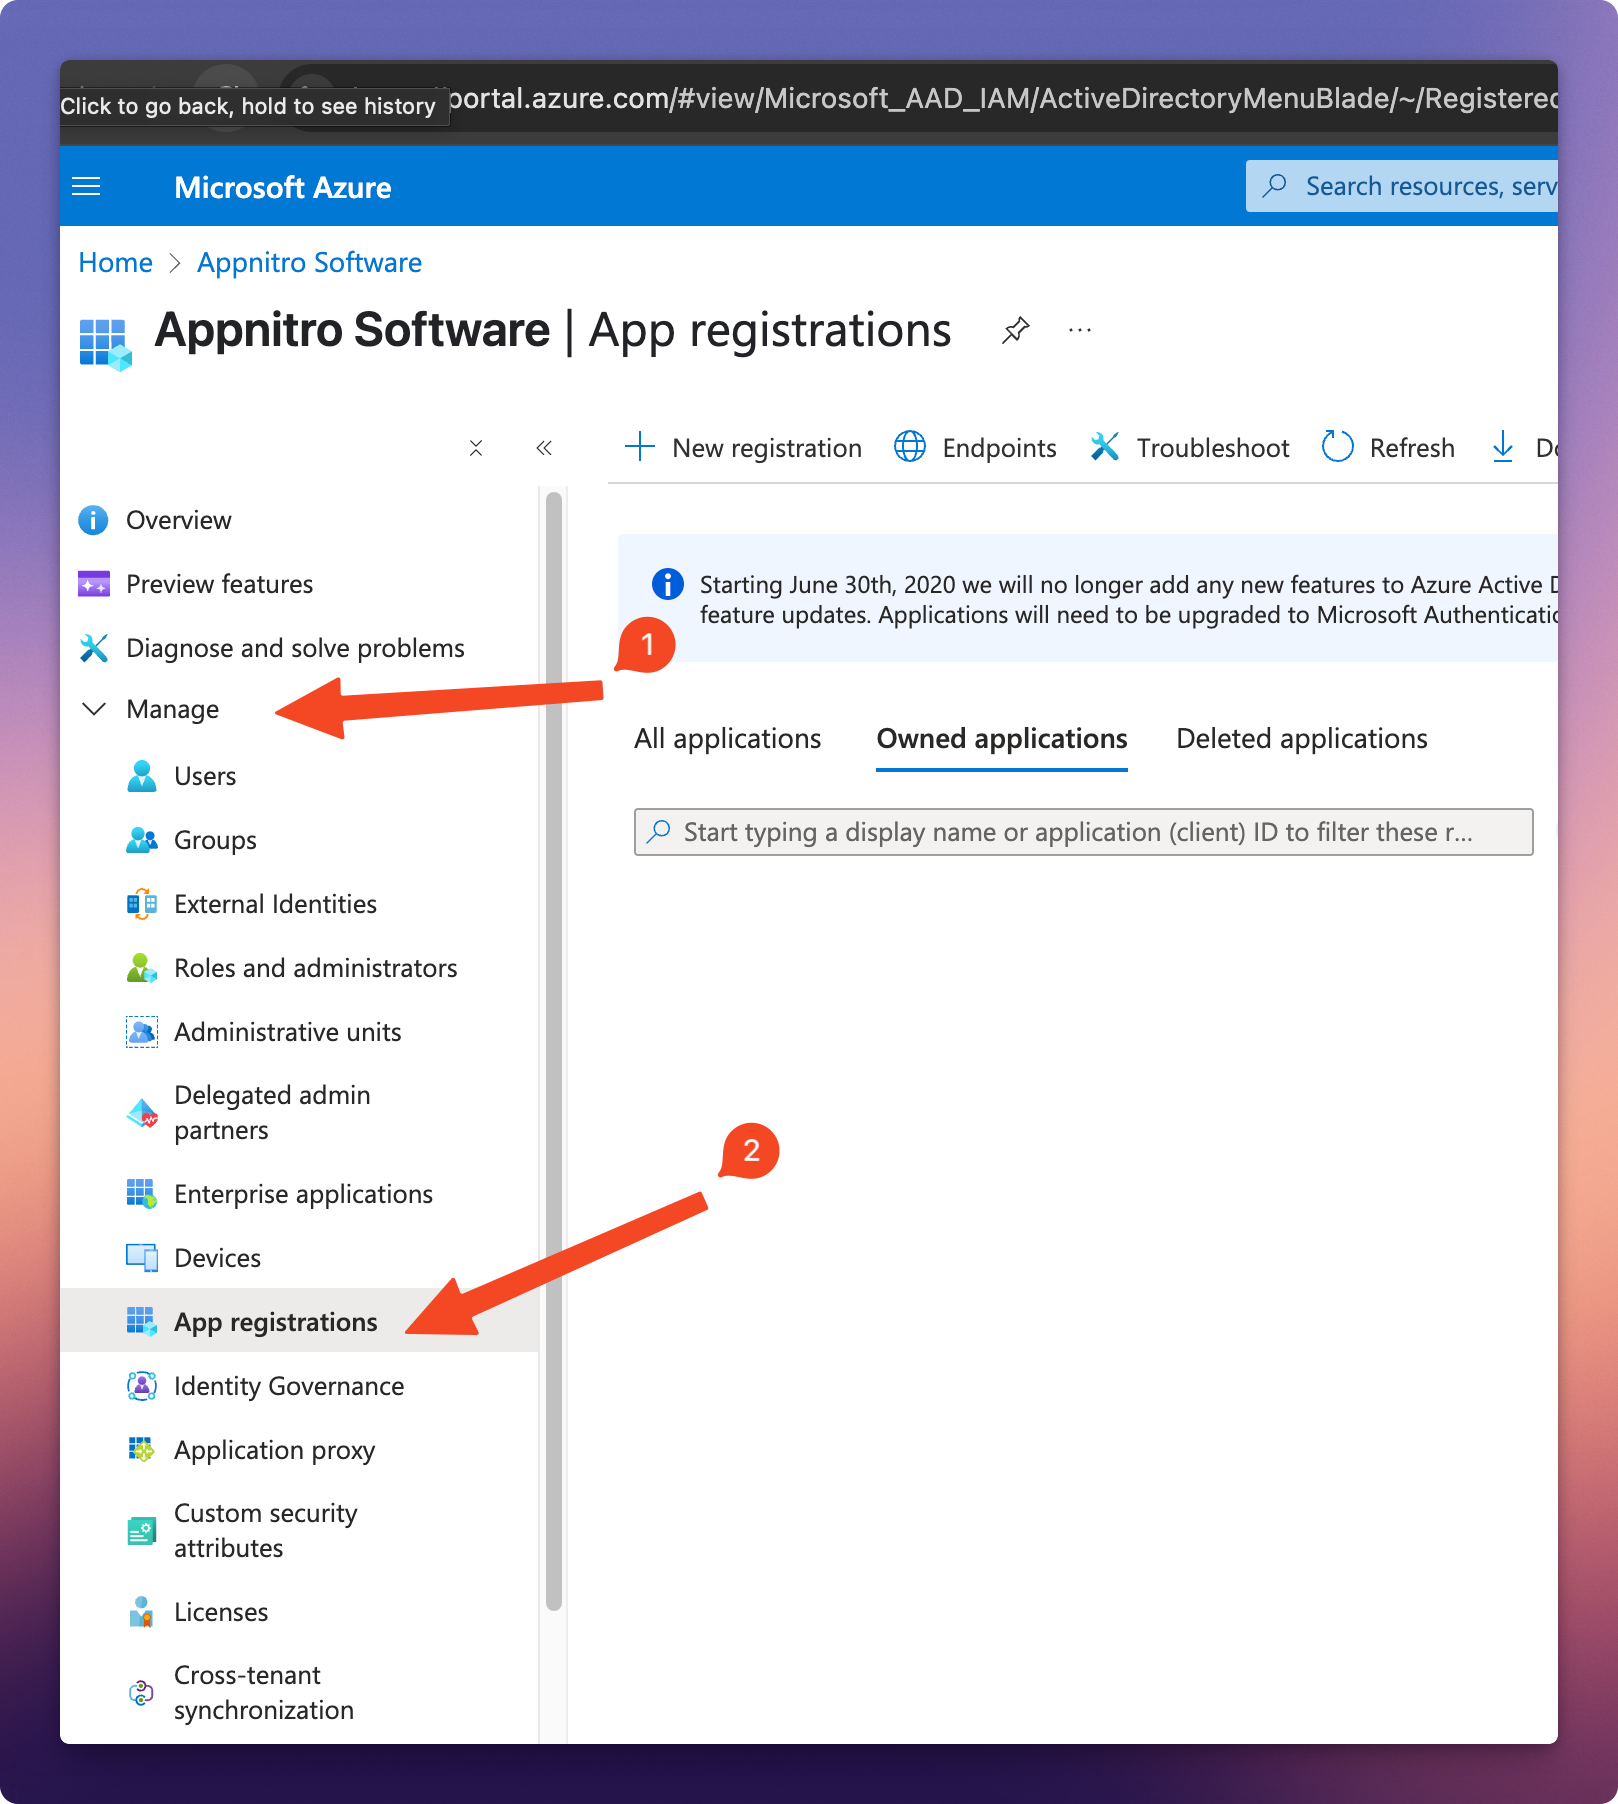
Under the "Manage" section on the left sidebar, choose "App registrations".
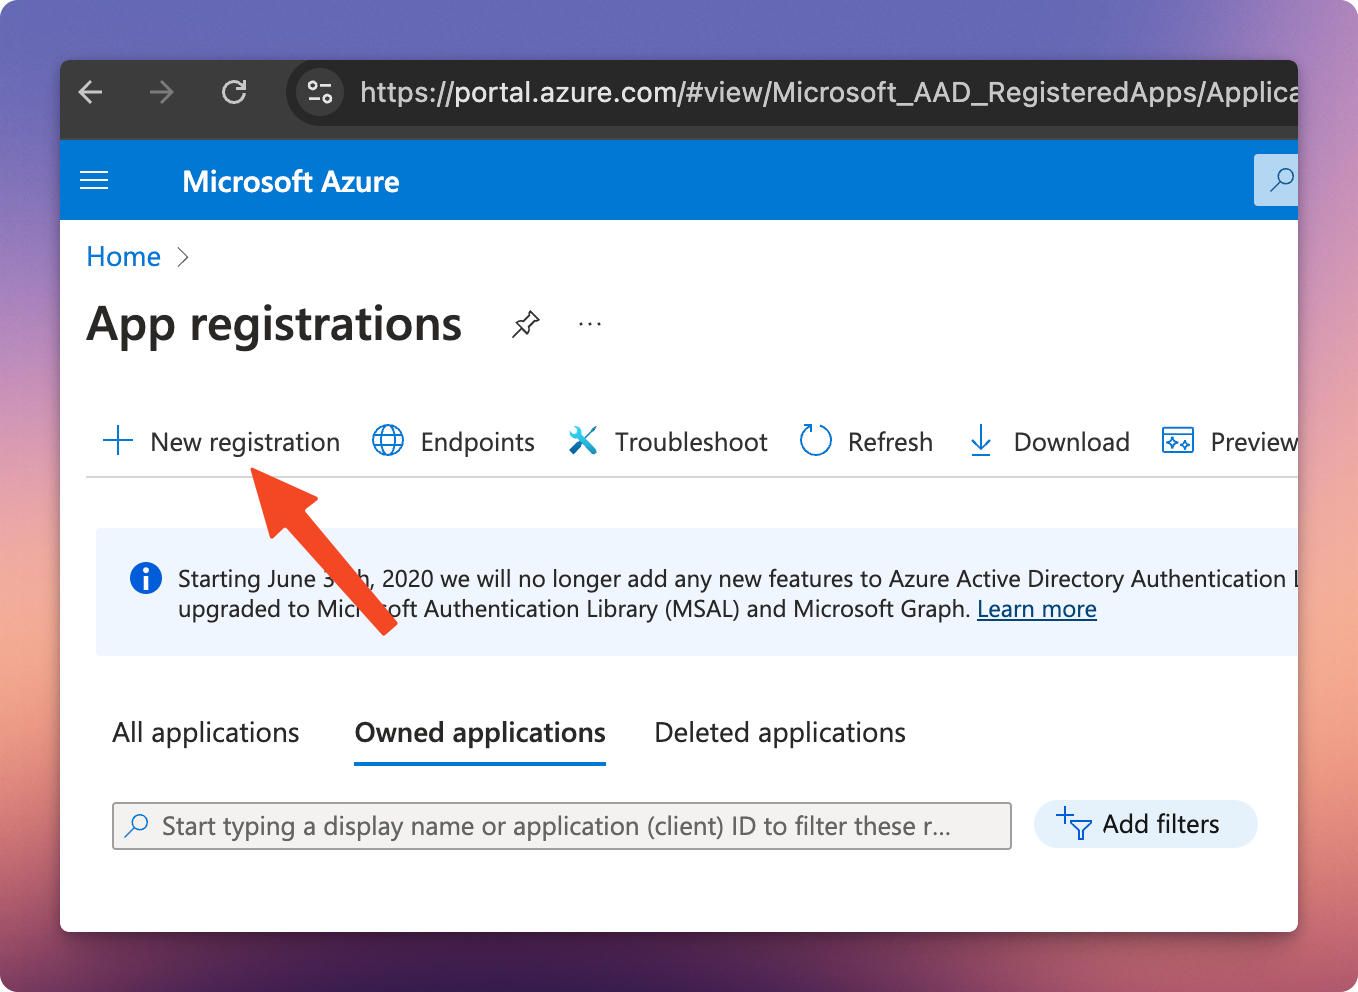
Click "New registration".
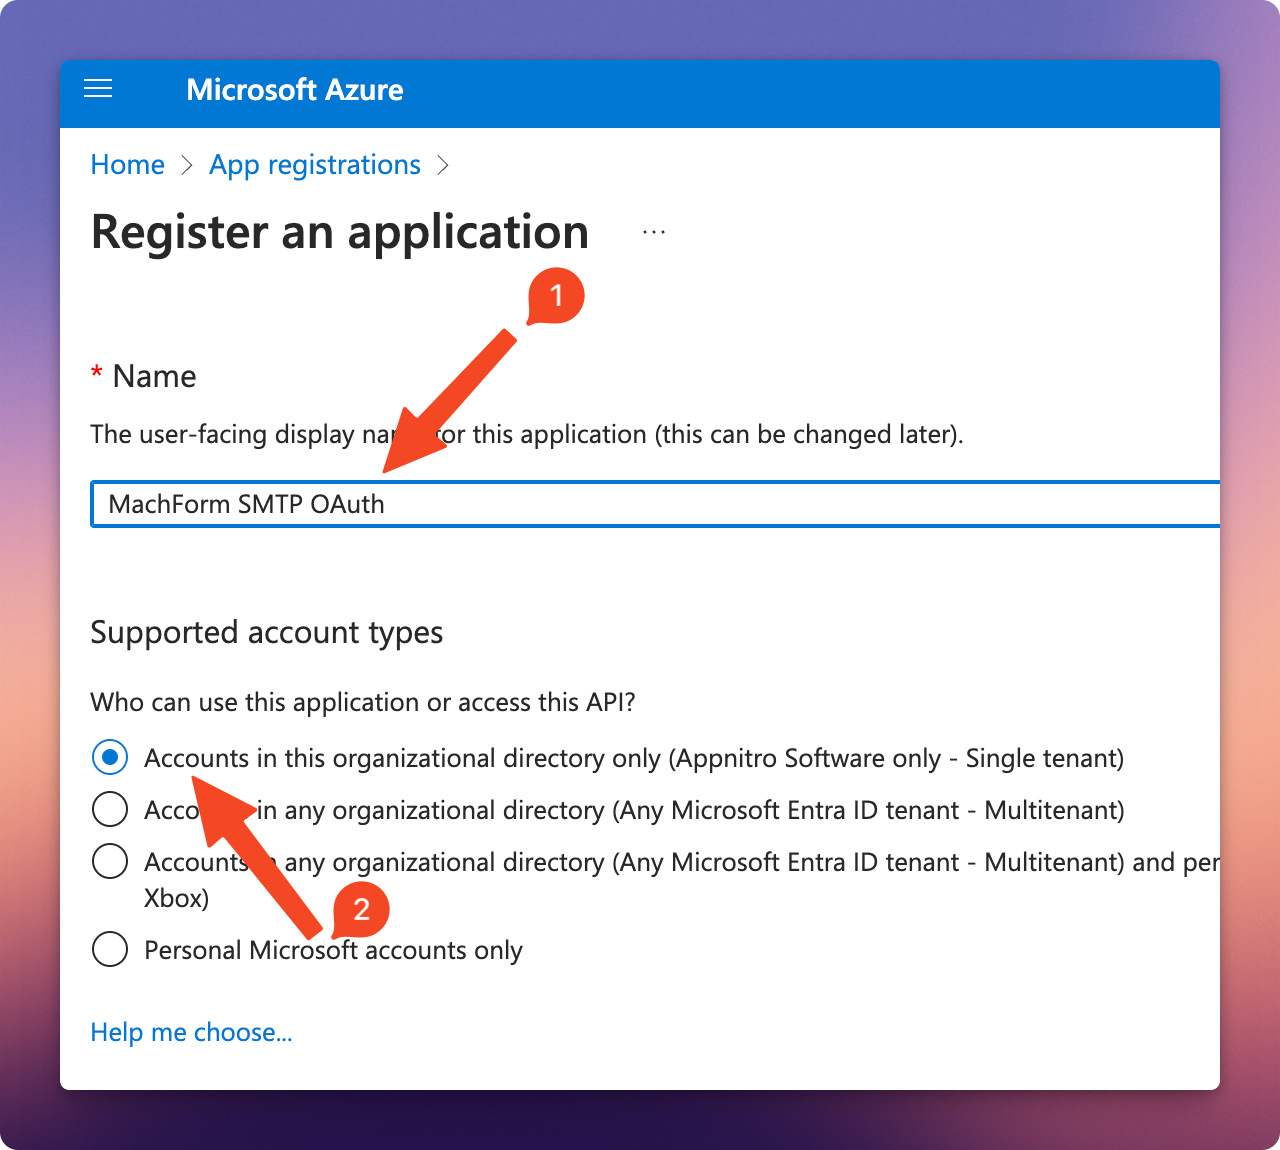
Enter a name, for example, "MachForm SMTP OAuth".
Under Supported account types, choose "Accounts in this organizational directory only (Single tenant)".
Provide a Redirect URI. Choose "Web" from the "Select a platform" dropdown and then put your Redirect URI and click the "Register" button.
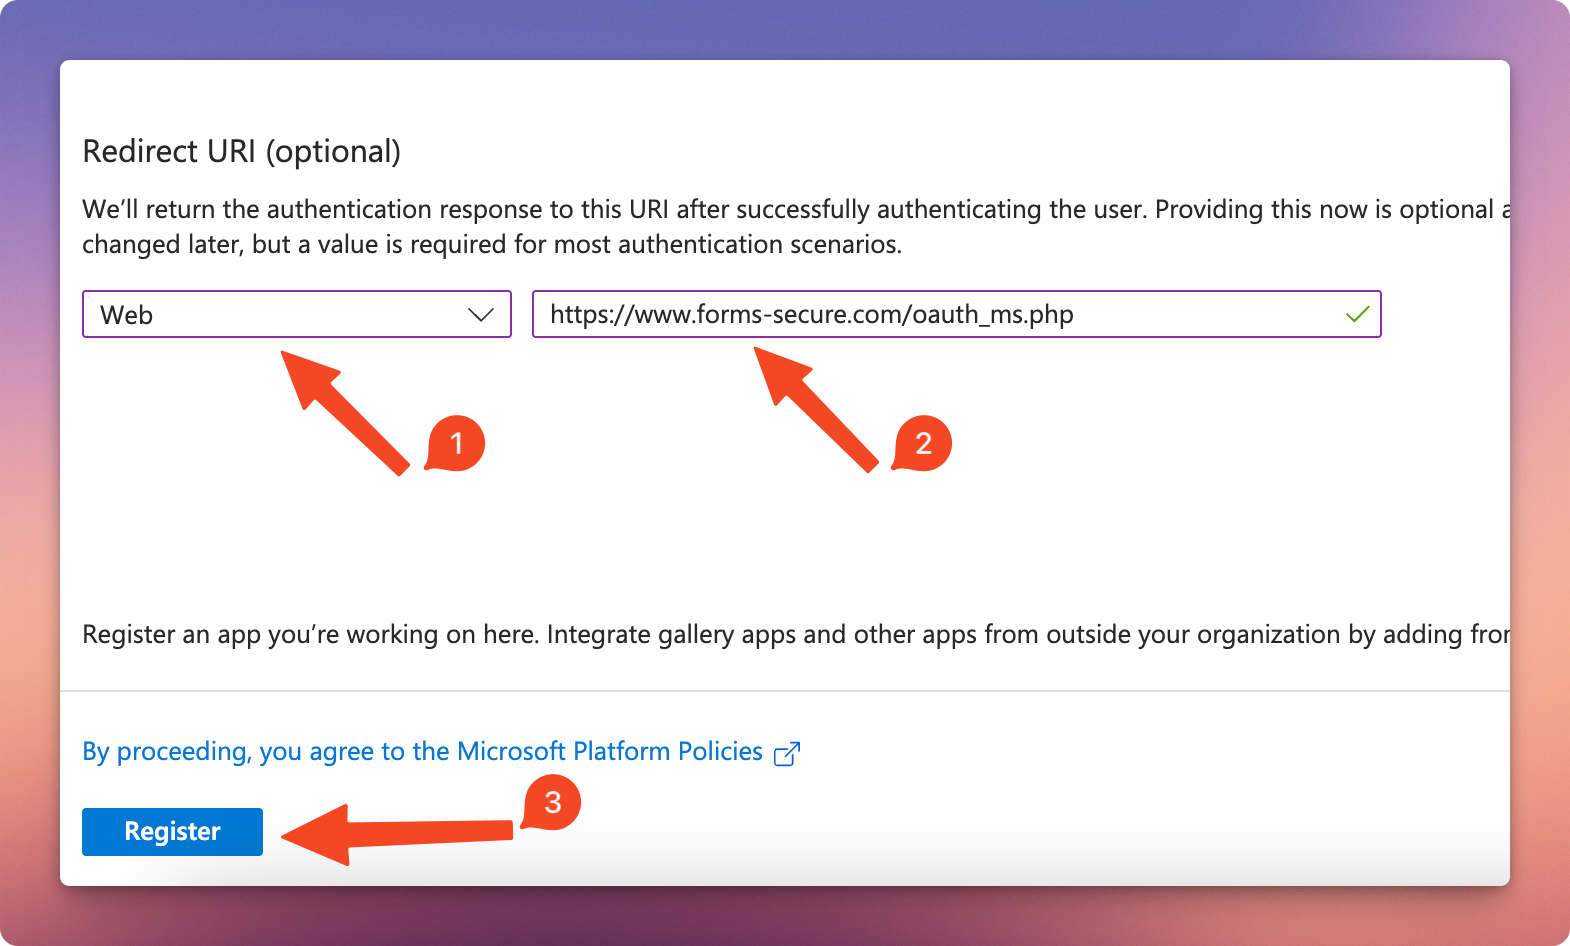
What is your "Redirect URI" ? To obtain your Redirect URI, login to your MachForm admin panel, go to Settings, check the "Use SMTP Server to Send Emails" option and choose "Microsoft 365 (OAuth). Your Redirect URI will be displayed and you can copy this URI.
Step 2: Obtain Application ID and Tenant ID
1. After registration, you will see the Application (client) ID and Directory (tenant) ID.
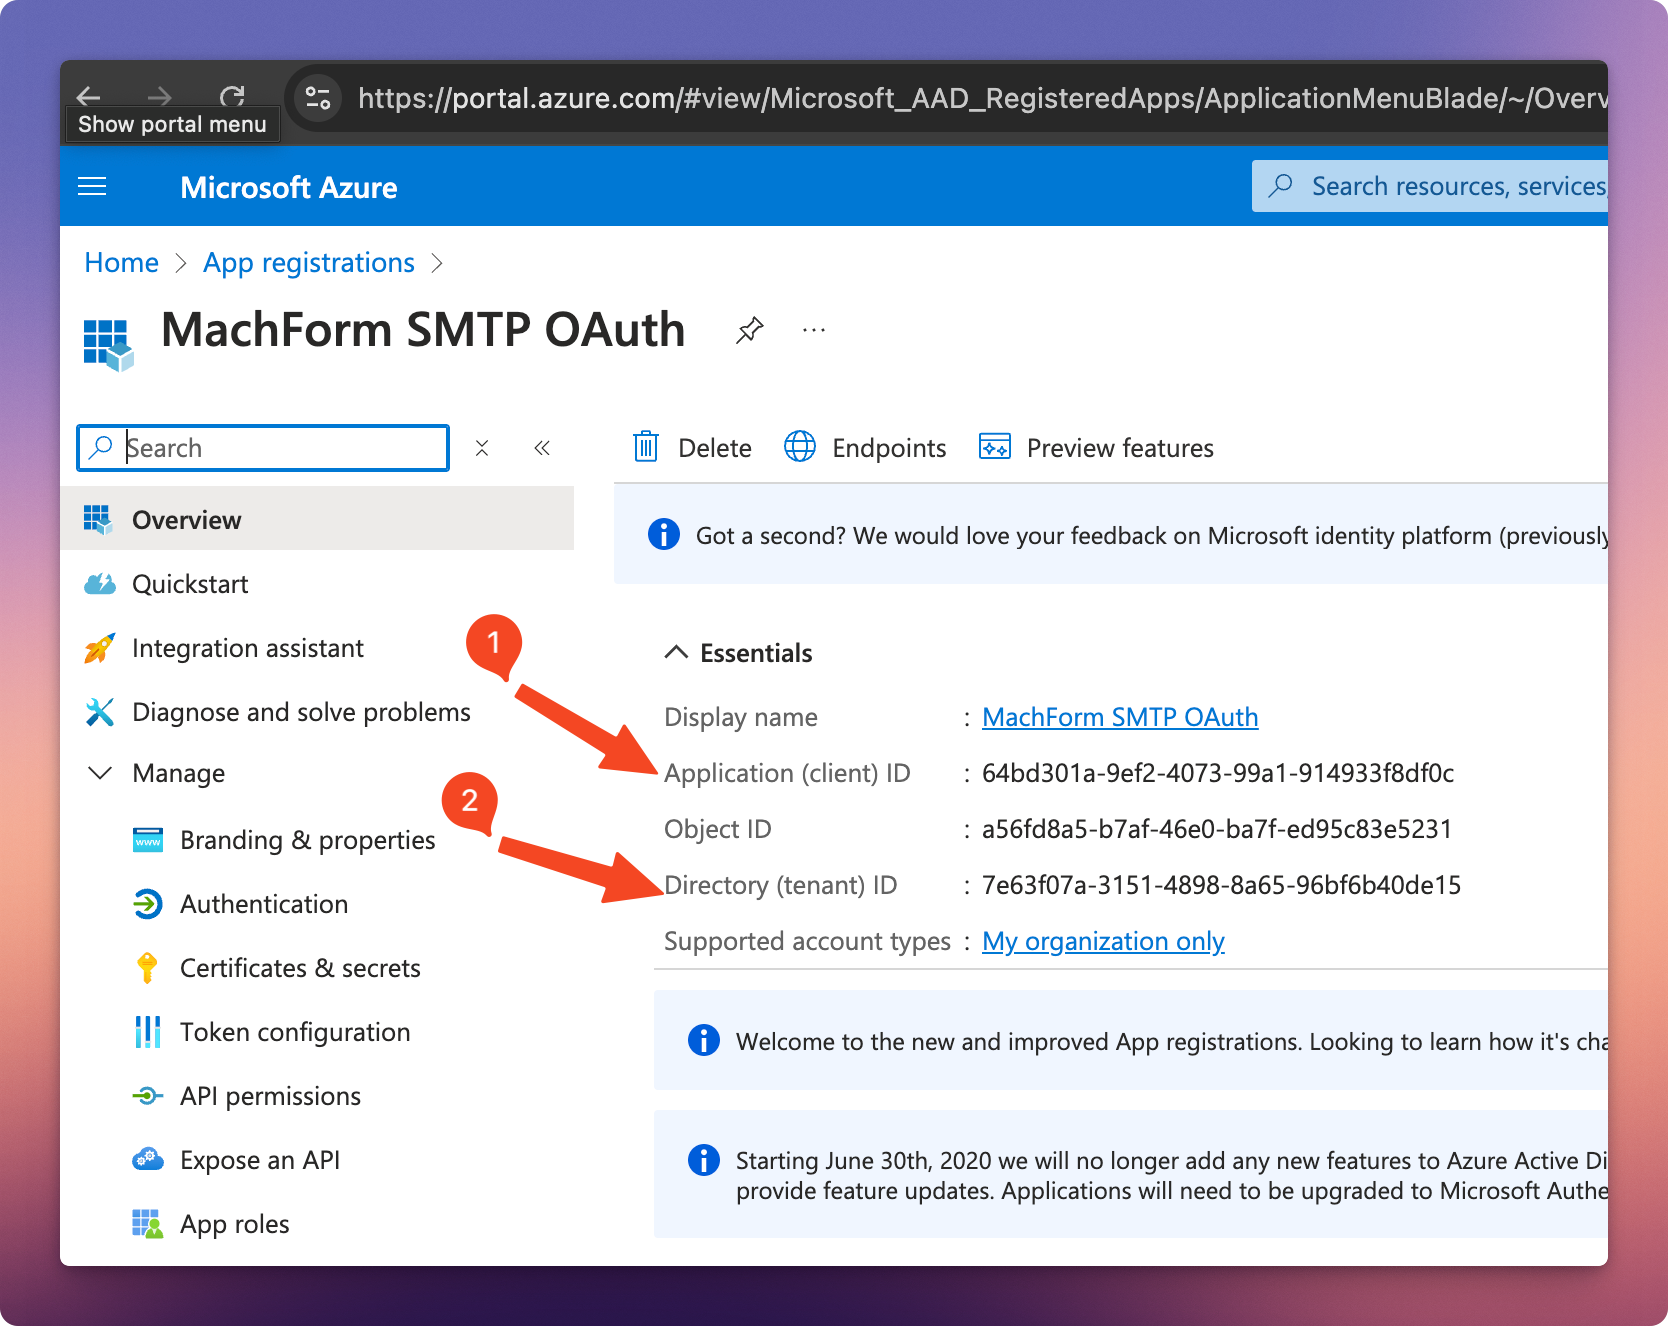
2. Copy these values to a safe place; you will need them later in MachForm settings.
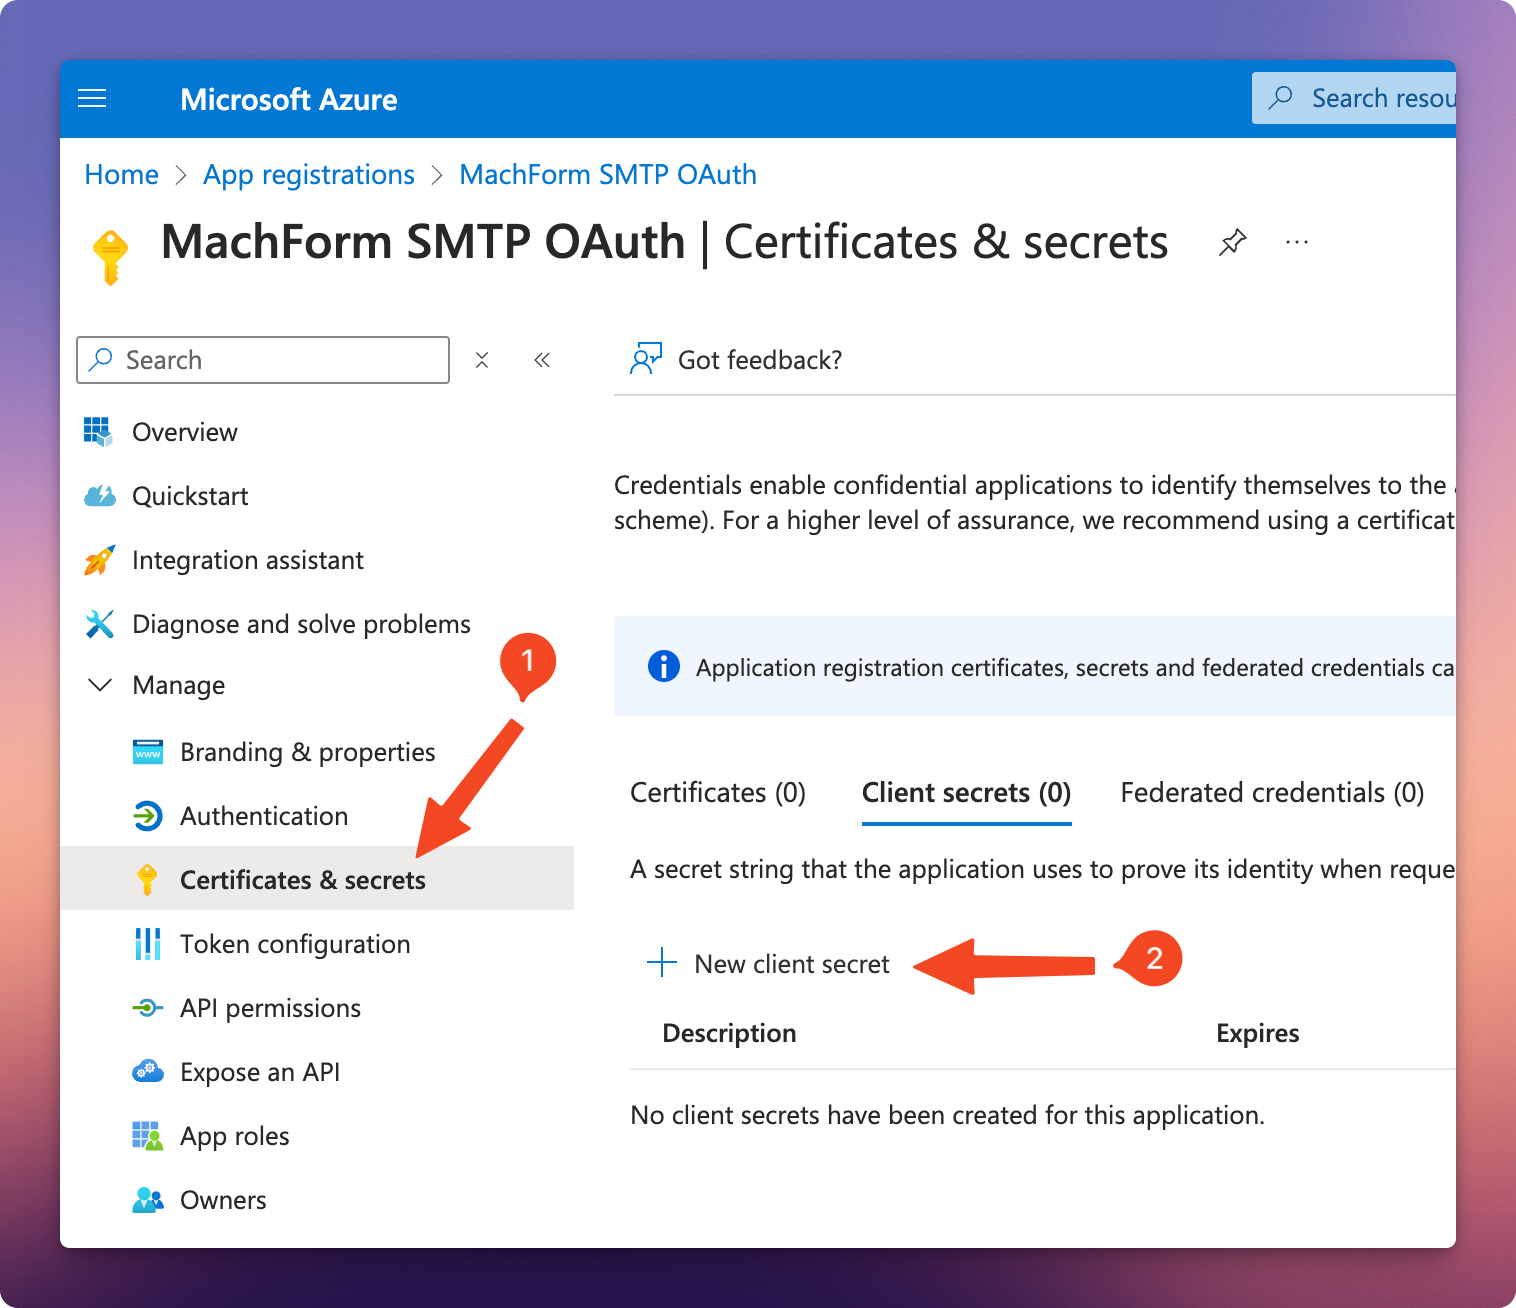
Step 3: Create a Client Secret
1. Click "Certificates & secrets" from the left menu and then click "New client secret".
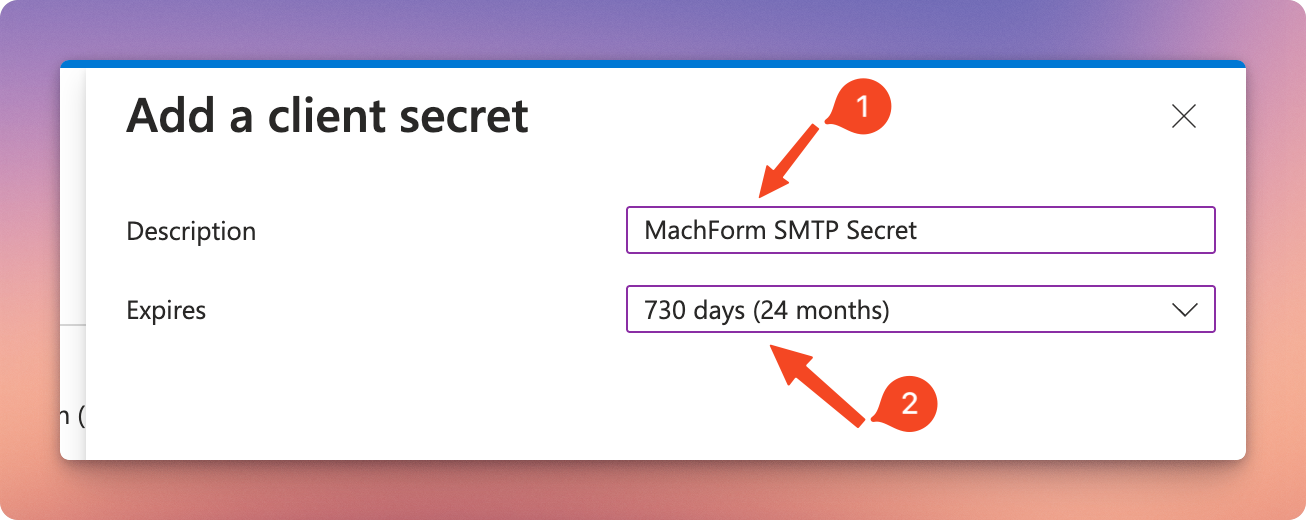
2. Enter "Client secret" details
Enter a description (e.g., "MachForm SMTP Secret").
Select an expiry duration (recommended: 730 days - 24 months).
Click "Add" button.
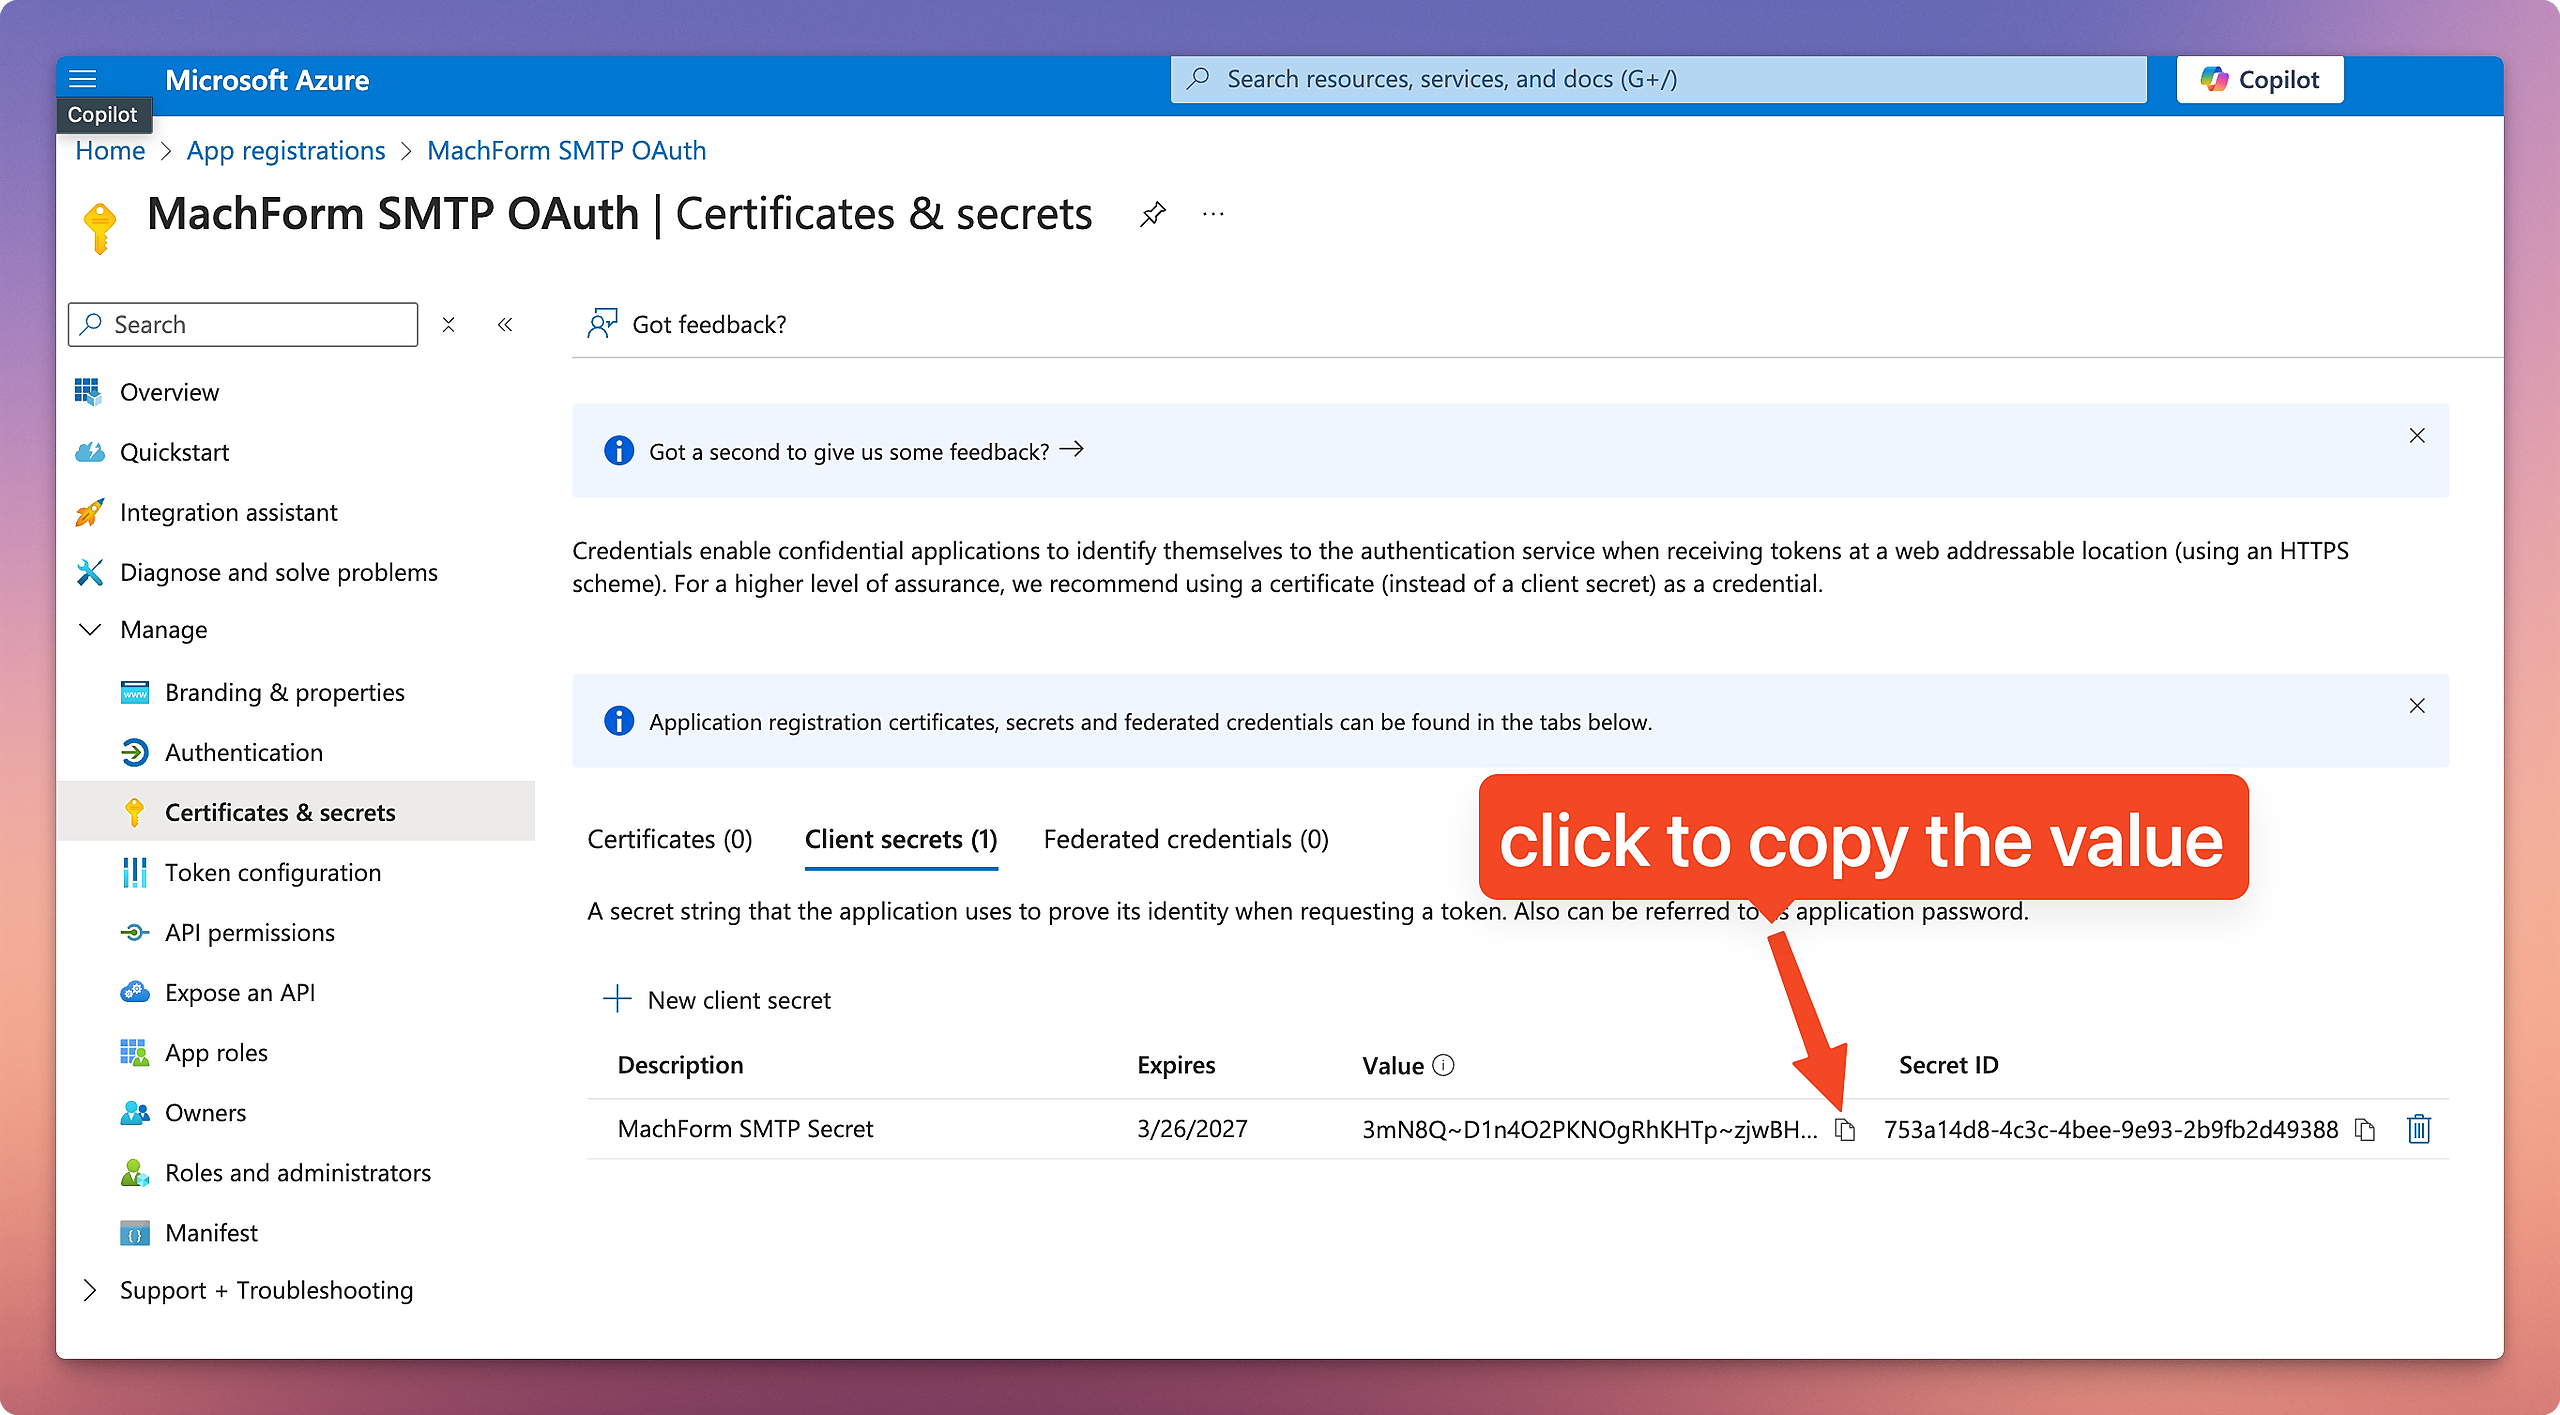
Copy the Value of the new client secret immediately and save it securely. Important: You won't be able to view it again after leaving this page.
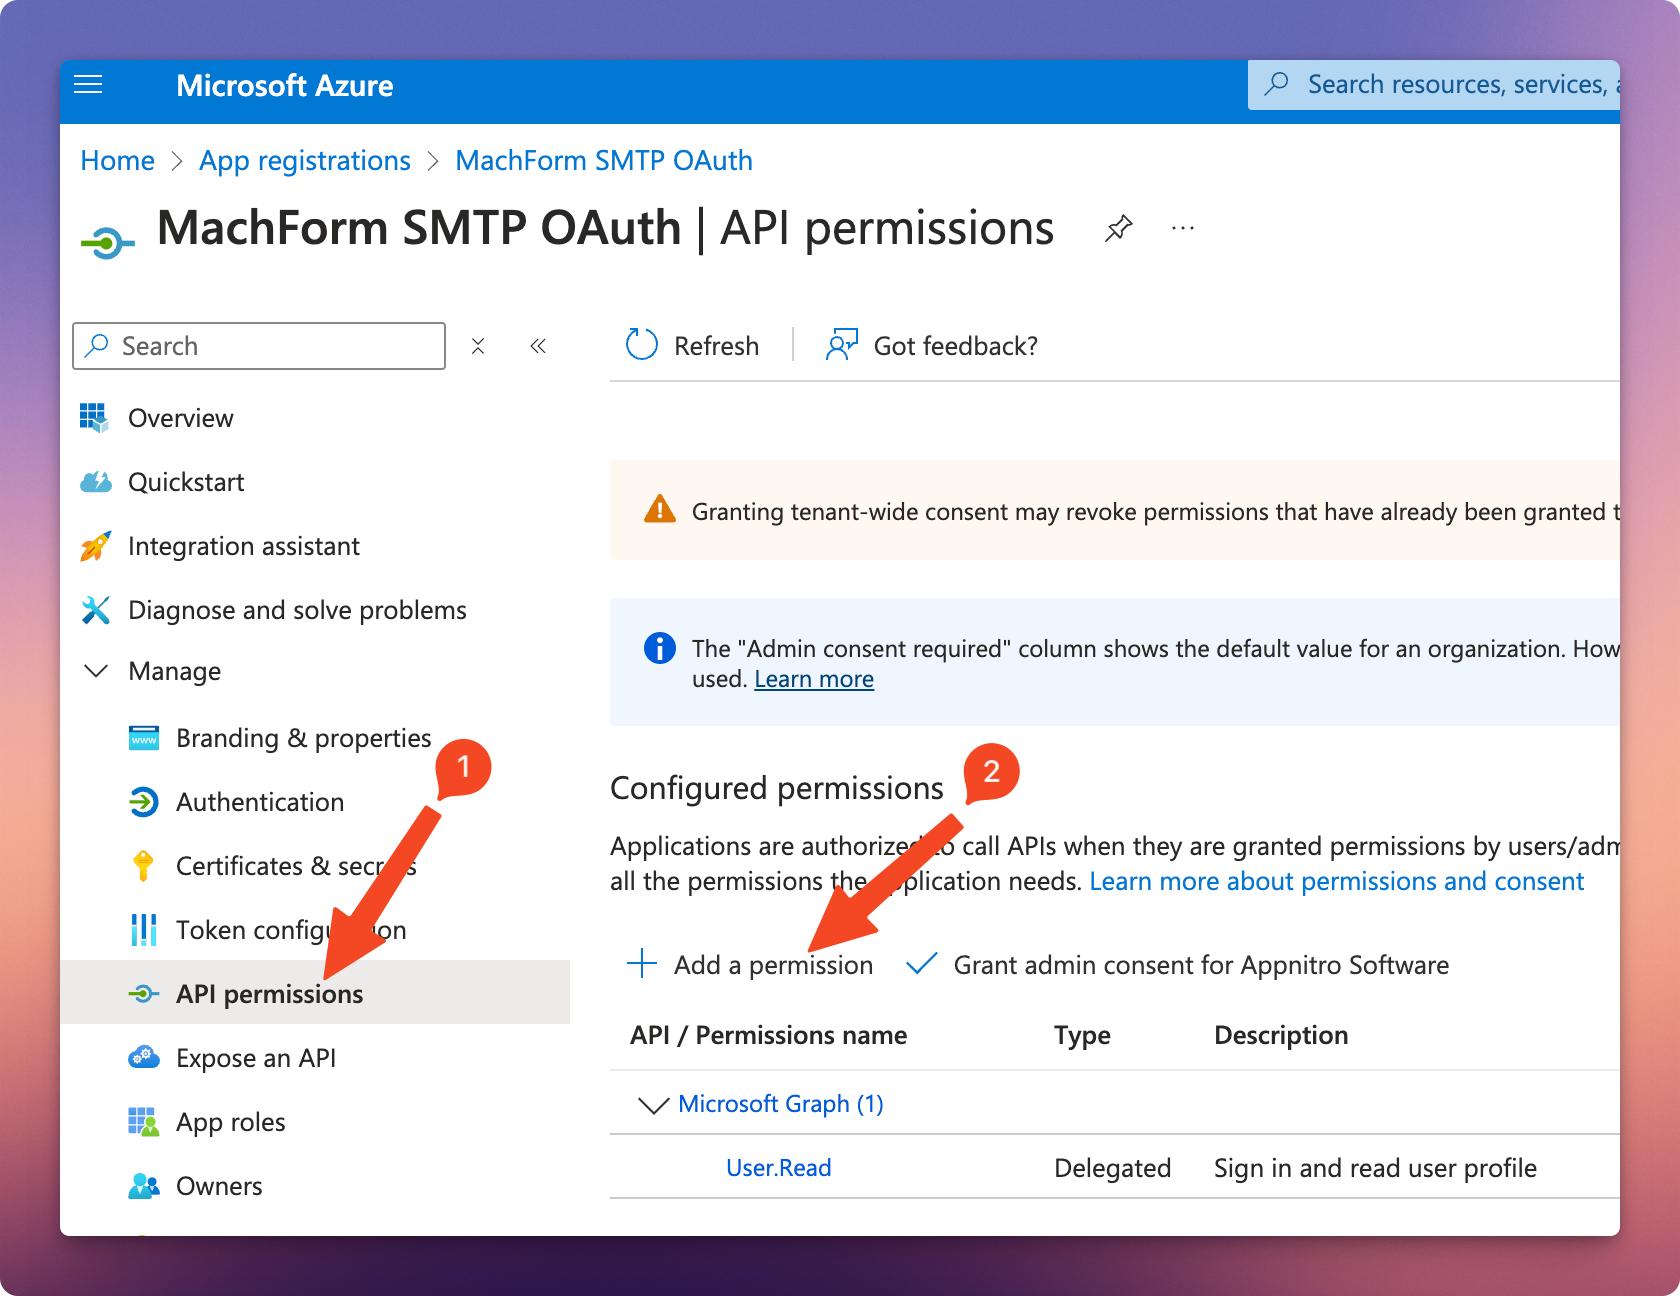
Step 4: Configure API Permissions
1. Click "API permissions" from the left menu and then click "Add a permission".
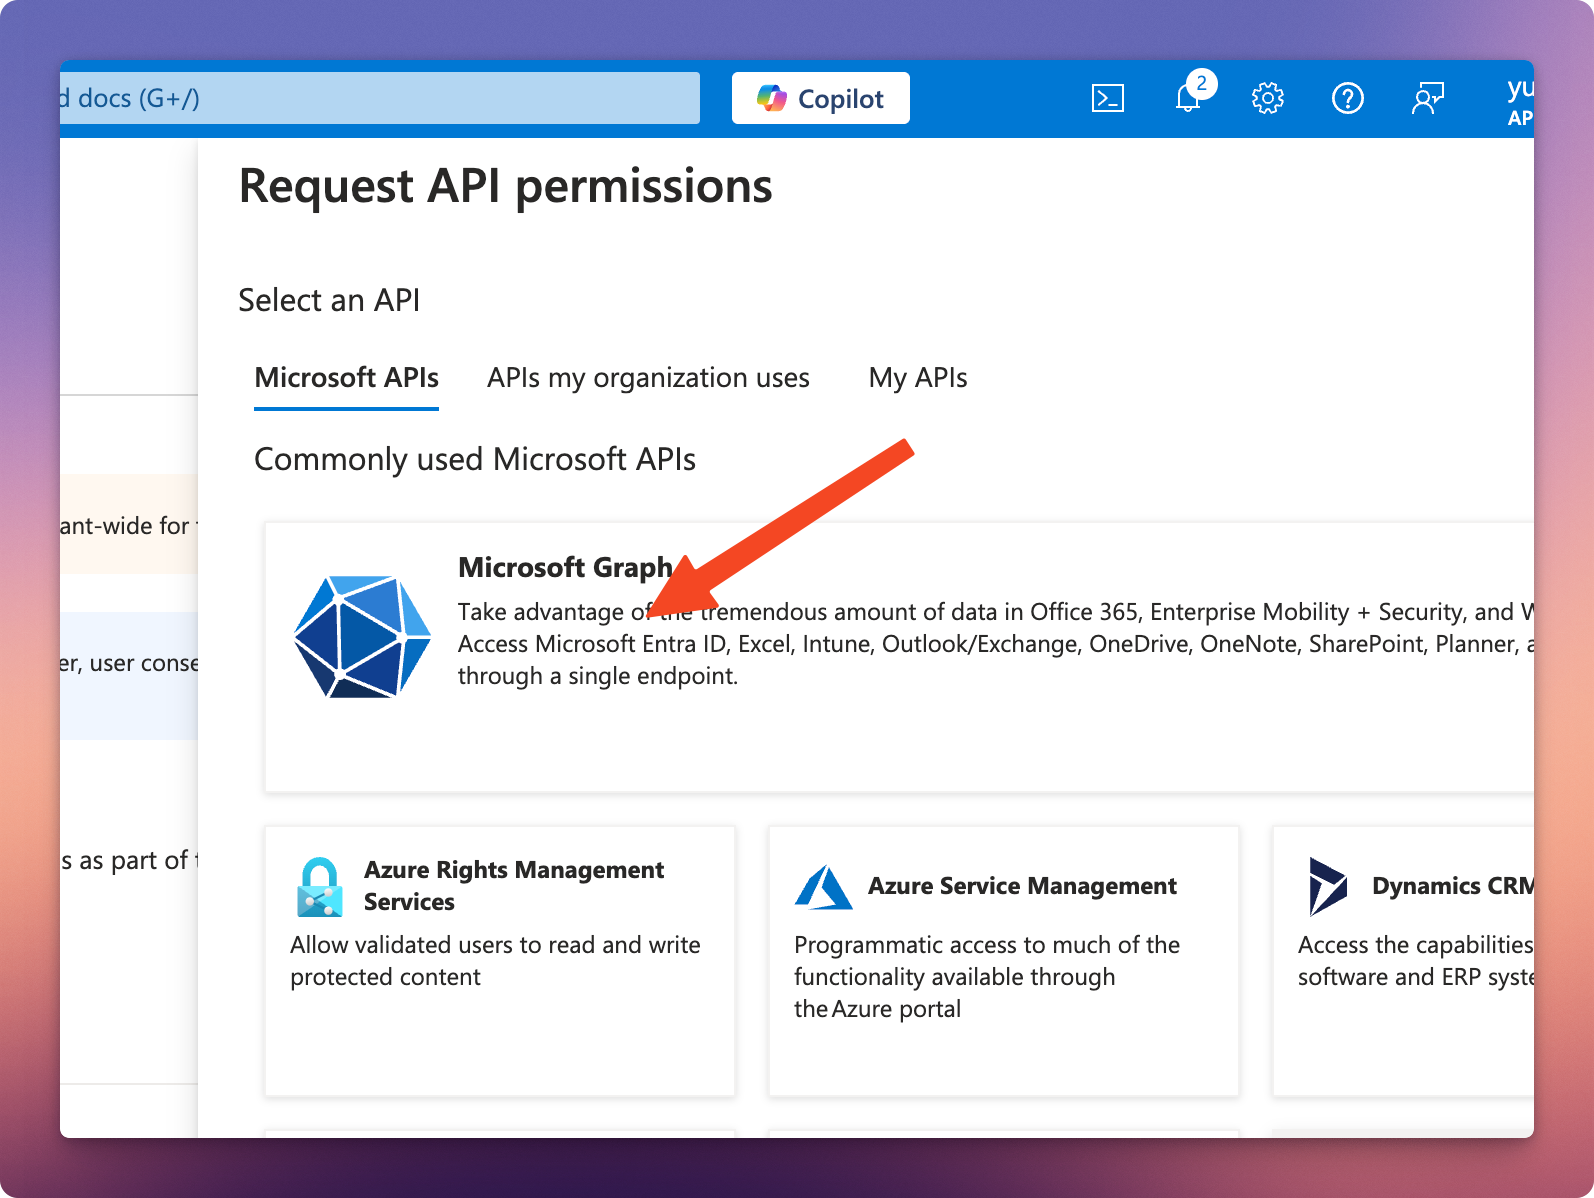
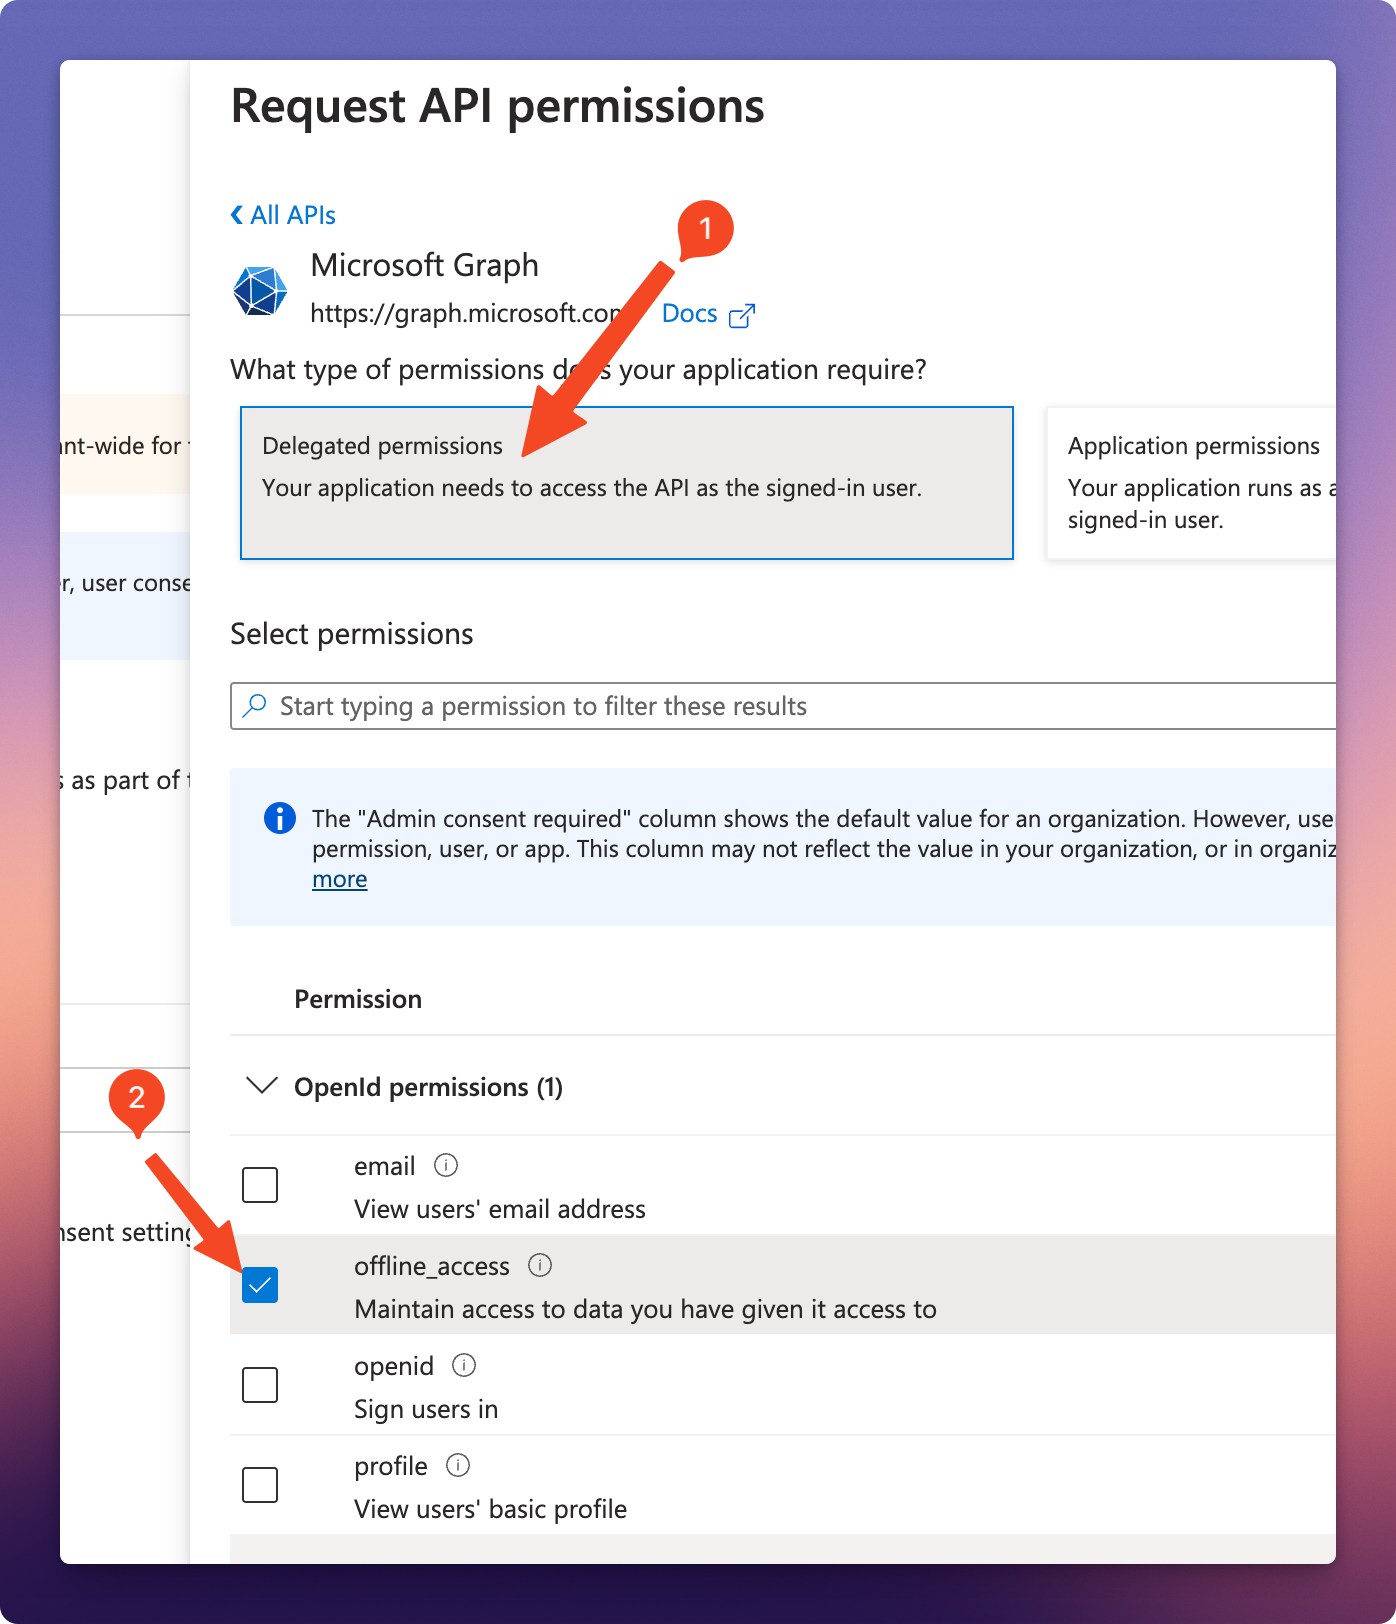
2. Choose "Microsoft Graph"
3. Choose "Delegated permissions" and then check the "offline_access" permission.
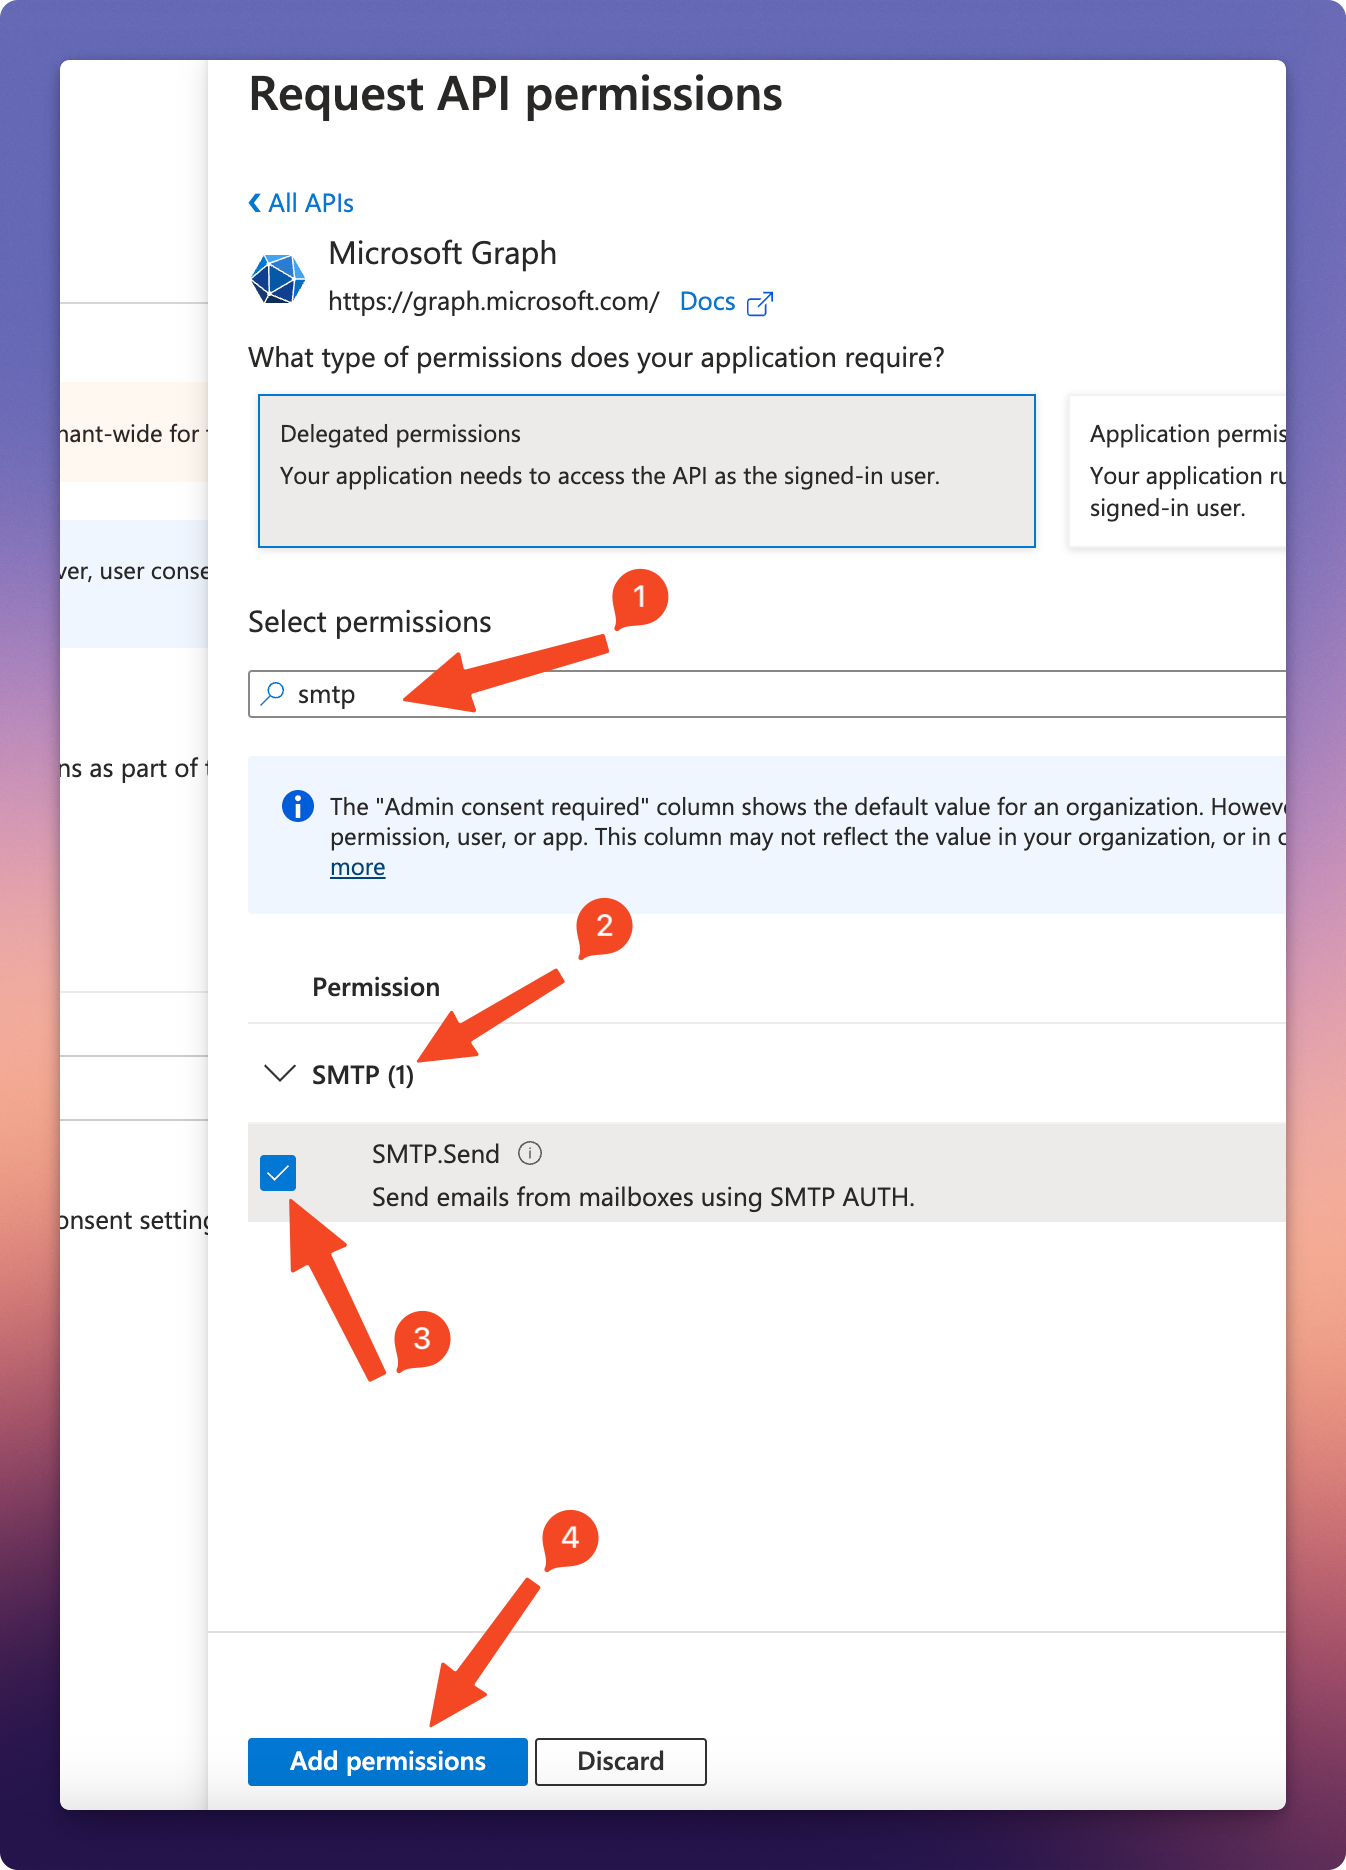
4. Click the permission search bar and type "smtp". Choose the "SMTP.Send" permission and click the "Add permissions" button. This will add the following permissions:
offline_access
SMTP.Send
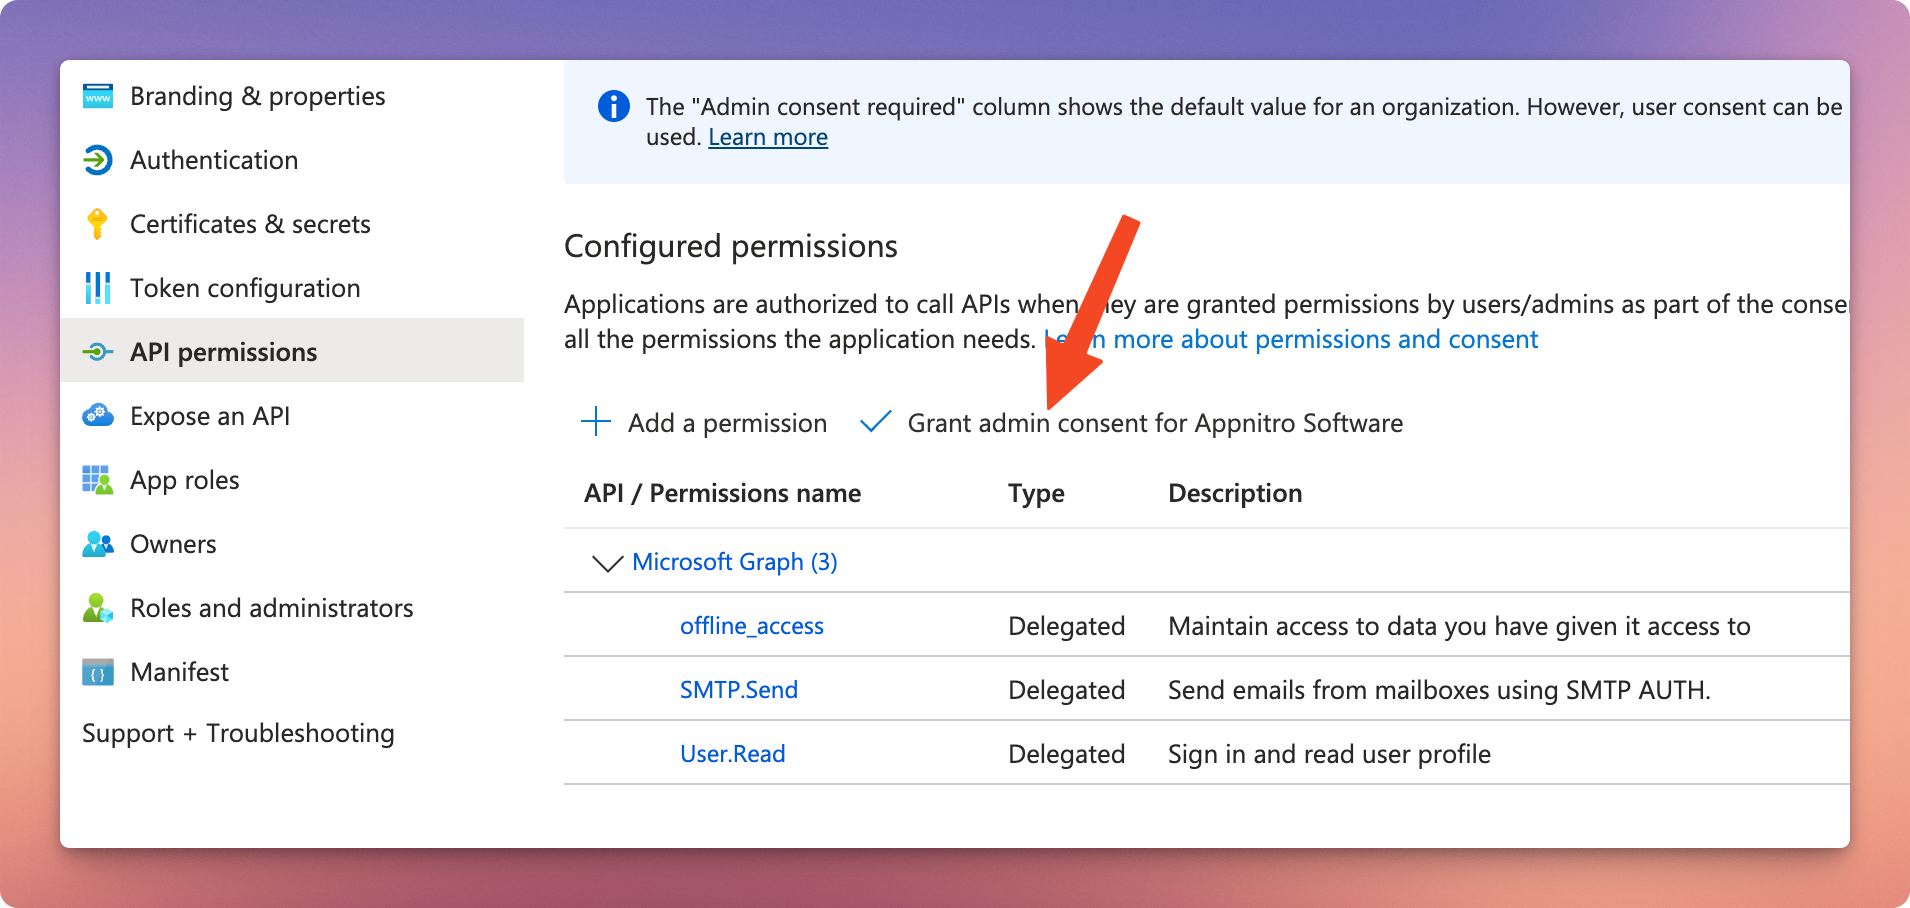
5. After adding permissions, click the "Grant admin consent for [your organization]" and confirm the prompt to apply the permissions.
Step 5: Configure MachForm Settings
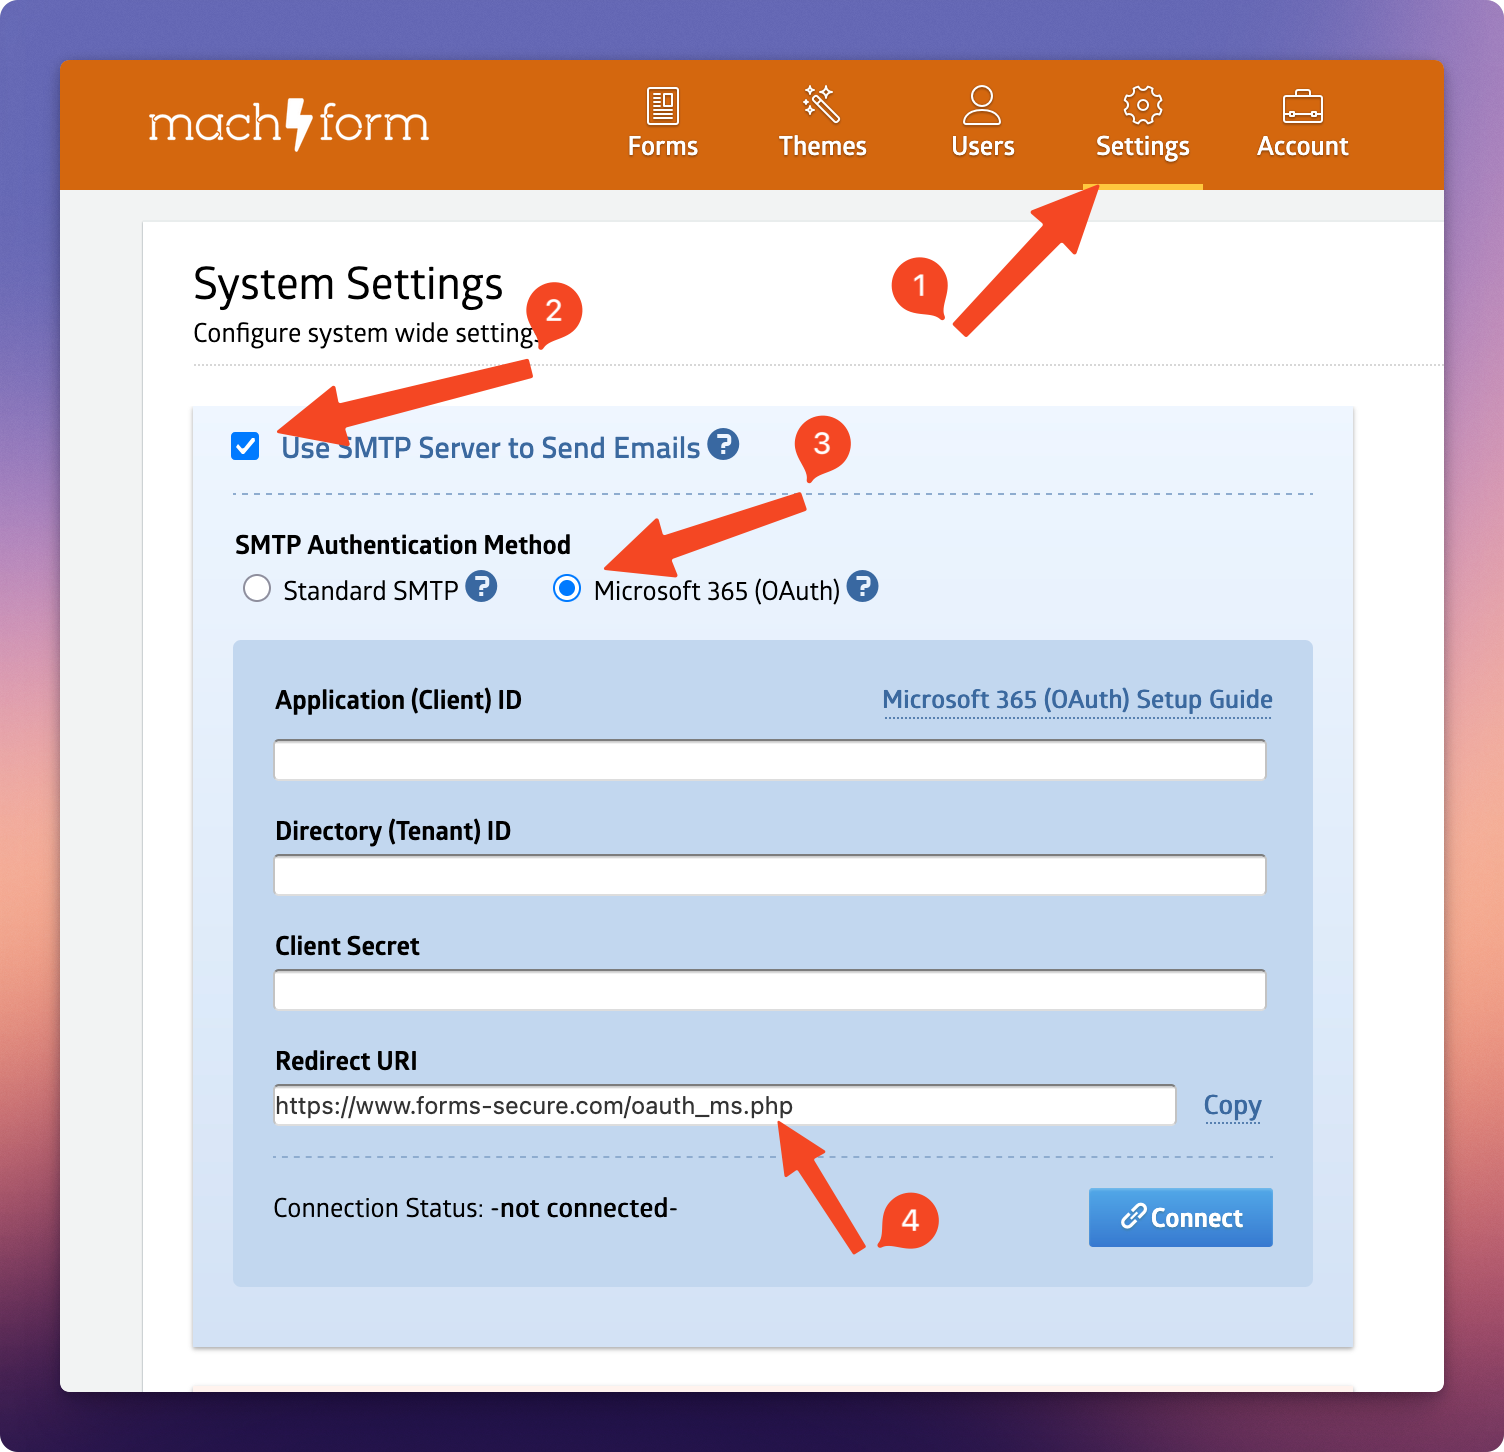
1. Log in to your MachForm Admin Panel
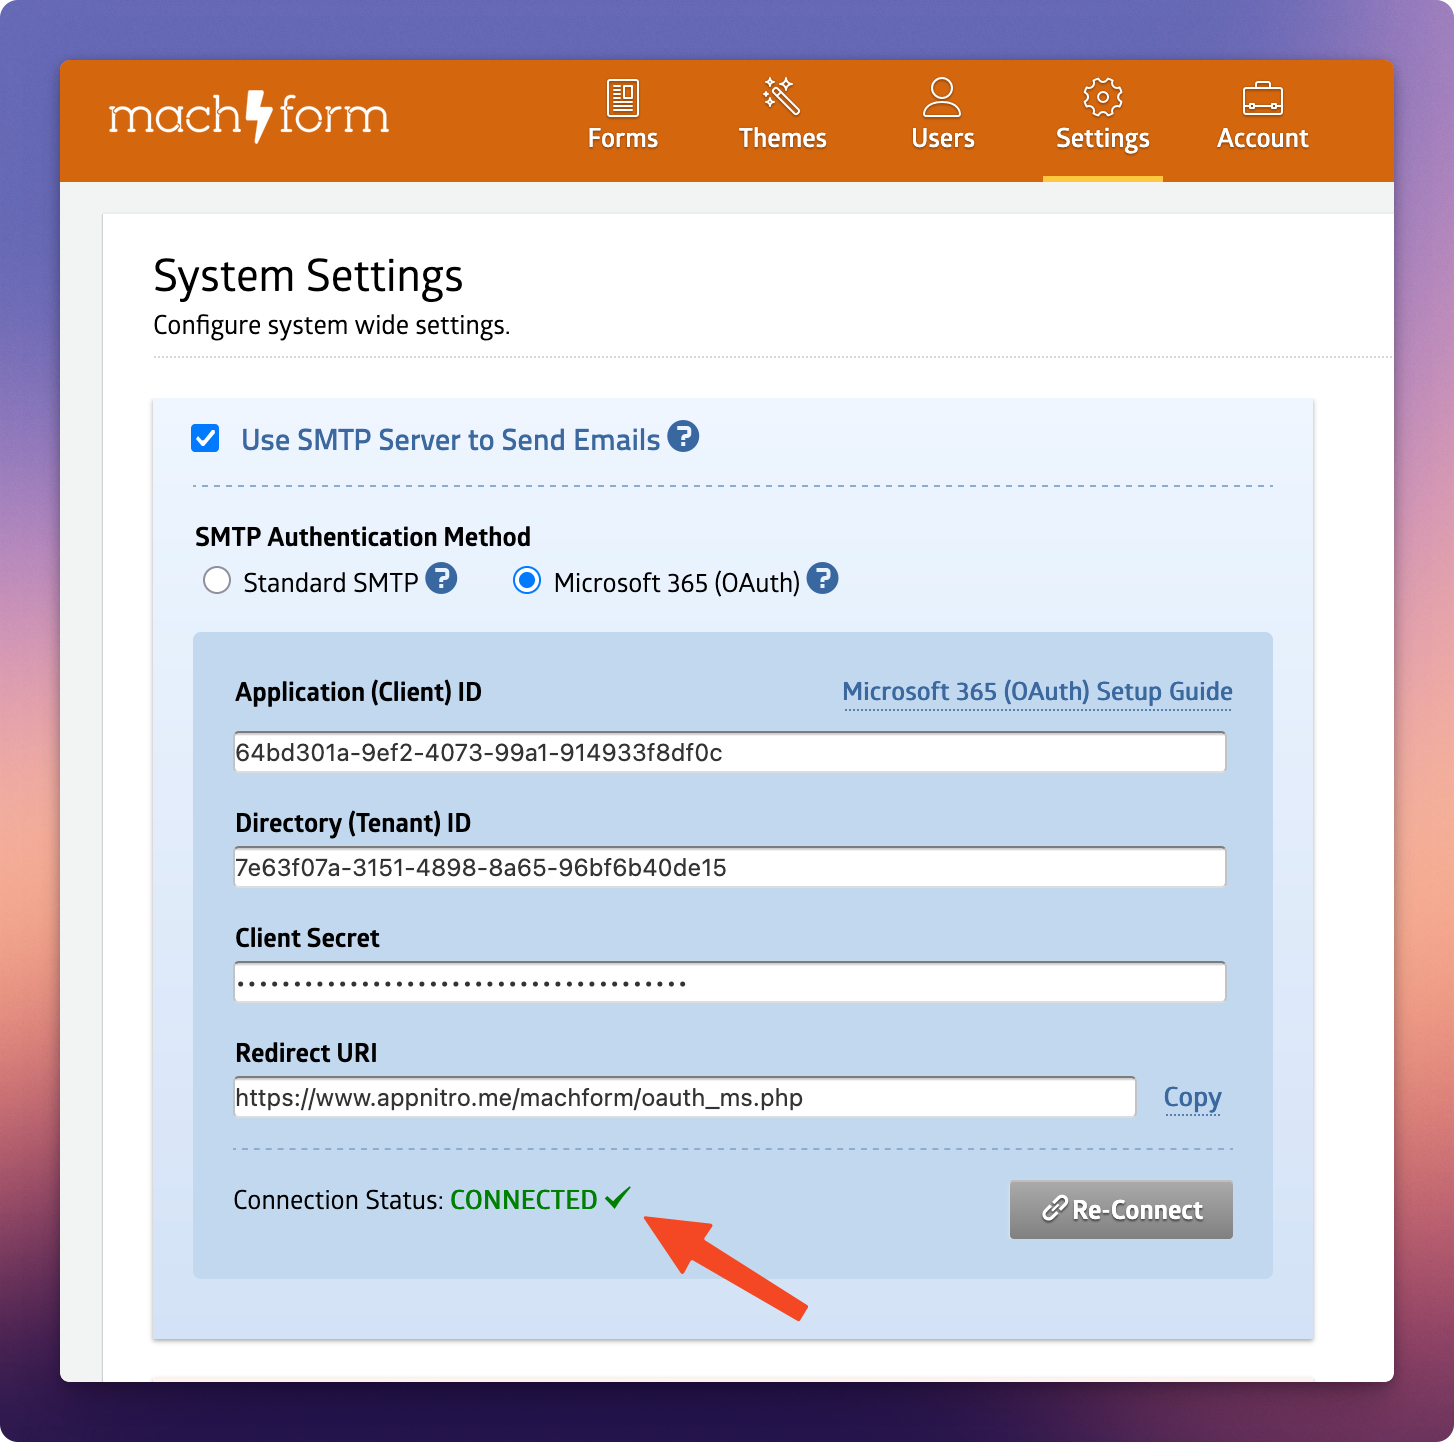
2. Navigate to "Settings", check the "Use SMTP Server to Send Emails" option and choose "Microsoft 365 (OAuth). Then enter all the credentials you collected from the previous steps into MachForm:
Application (Client) ID
Directory (Tenant) ID
Client Secret
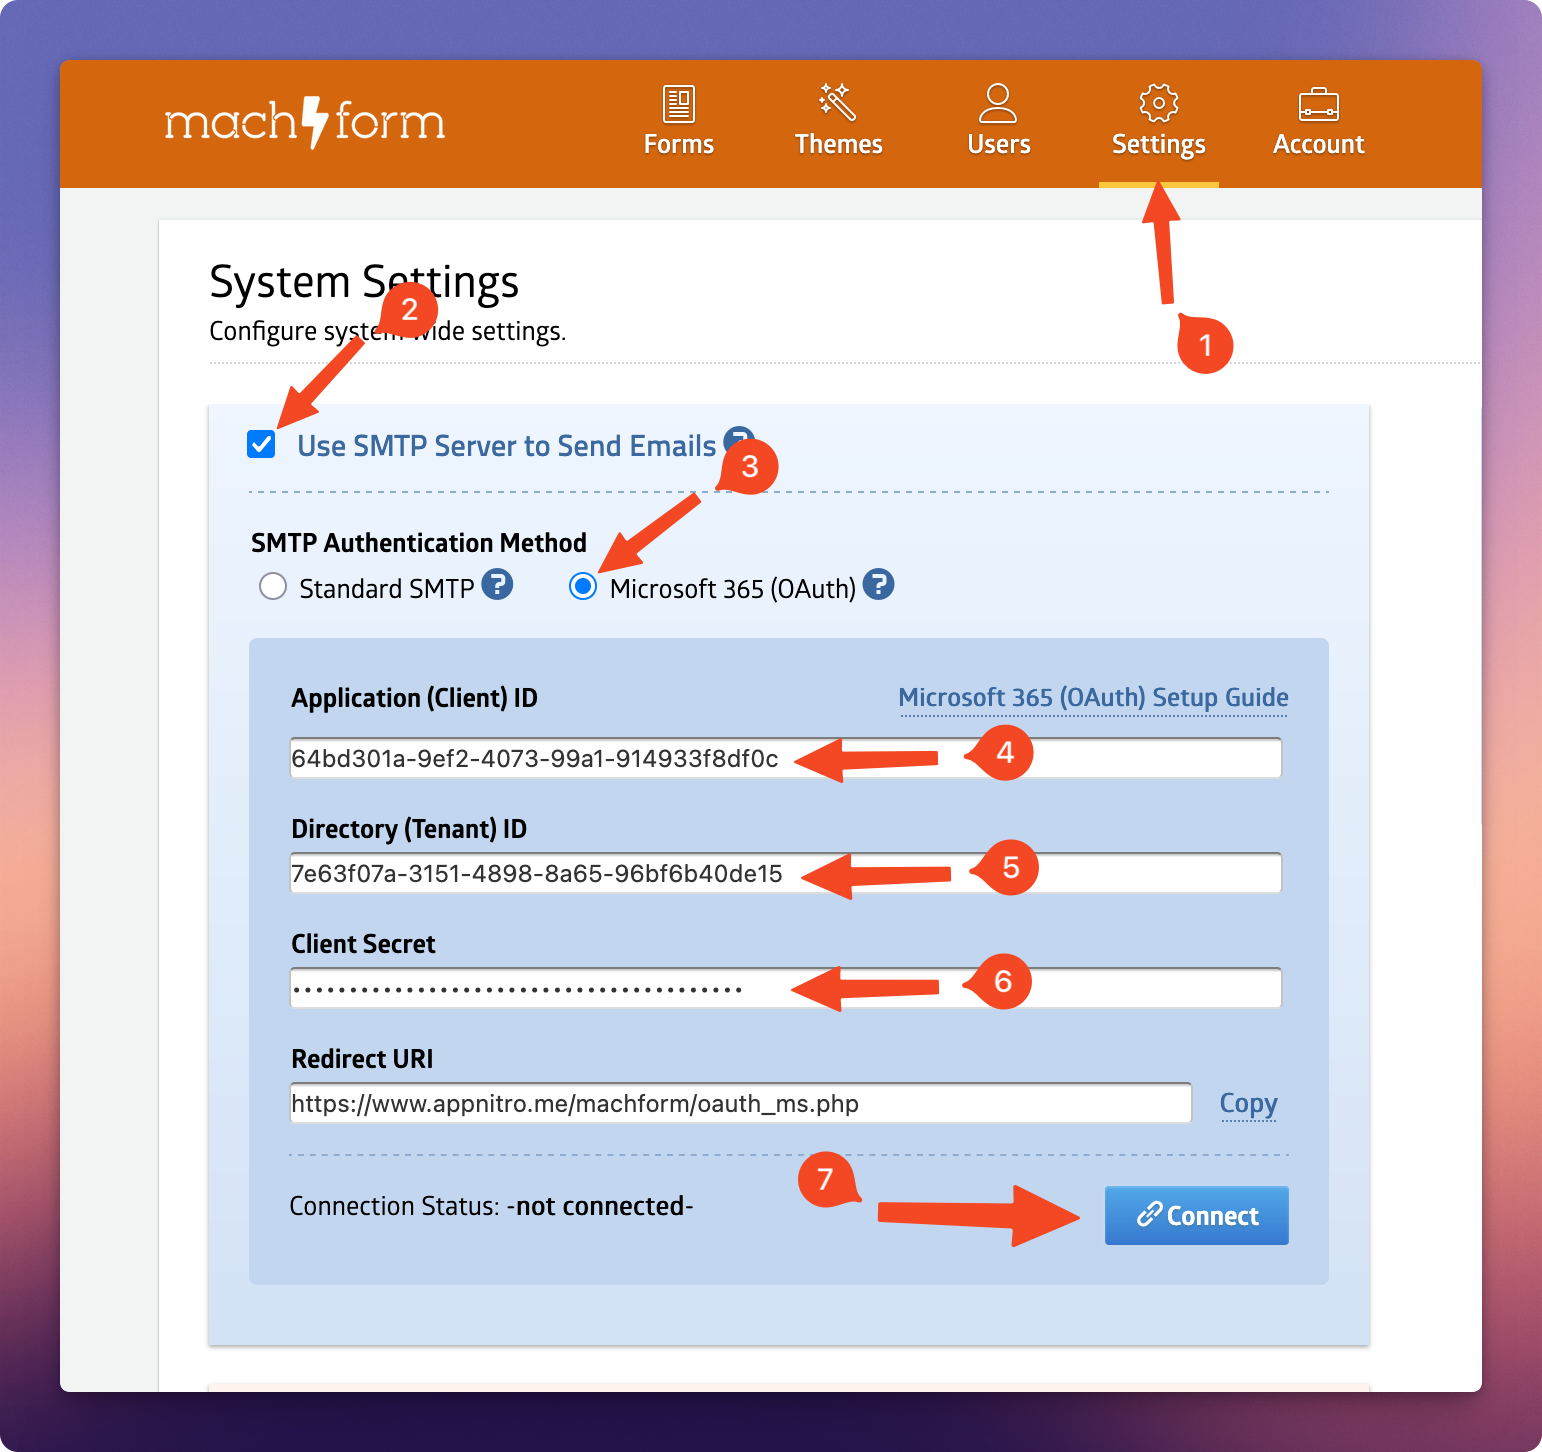
3. Click the "Connect" button, and you’ll be redirected to the Microsoft login page. Sign in with your Microsoft 365 account and follow the prompts to complete the authorization process.
4. You’ll be redirected back to your MachForm Settings page, and that’s it! You’ve successfully configured MachForm to use the Microsoft 365 SMTP server with OAuth.
Important Notes
Once you’ve connected your MachForm with the Microsoft 365 SMTP server, you need to ensure all your forms are using your Microsoft 365 email address as the sender address (From Email Address). Otherwise, the Microsoft 365 SMTP server will reject the email delivery.
This also means you’ll need to change the Default Email From Address on your Settings page to use your Microsoft 365 email address as well.