Overview
This page provides specific instructions for setting up MachForm Single Sign-On (SSO) with Google SSO.
If you found this page directly, please note that it is a continuation of the main How to Set Up MachForm with Single Sign-On (SSO). Before proceeding, we recommend reviewing the main manual to understand the overall configuration steps and prerequisites. This page focuses only on the Google SSO setup portion.
Step 1: Create Google SAML App
1. Log in to your Google Workspace Admin Console
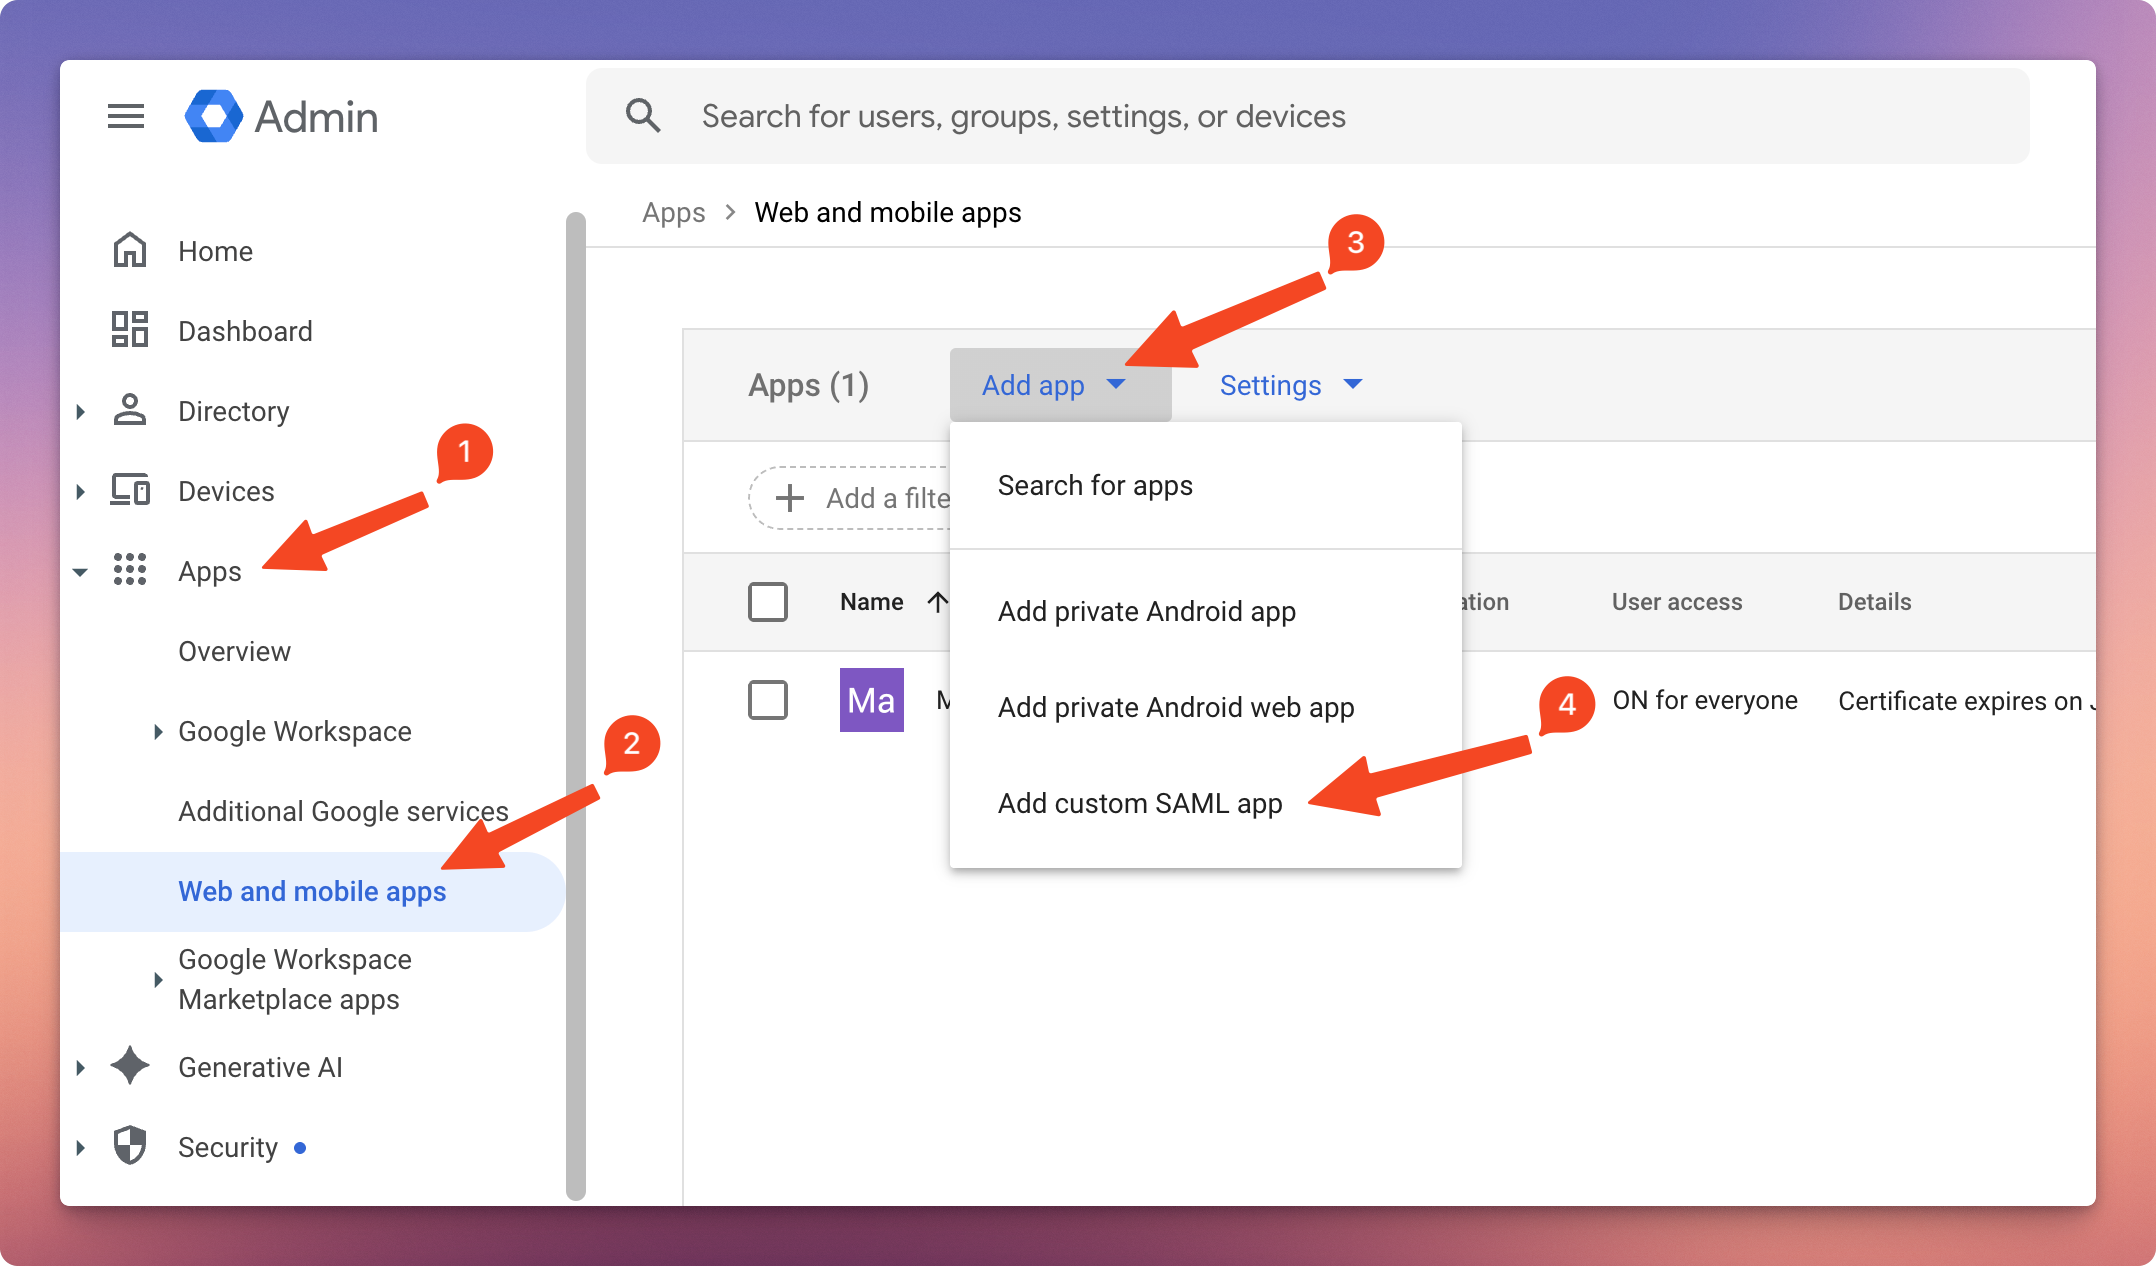
In the menu on the left, click Apps.
Click Web and mobile apps.
Click Add app.
Select Add custom SAML app.
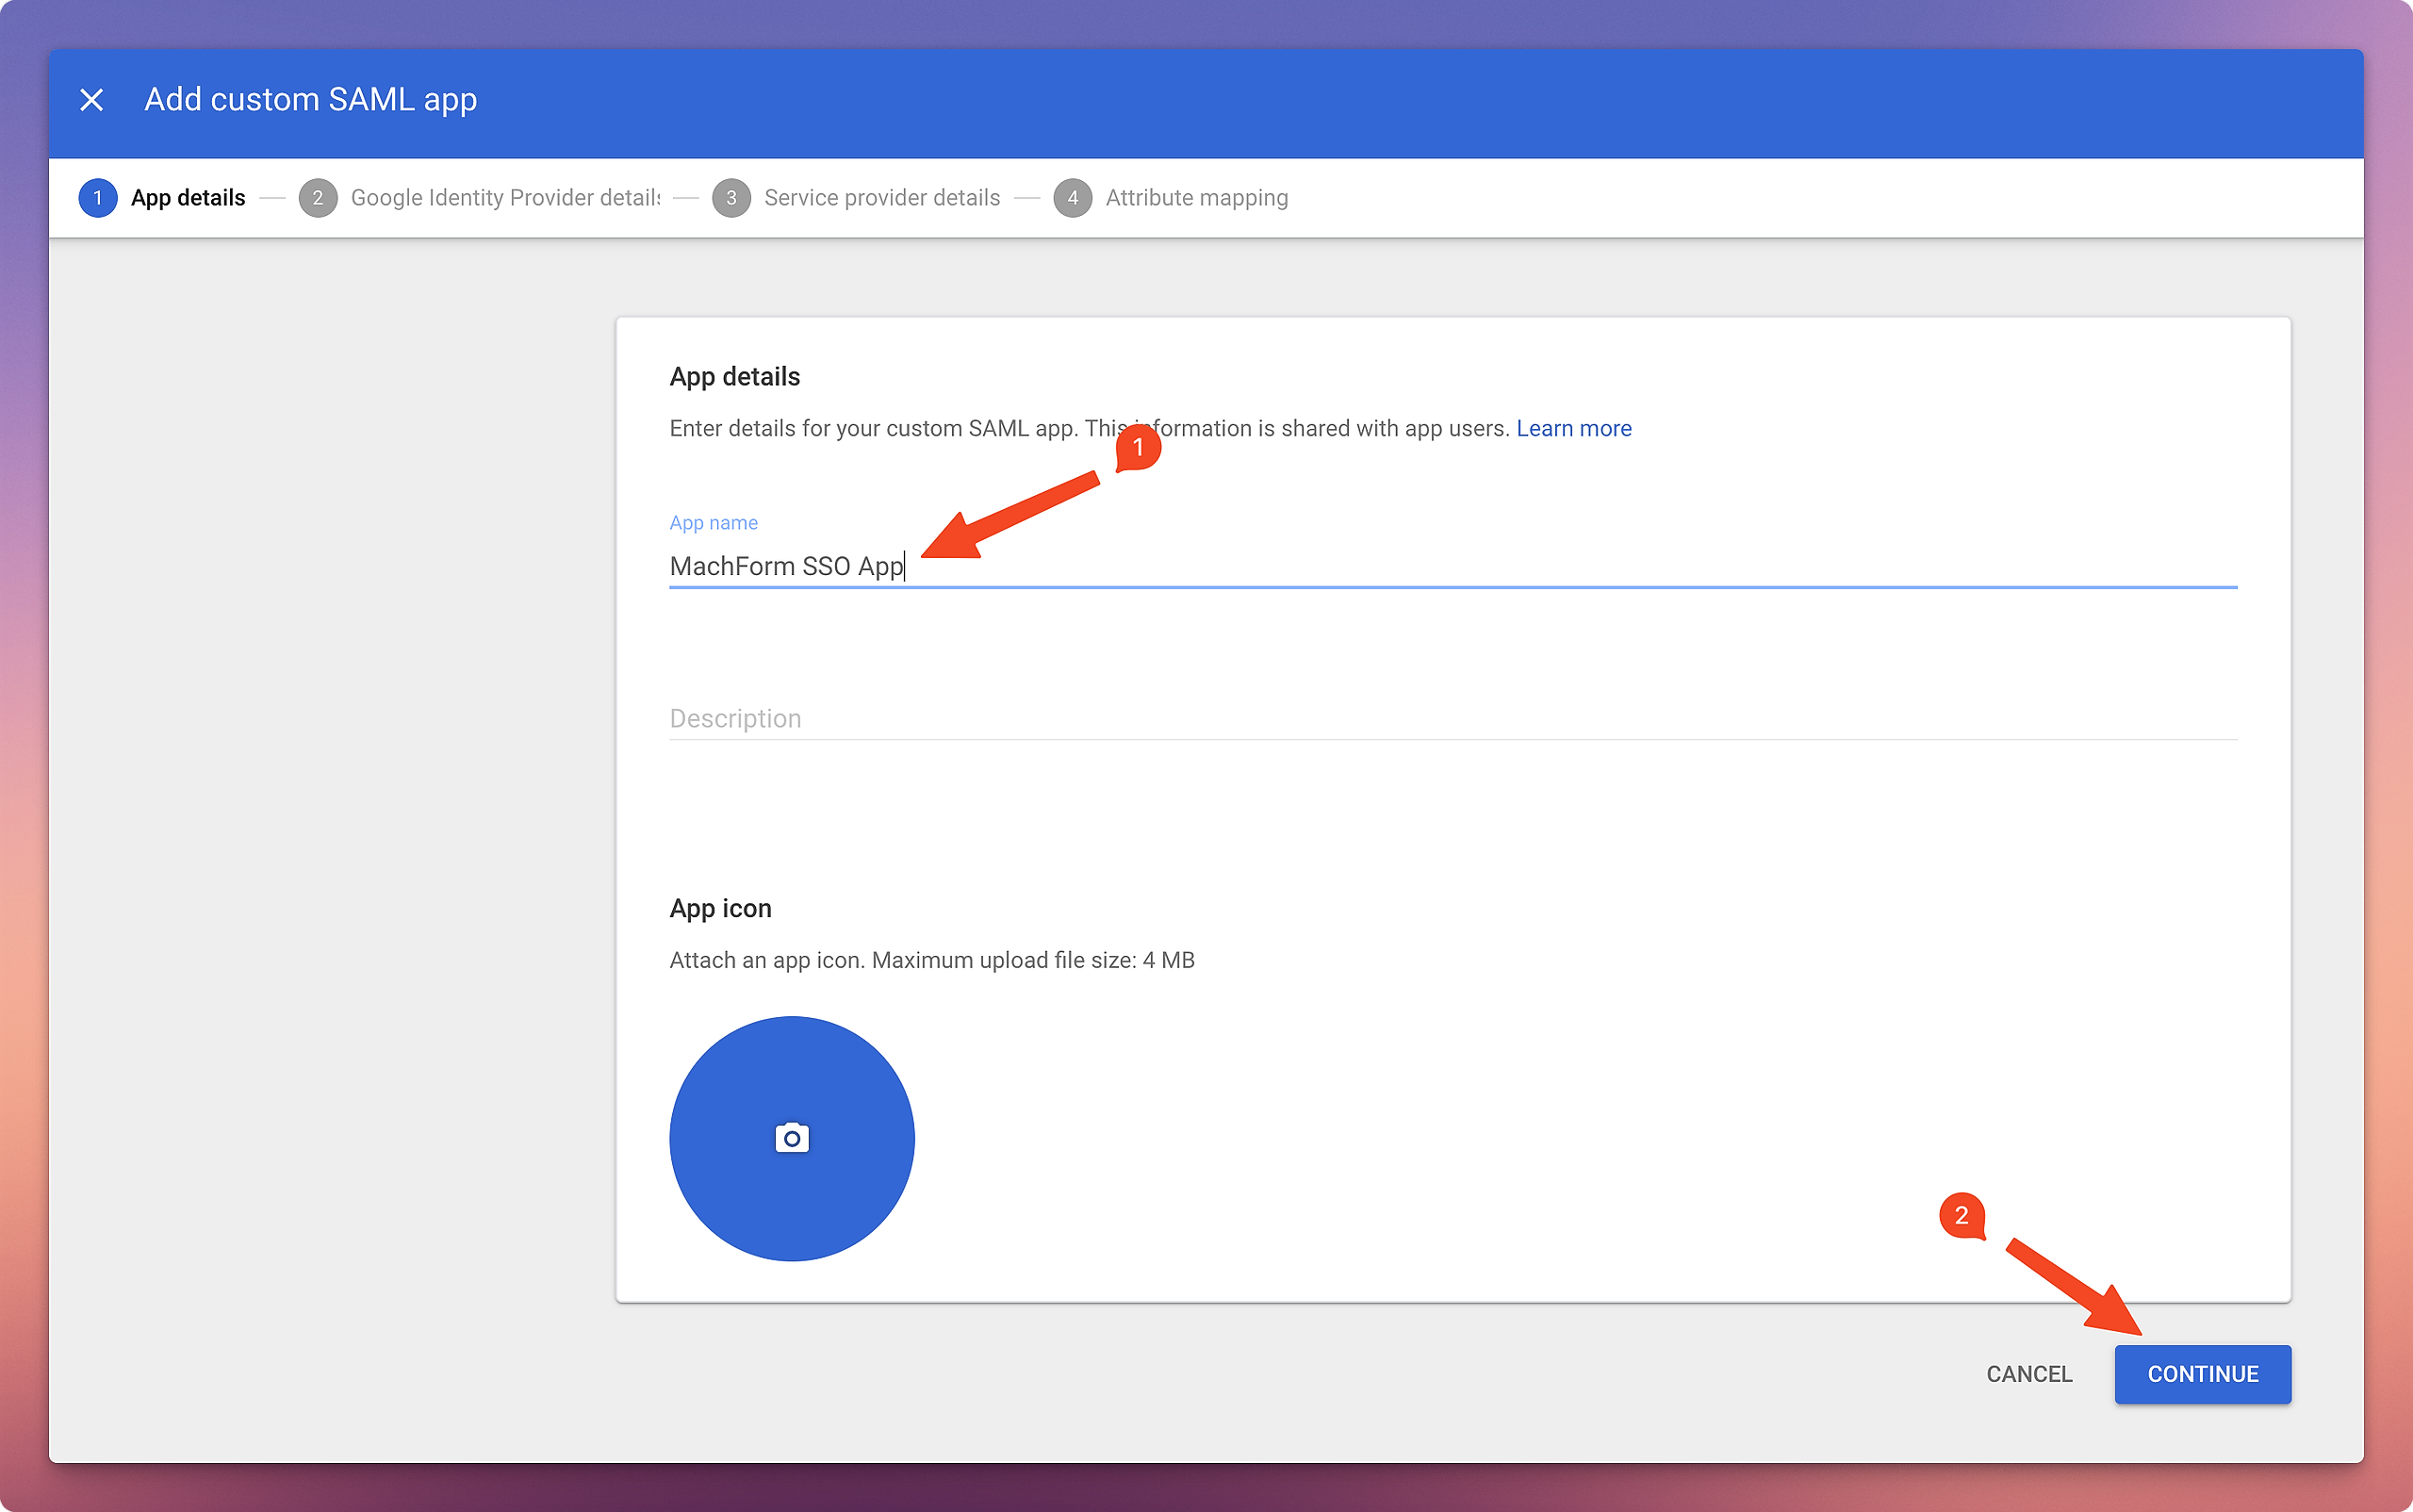
2. On the Add Custom SAML App page, enter your app name and click Continue.
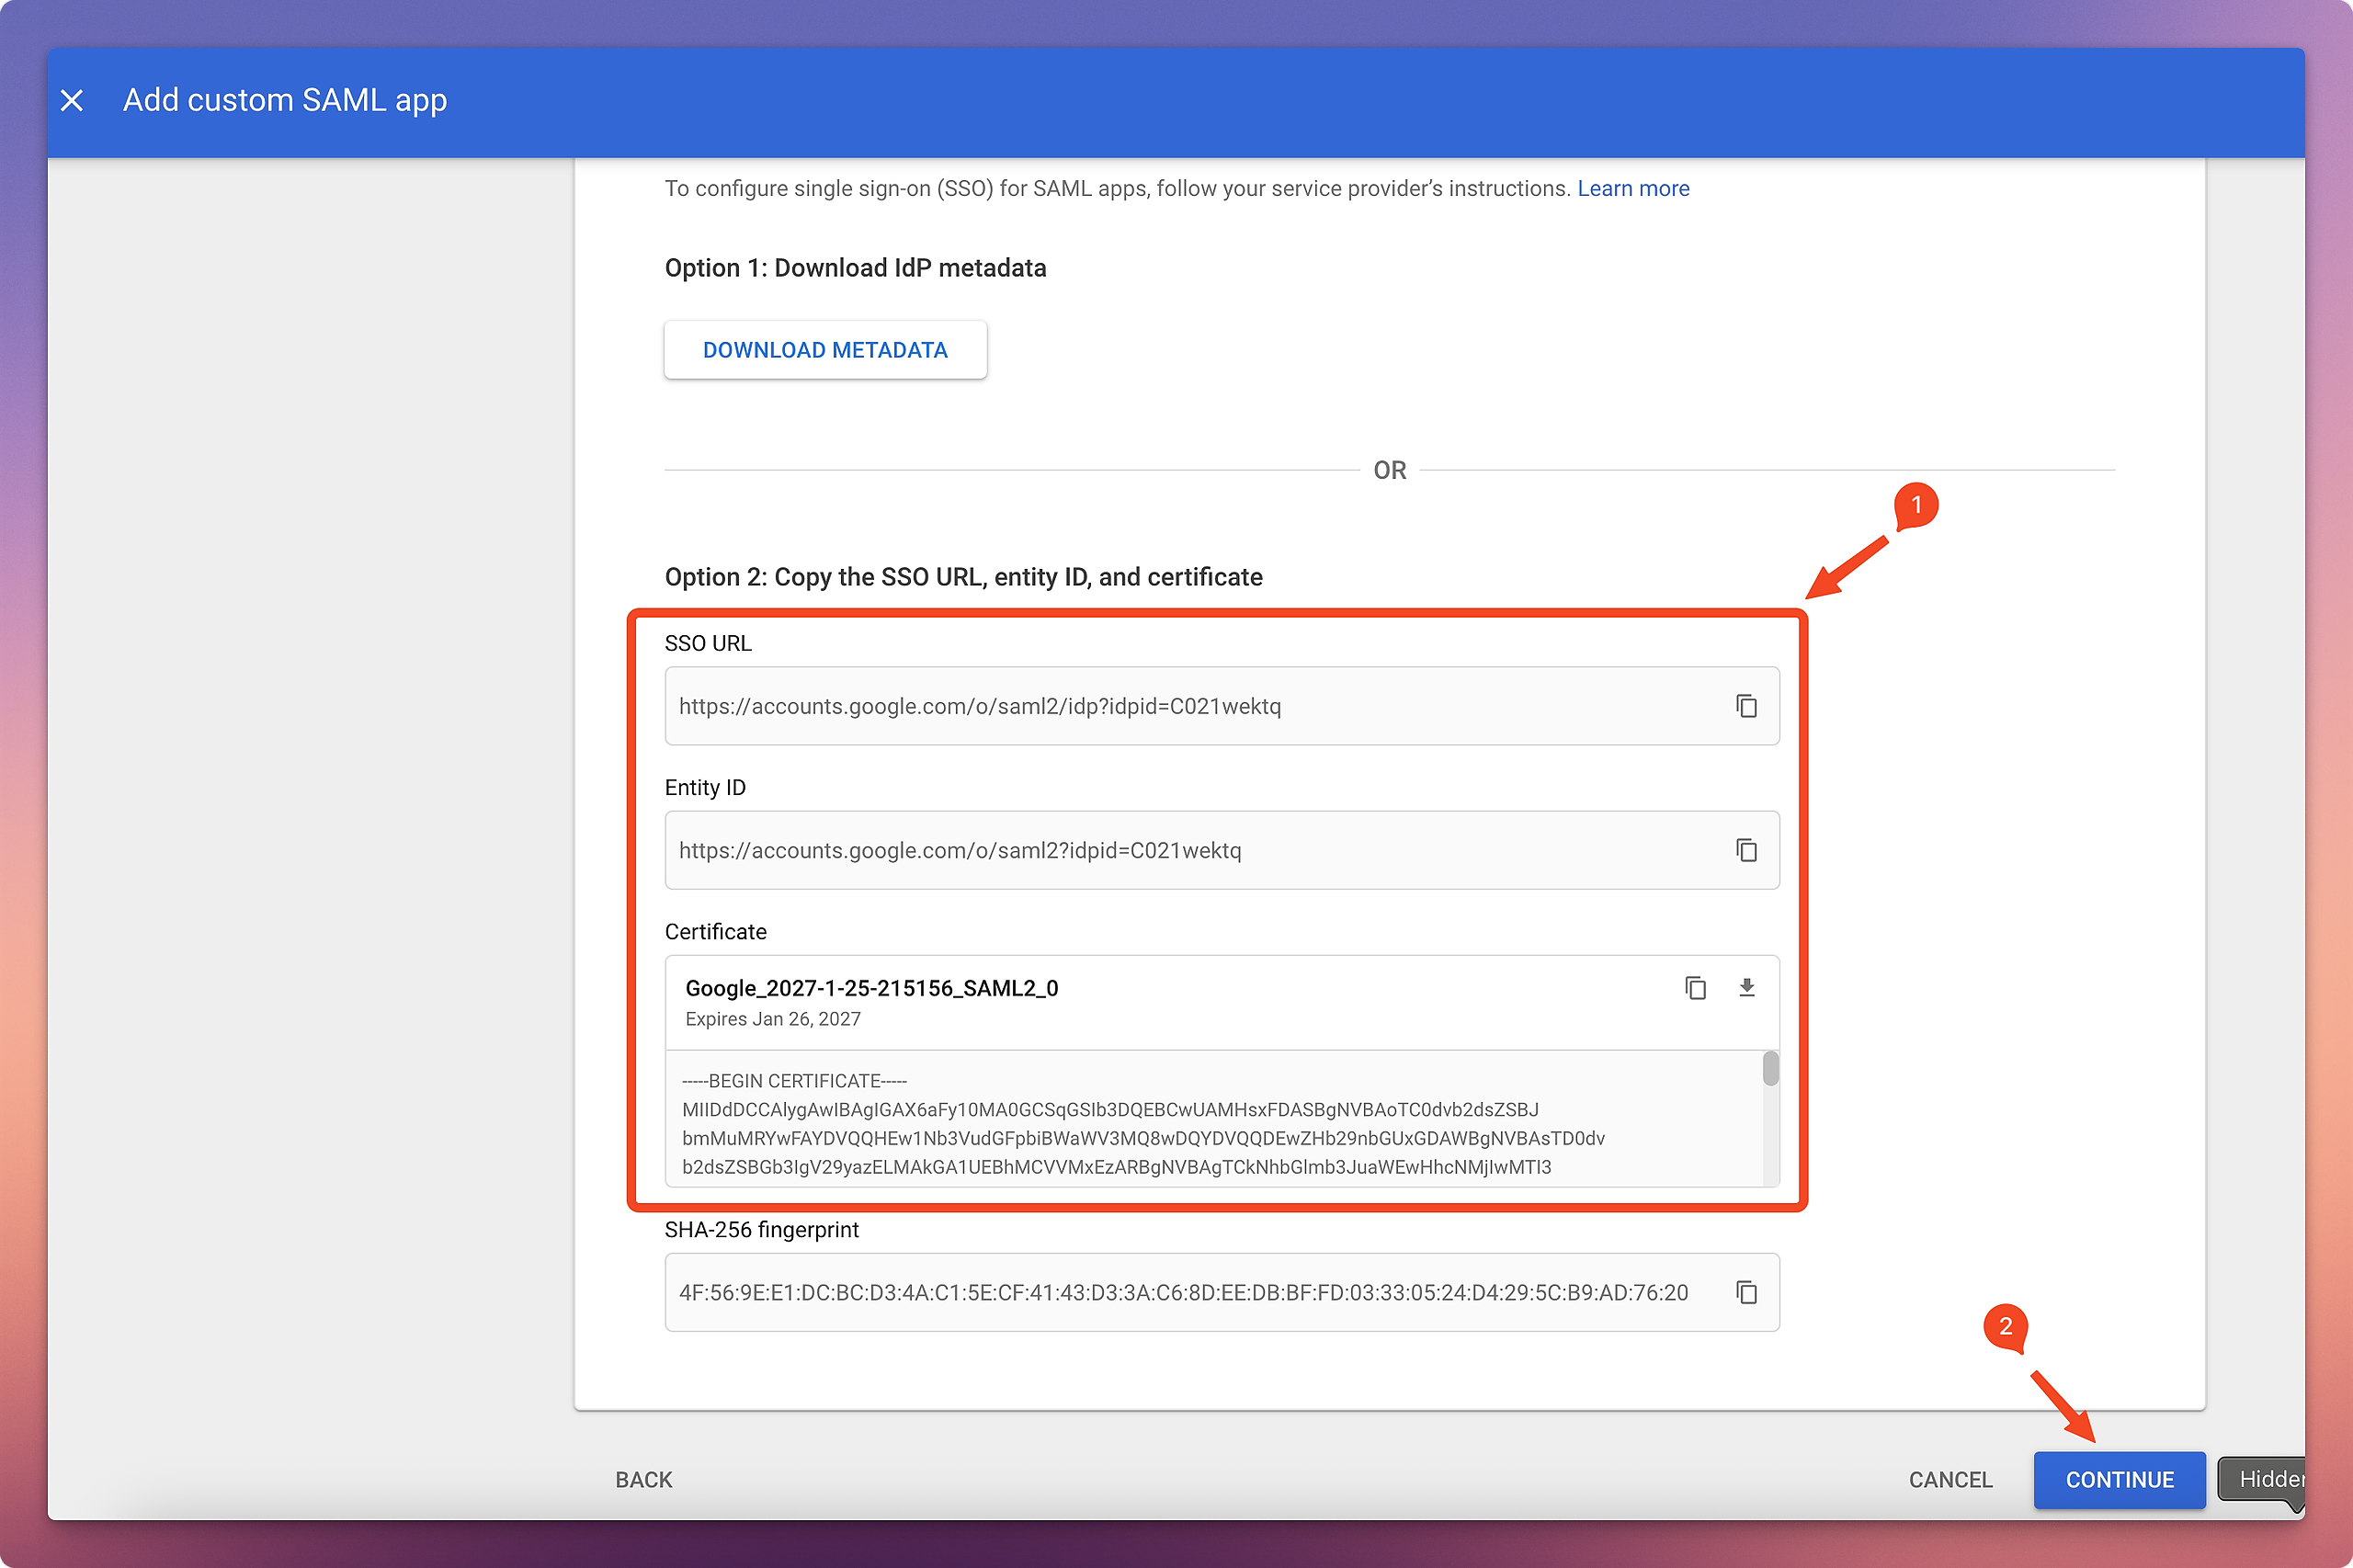
3. On the Google Identity Provider Details screen, copy the SSO URL, Entity ID, and Certificate. Use this information to complete the SSO setup in MachForm later. Click Continue.
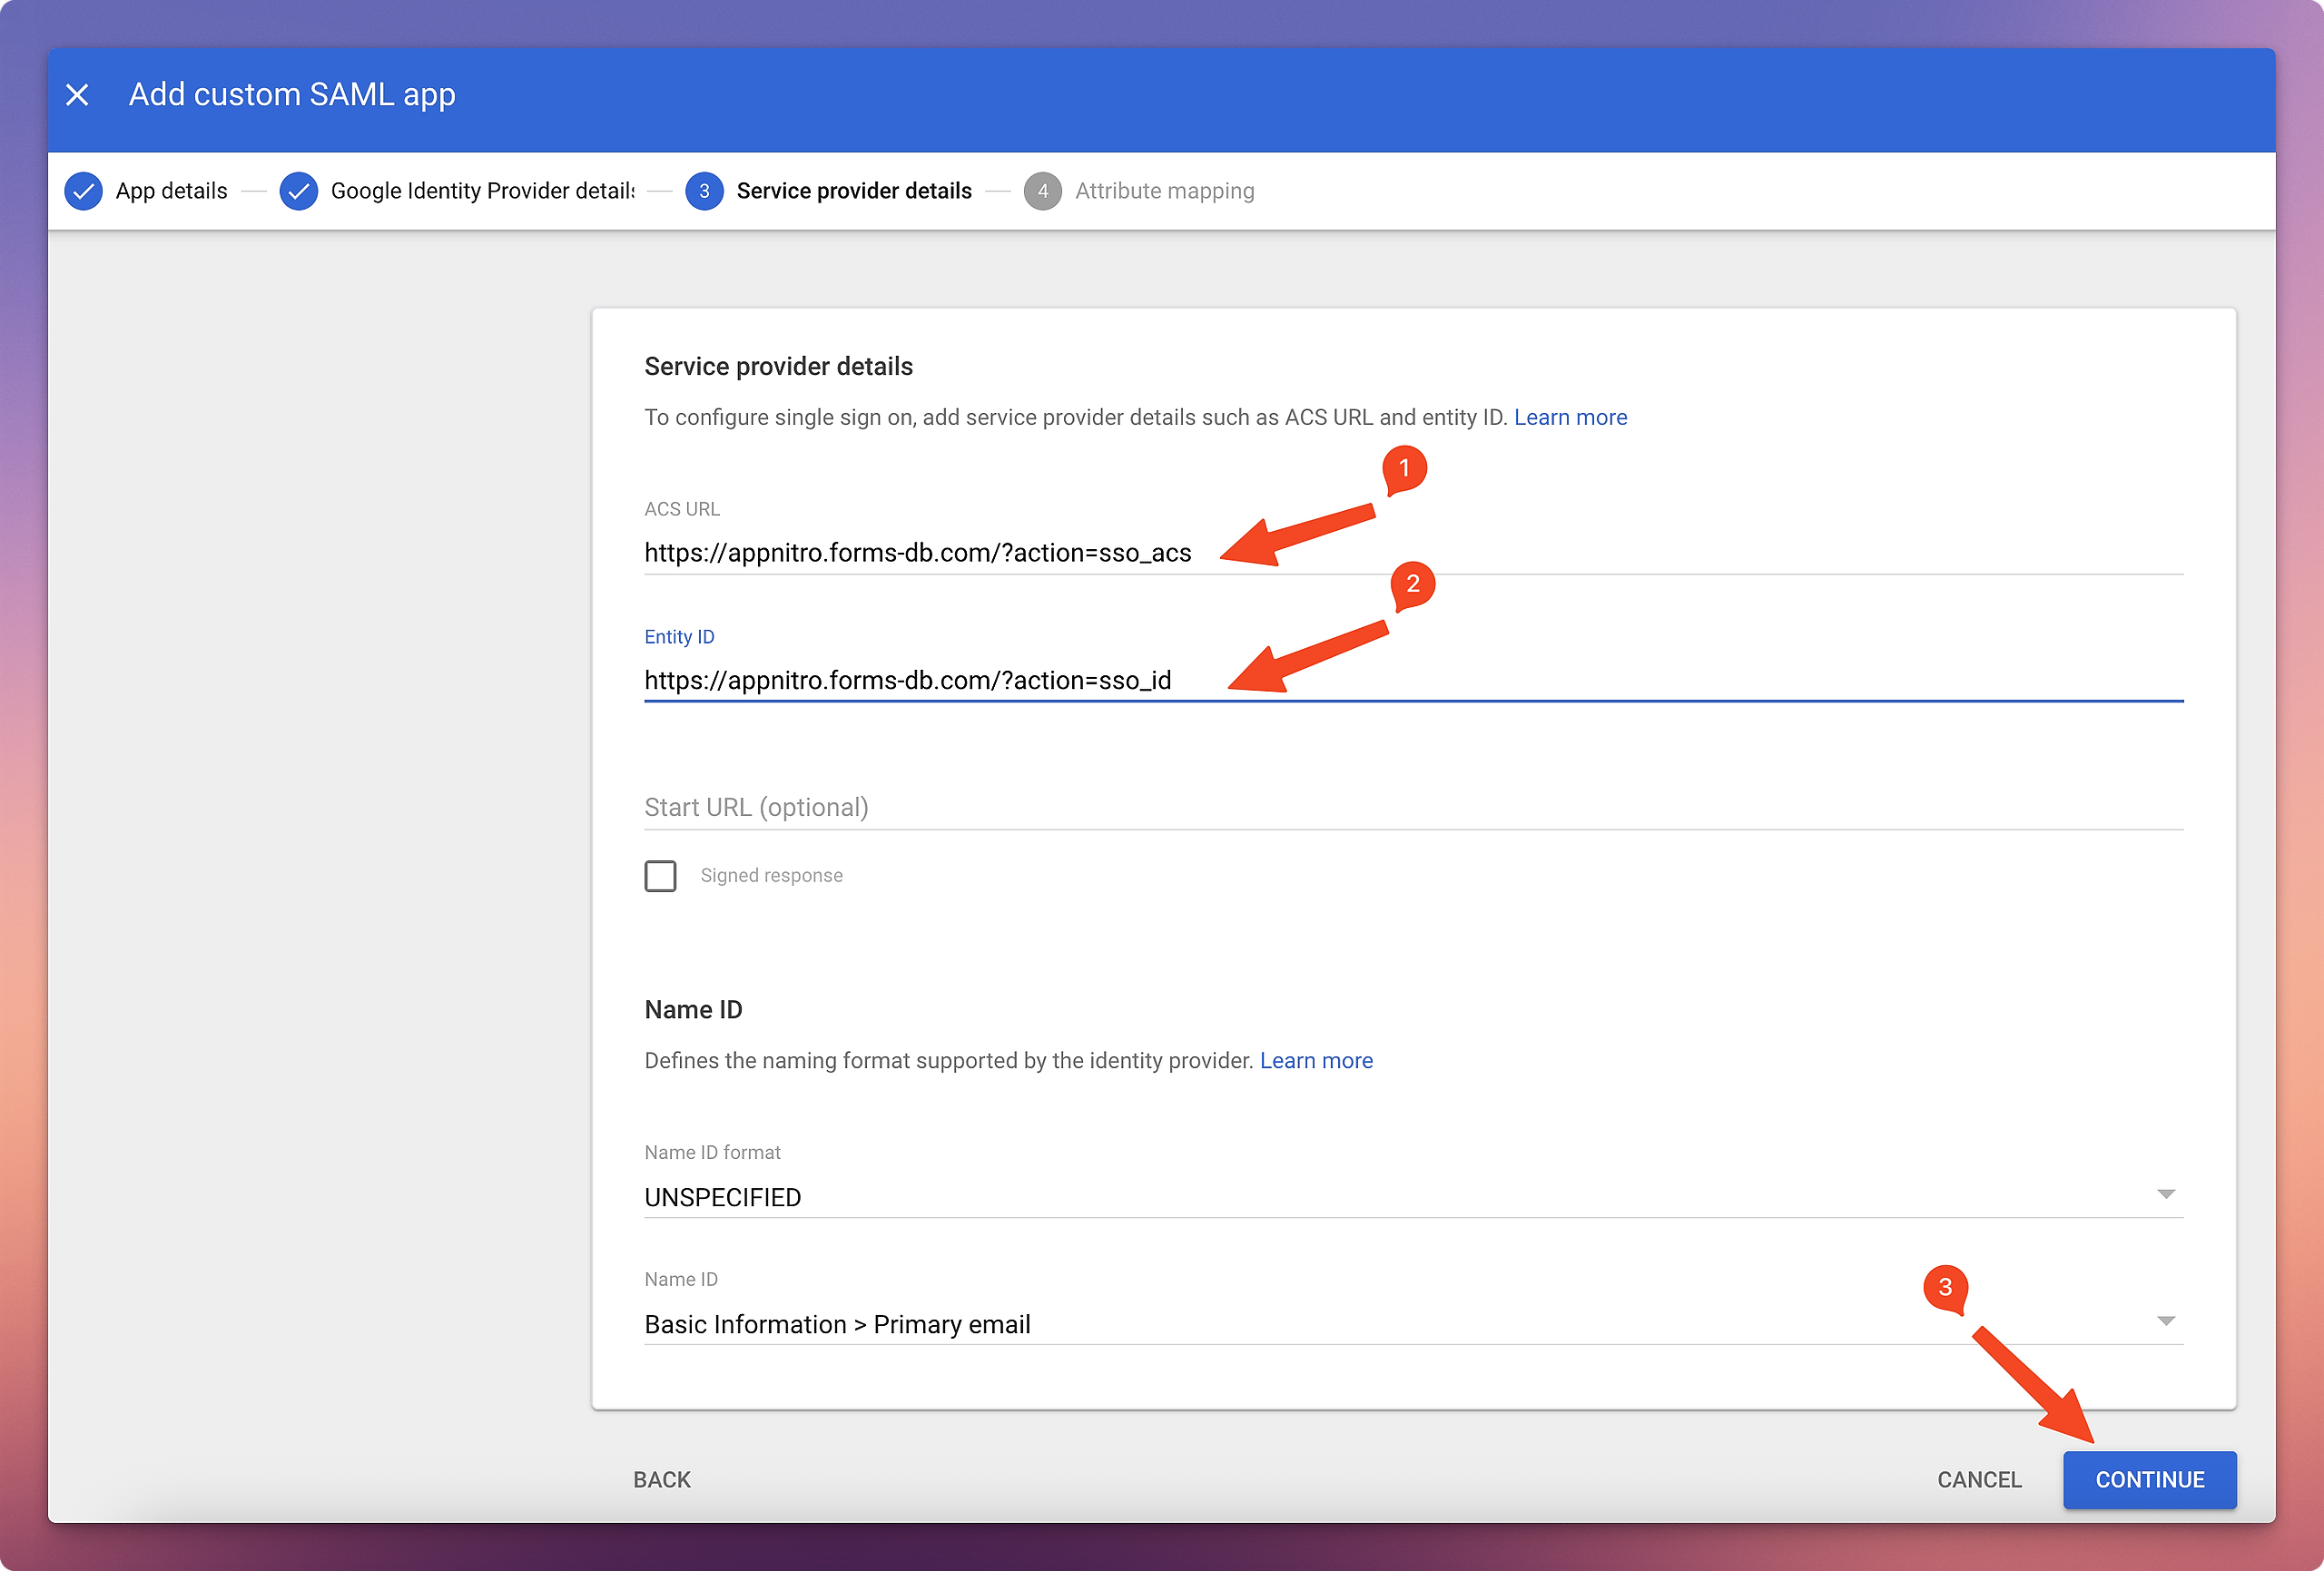
4. On the Service Provider Details screen, fill in your MachForm Service Provider Metadata, then click Continue.
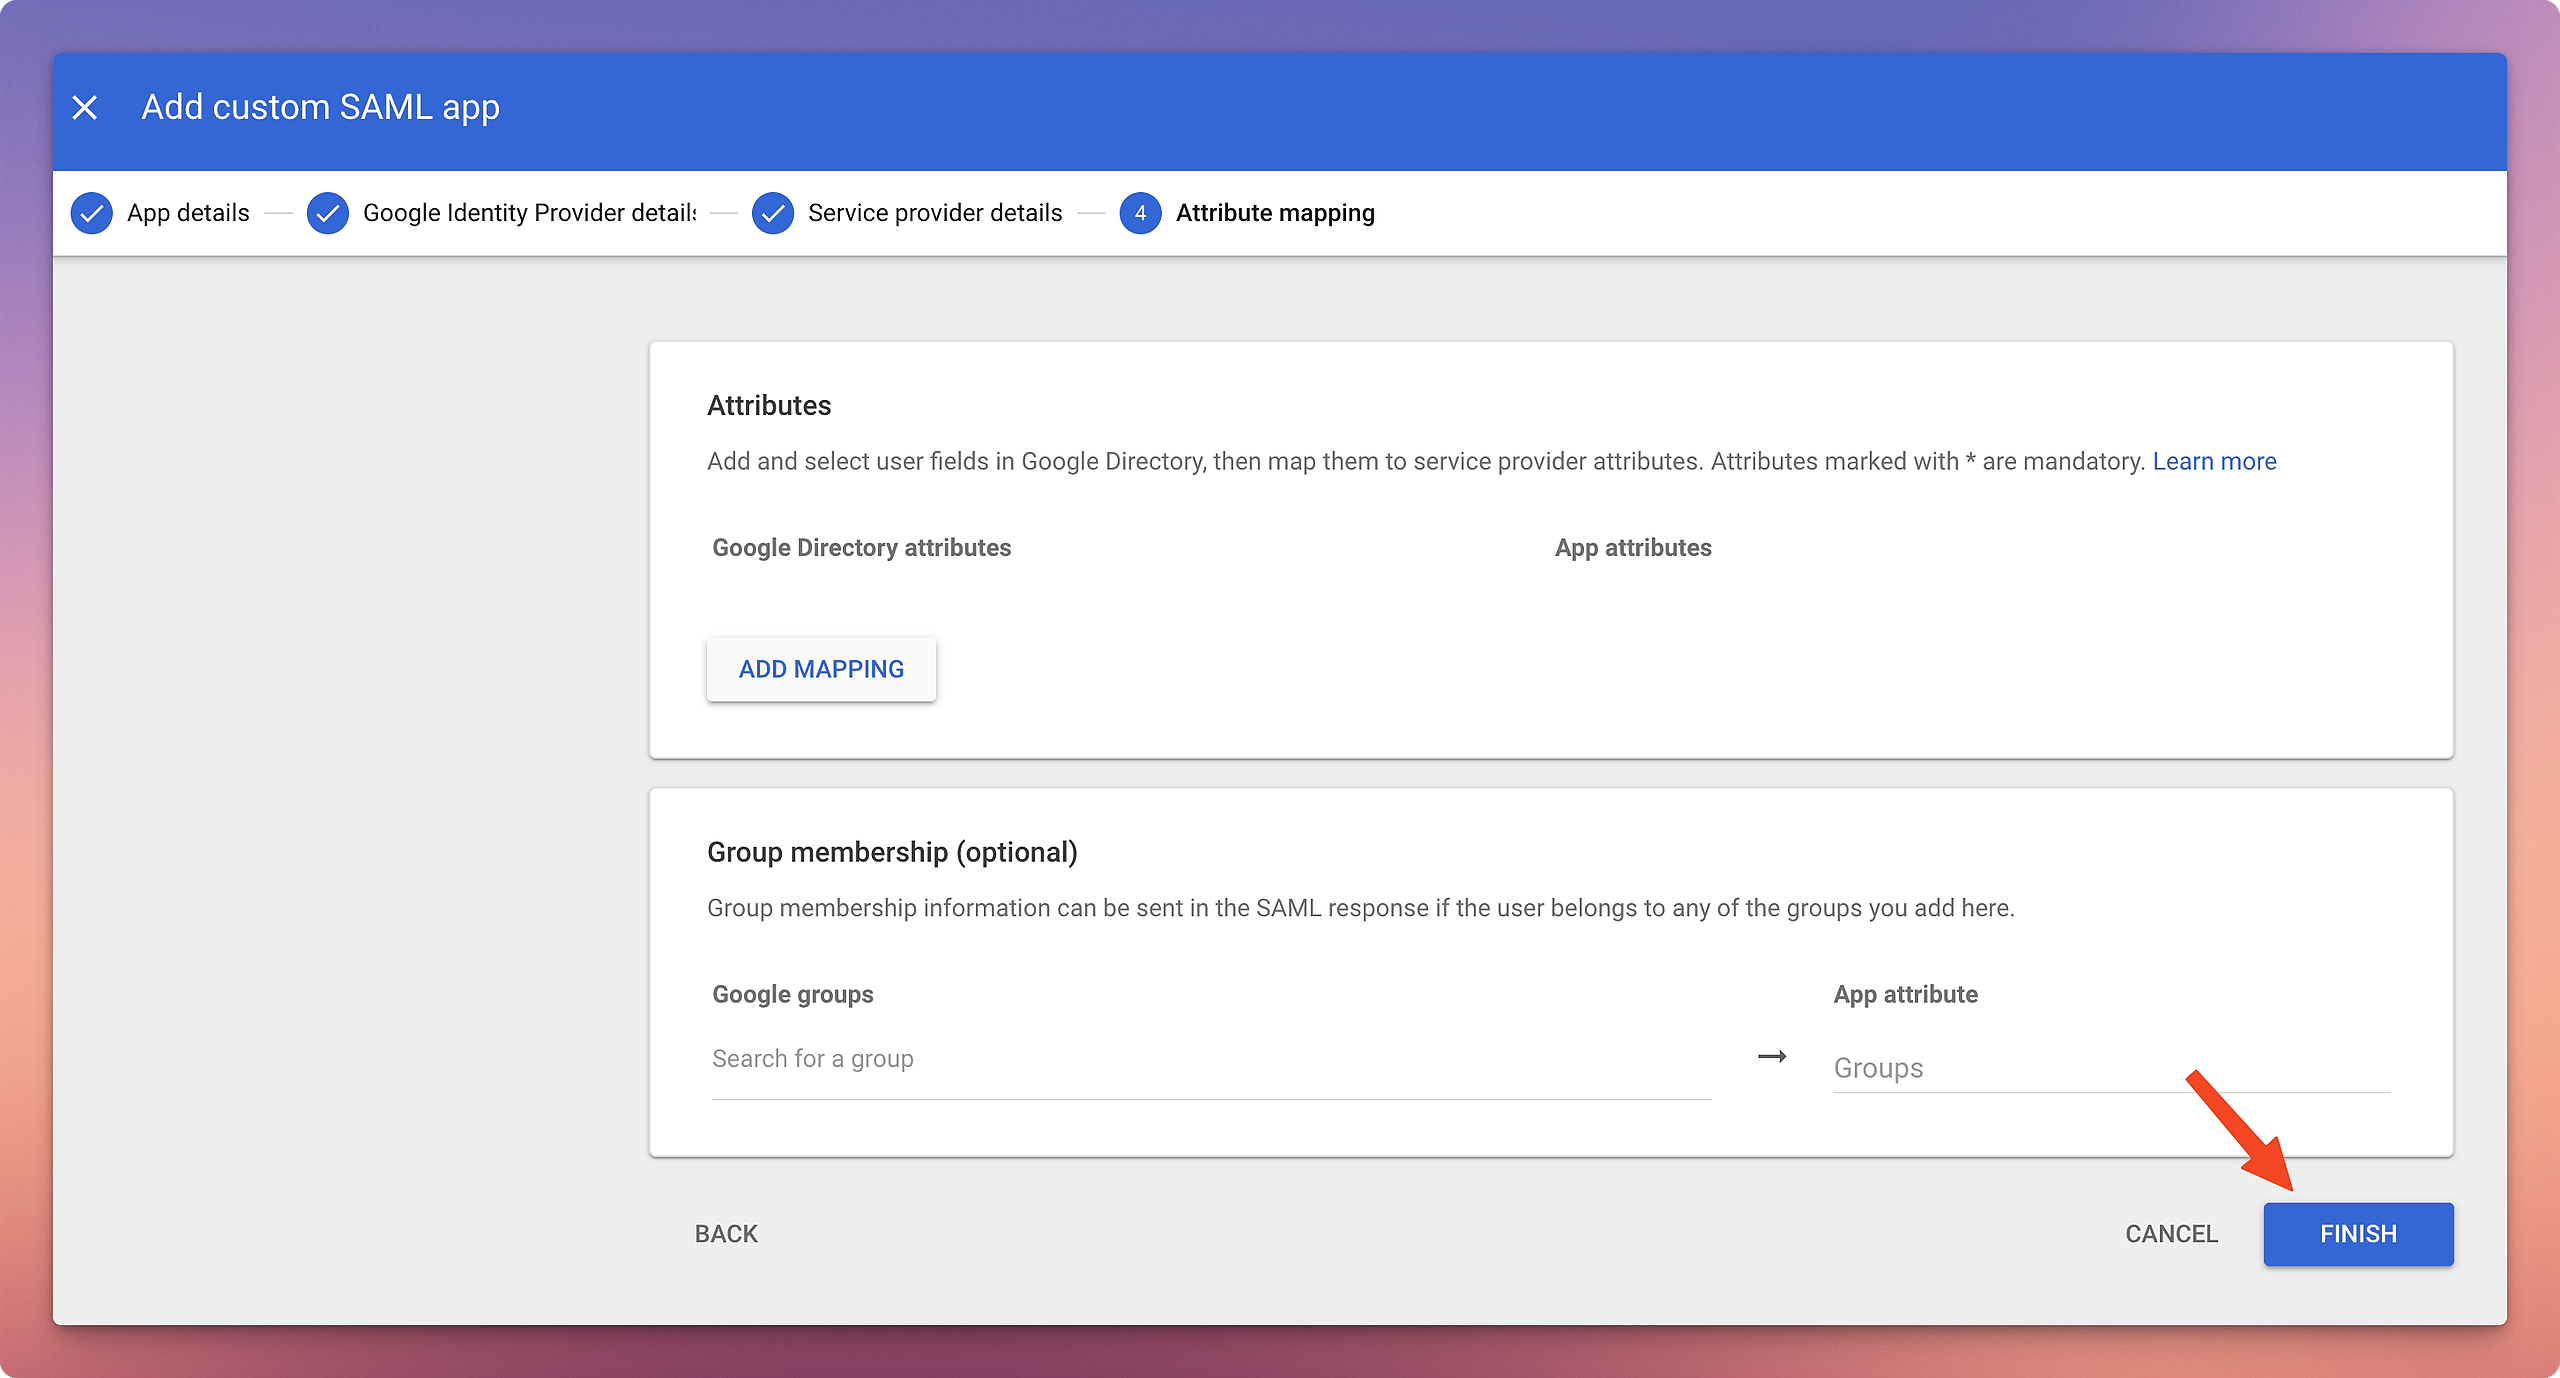
5. On the Attribute Mapping screen, click Finish.
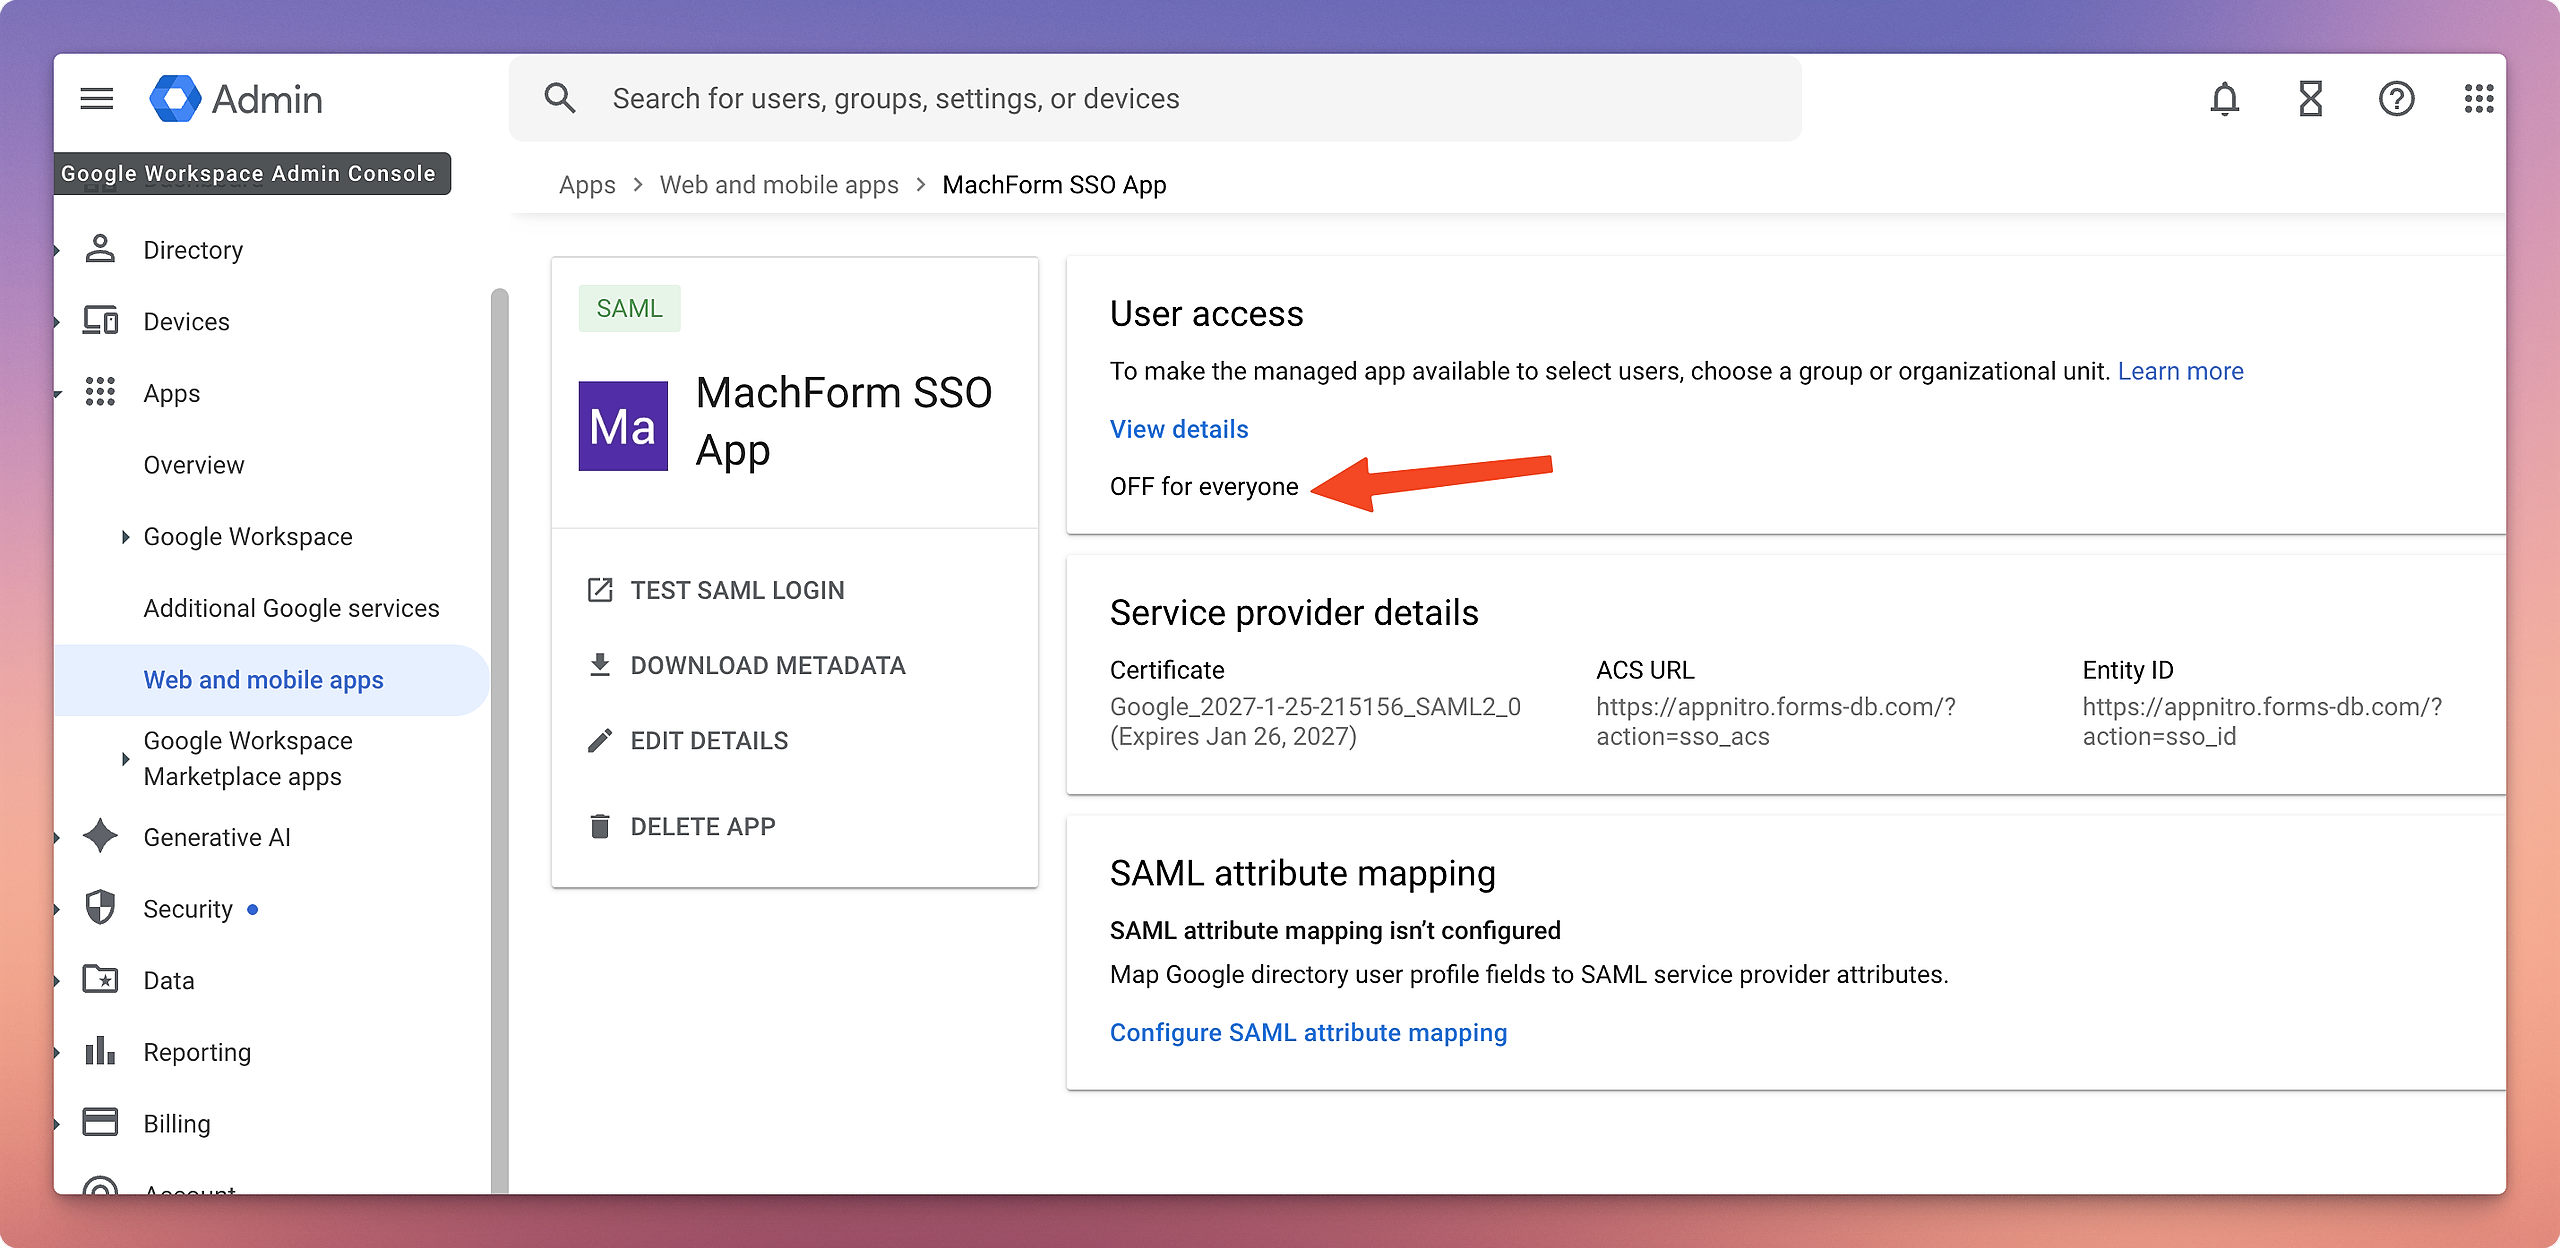
Step 2: Assign User Access to the SAML App
1. In the newly created Custom SAML App, under the User Access section, click OFF for Everyone.
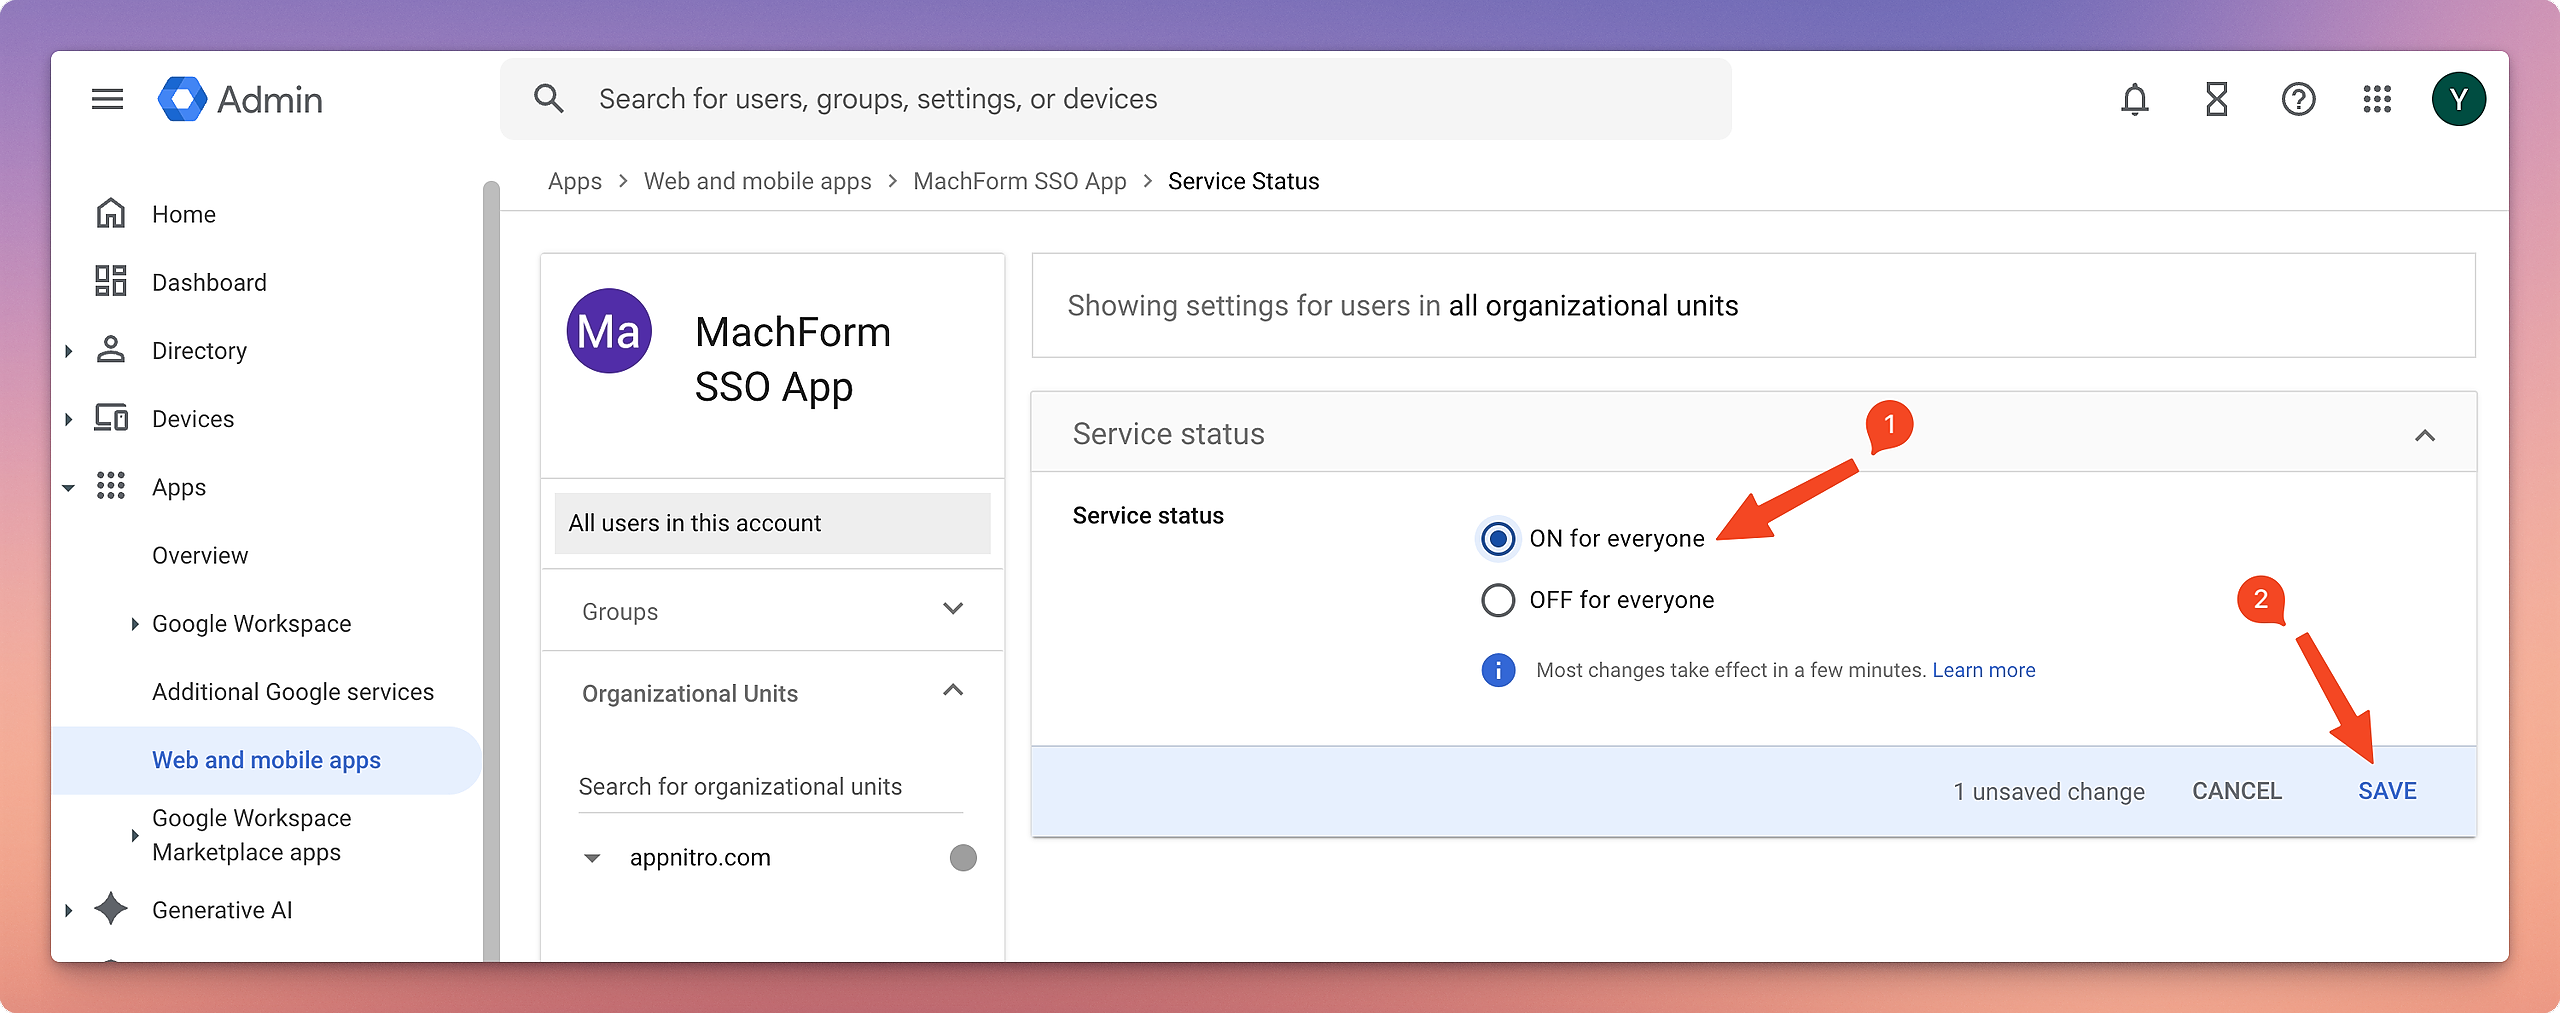
2. Select ON for everyone, then click Save.
You can now continue to Step 4 in How to Set Up MachForm with Single Sign-On (SSO).