Overview
This page provides specific instructions for setting up MachForm Single Sign-On (SSO) with Microsoft Entra ID.
If you found this page directly, please note that it is a continuation of the main How to Set Up MachForm with Single Sign-On (SSO). Before proceeding, we recommend reviewing the main manual to understand the overall configuration steps and prerequisites. This page focuses only on the Microsoft Entra ID SSO setup portion.
Step 1: Create Microsoft Entra ID Non-gallery application
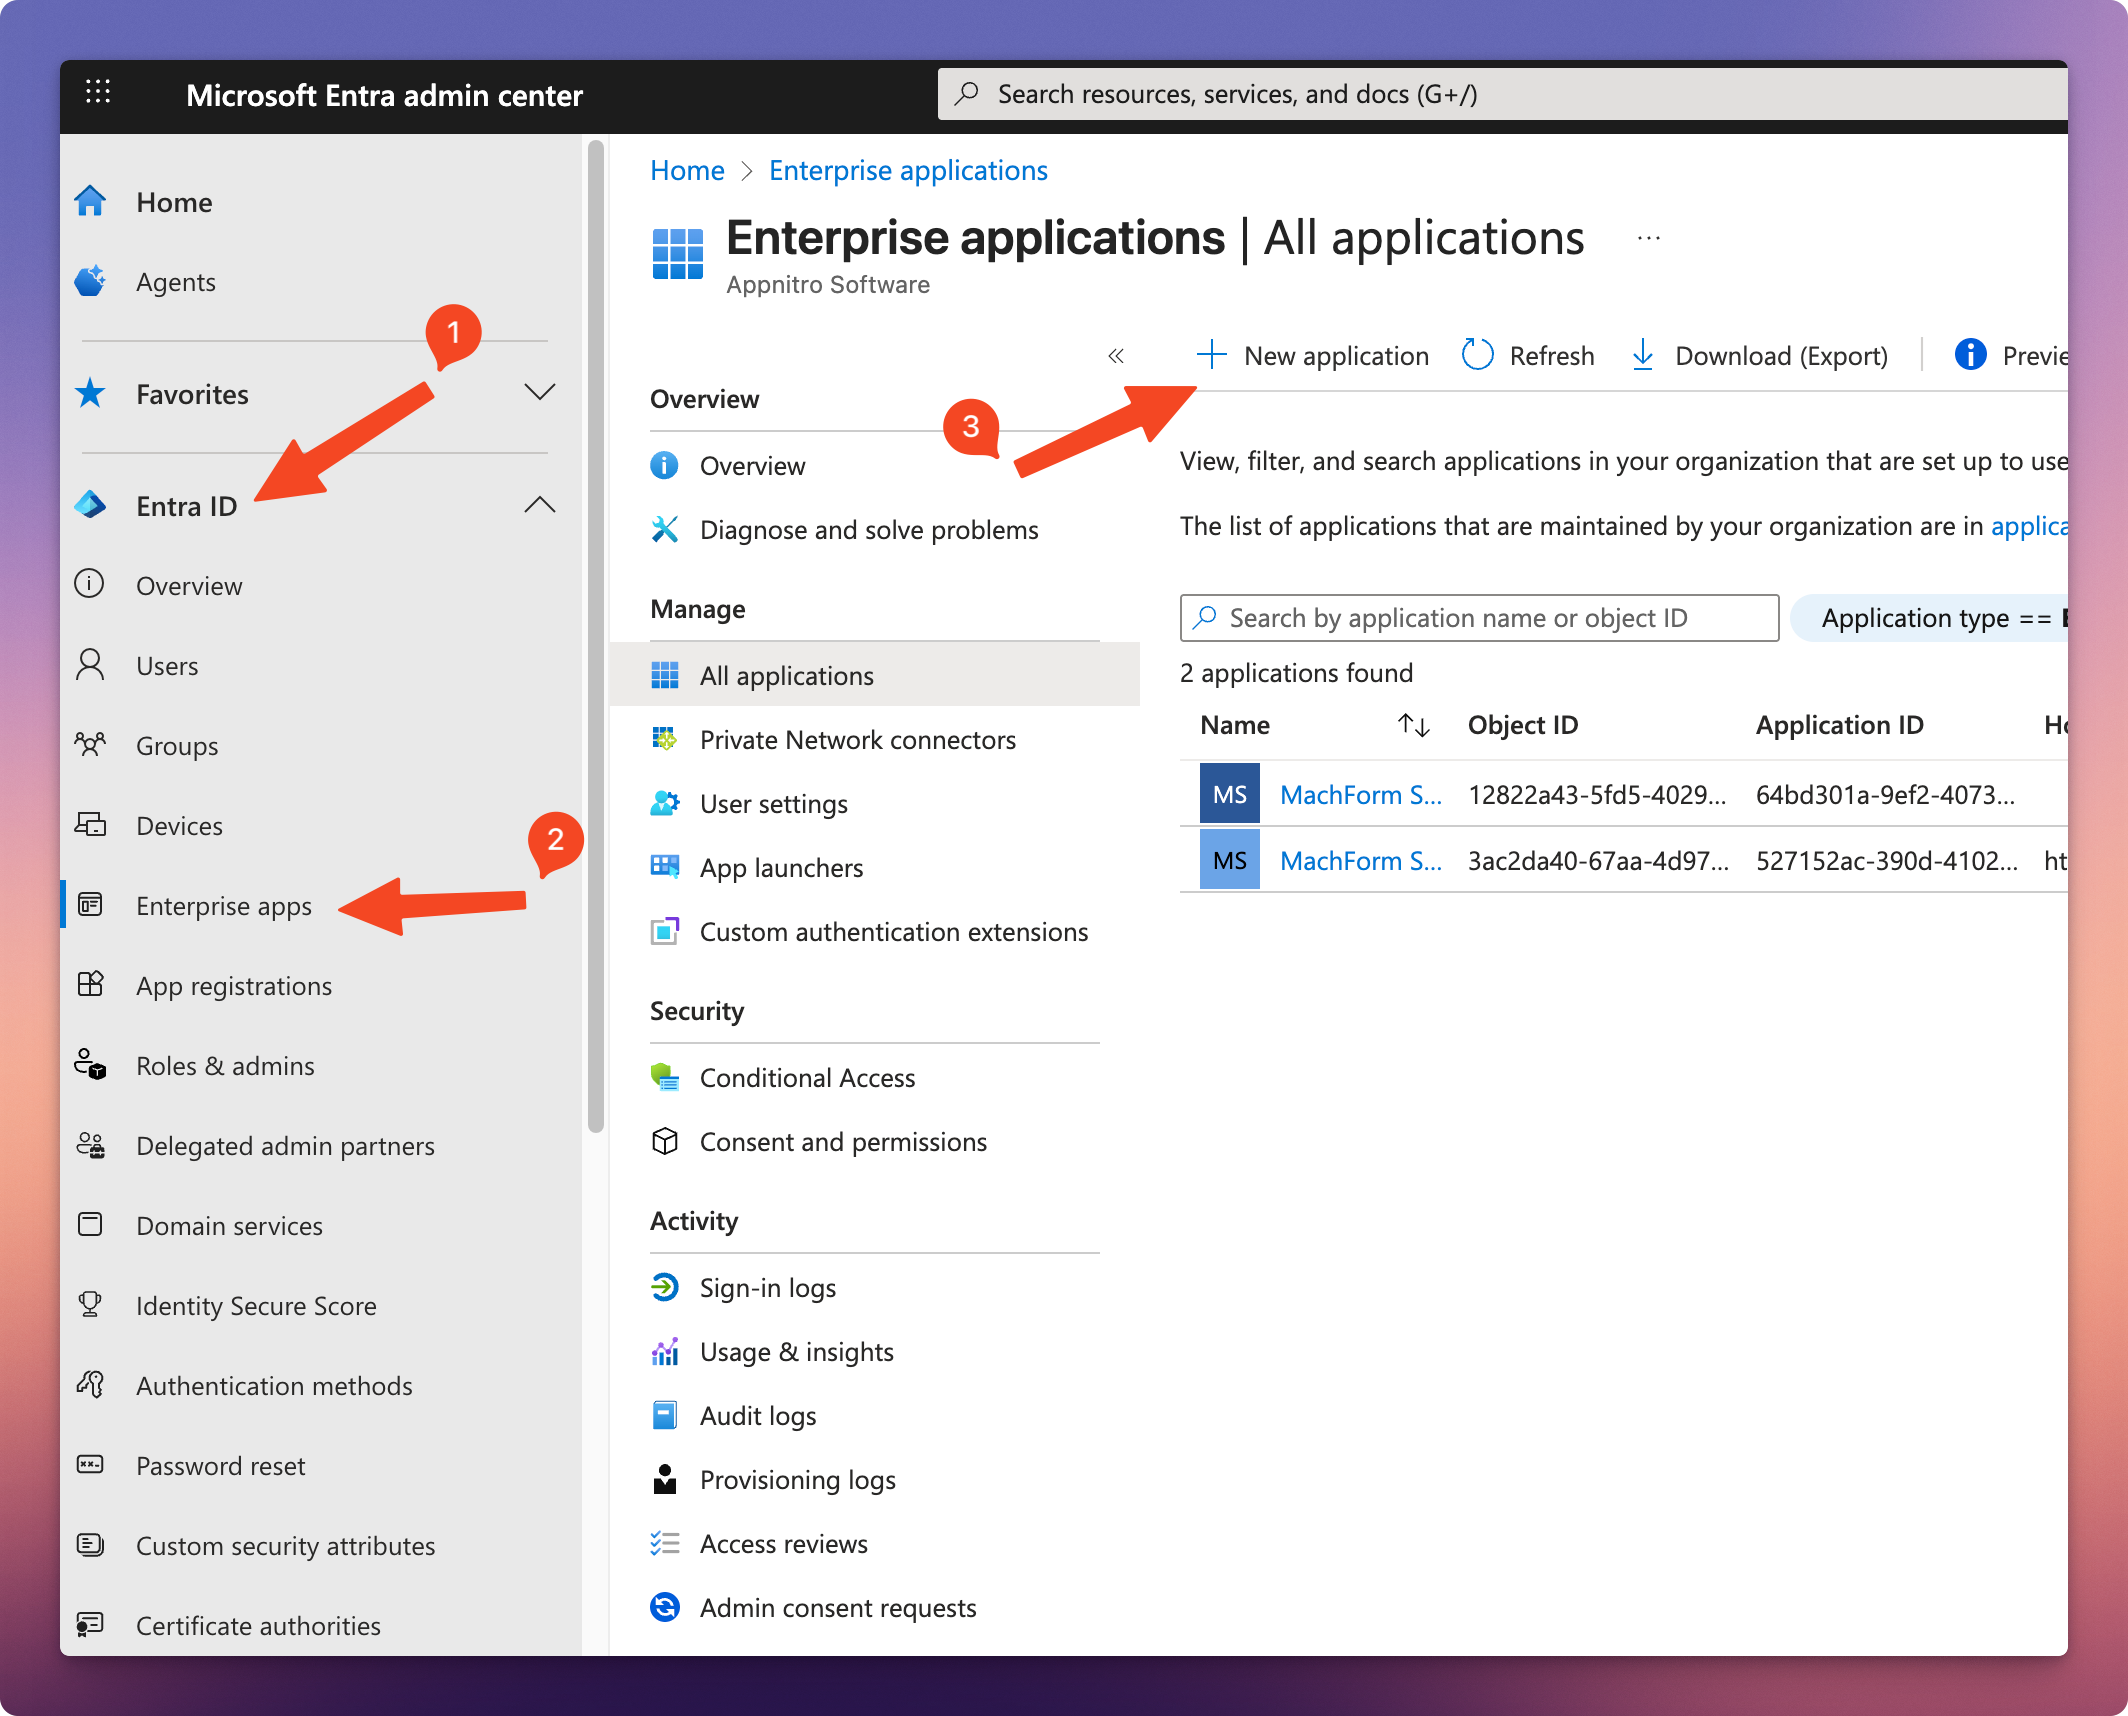
1. Log in to your Microsoft Entra admin center. Click Entra ID, then click Enterprise apps. Click the New application button to create the app.
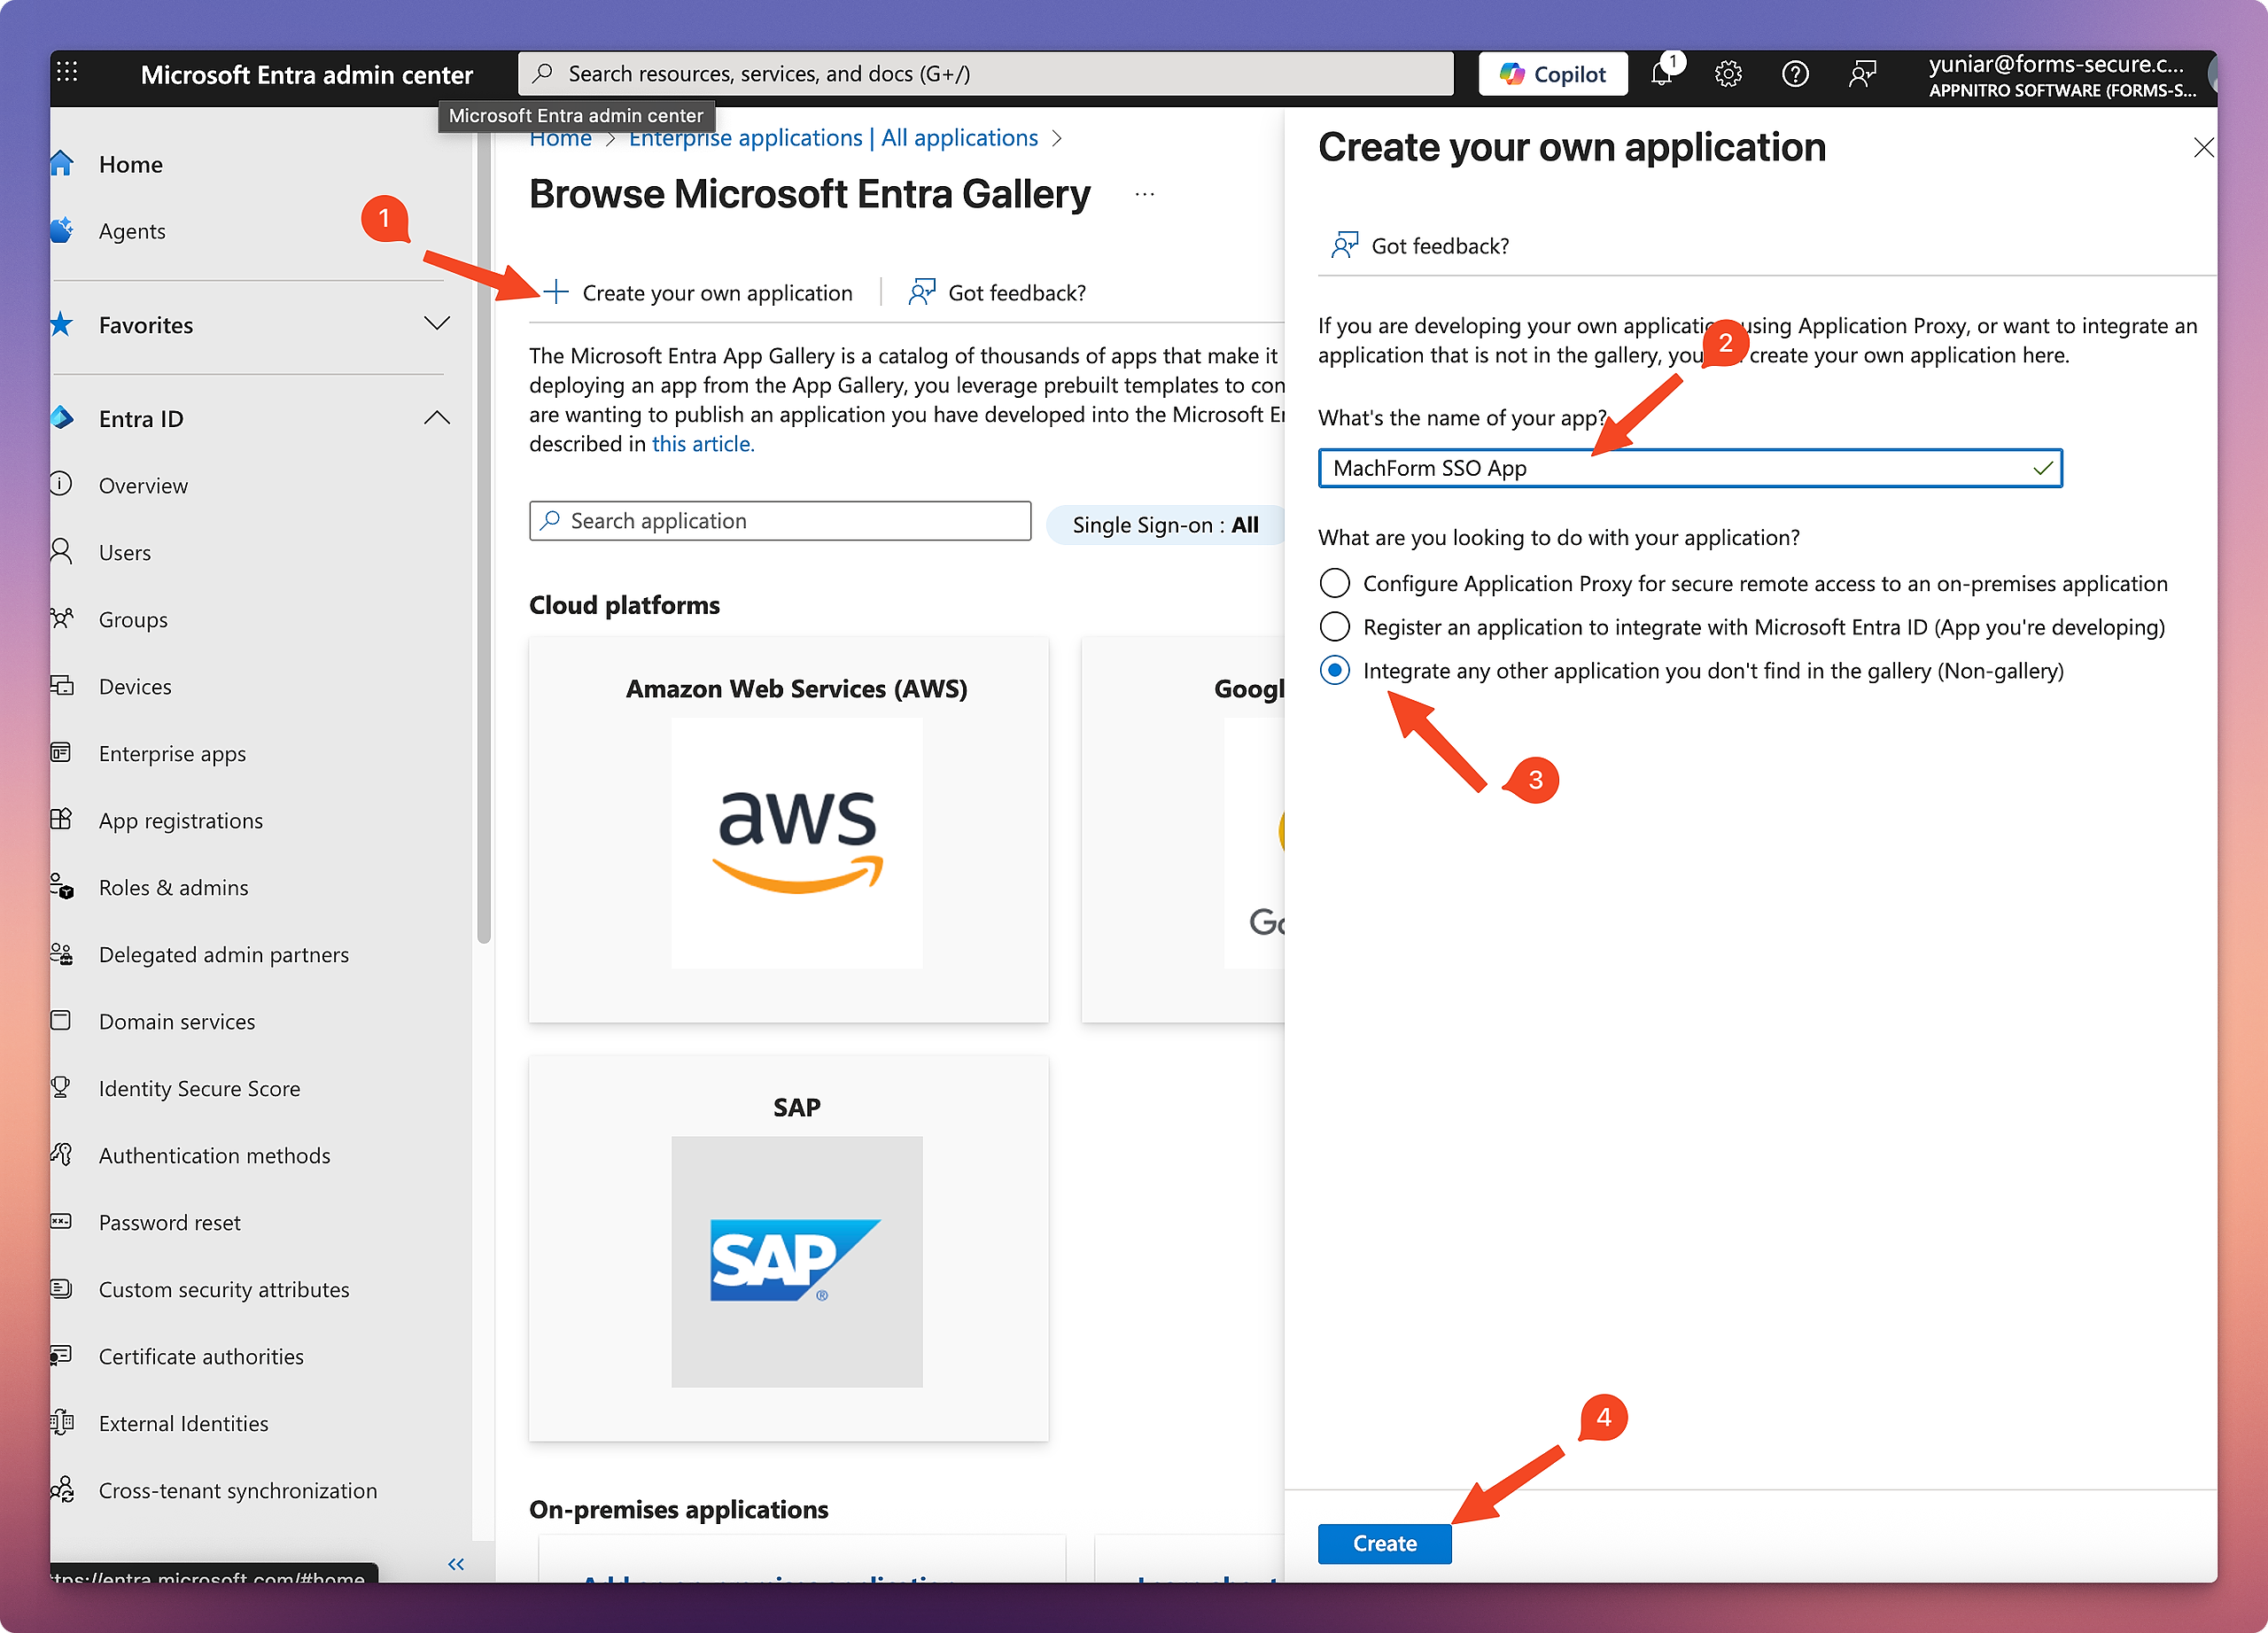
2. On the Browse Microsoft Entra Gallery page, click Create your own application. Enter your app name, and select Integrate any other application you don't find in the gallery (Non-gallery). Click the Create button.
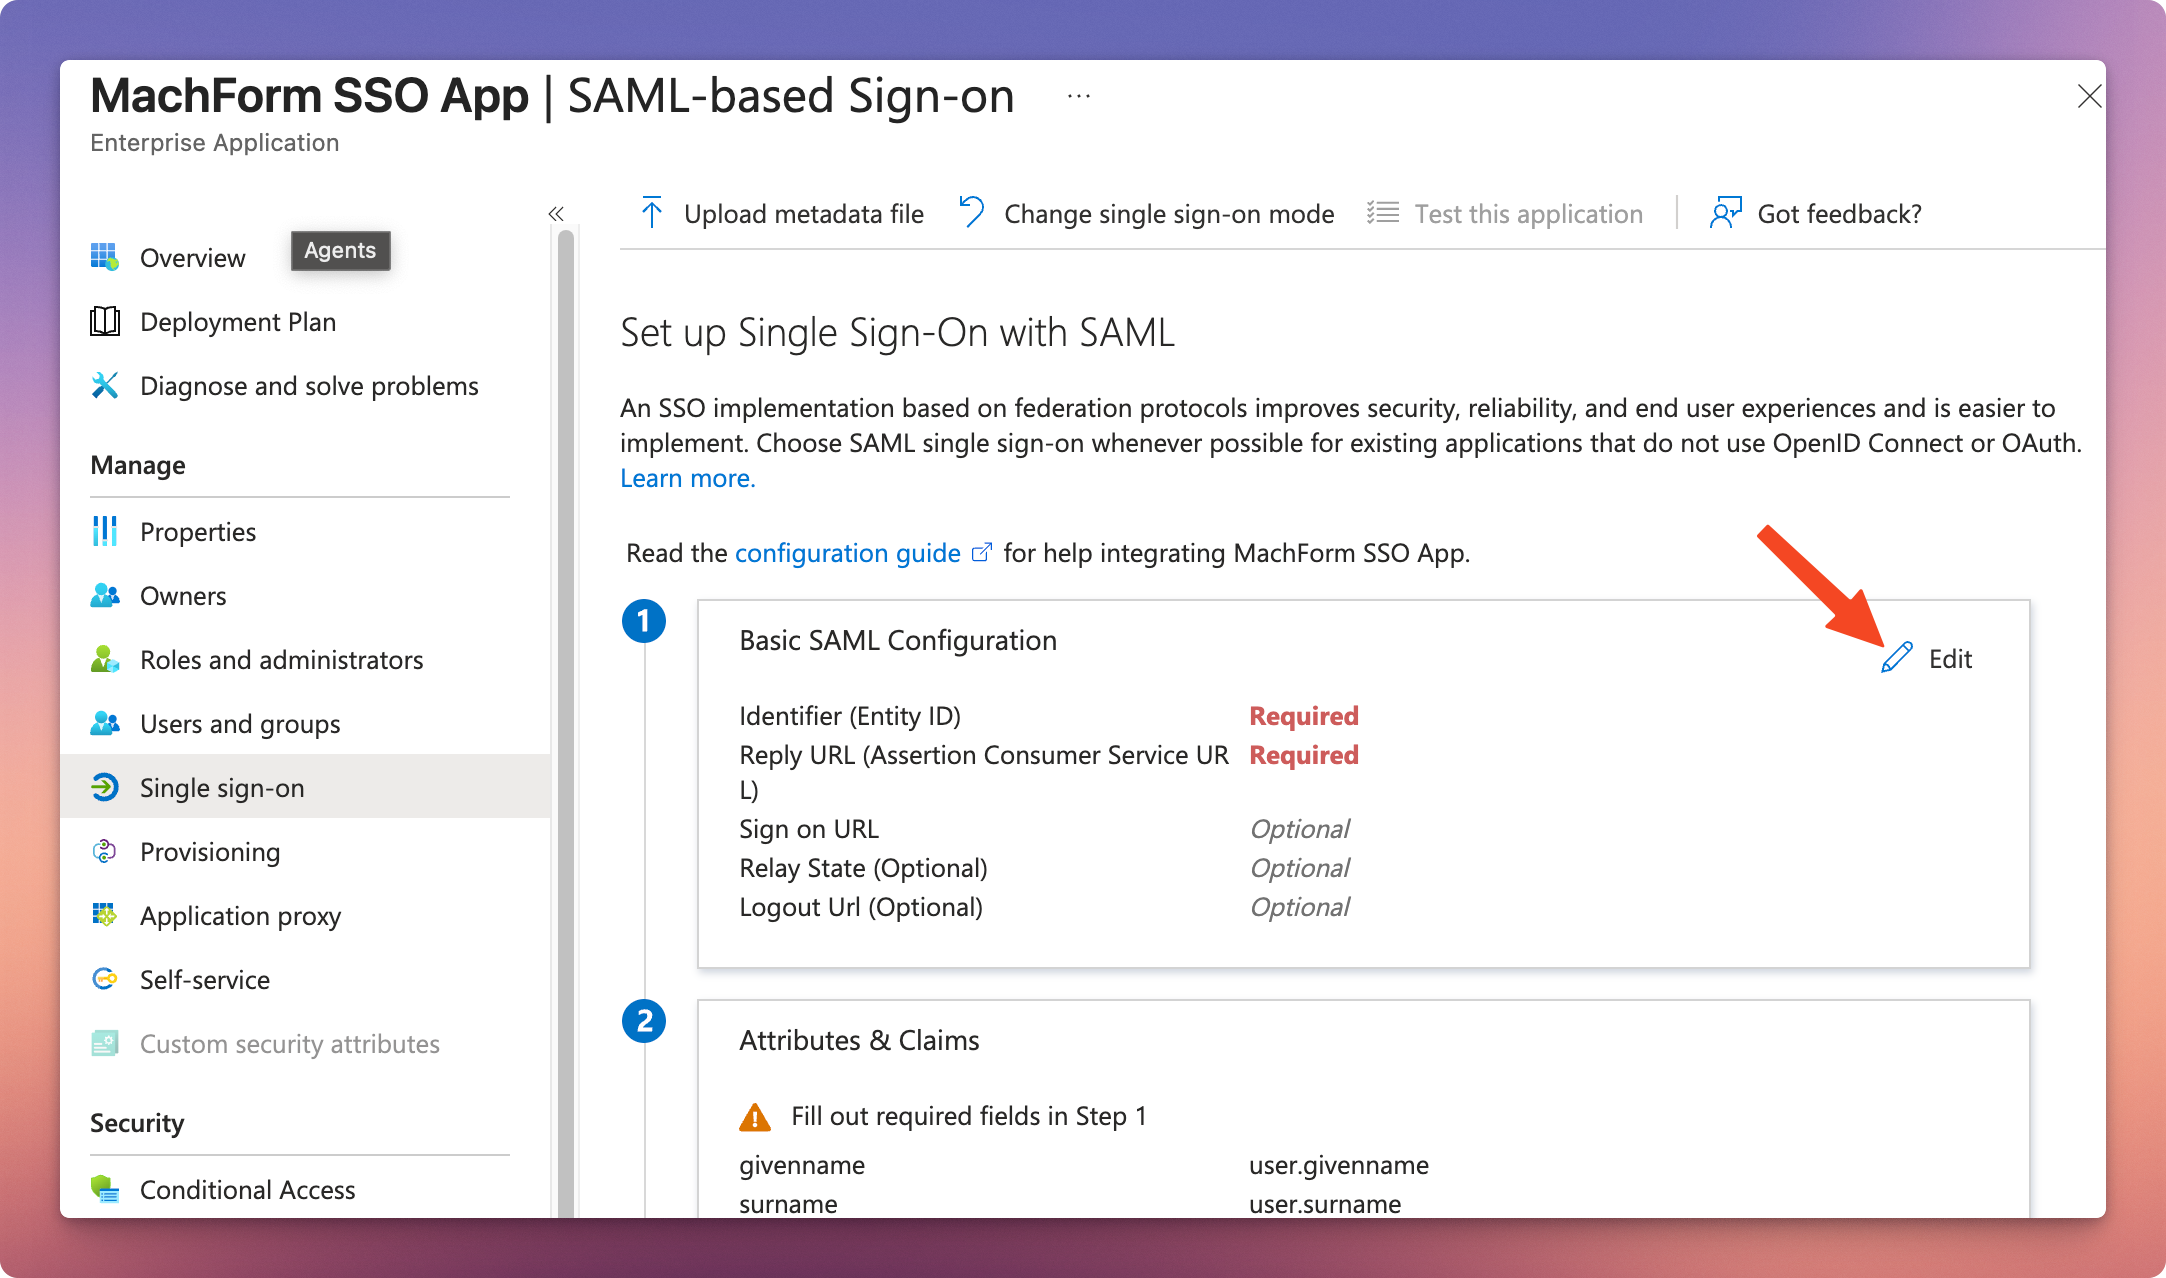
3. Your app will be created. Click Single Sign-on under the Manage section of your app, then click SAML.

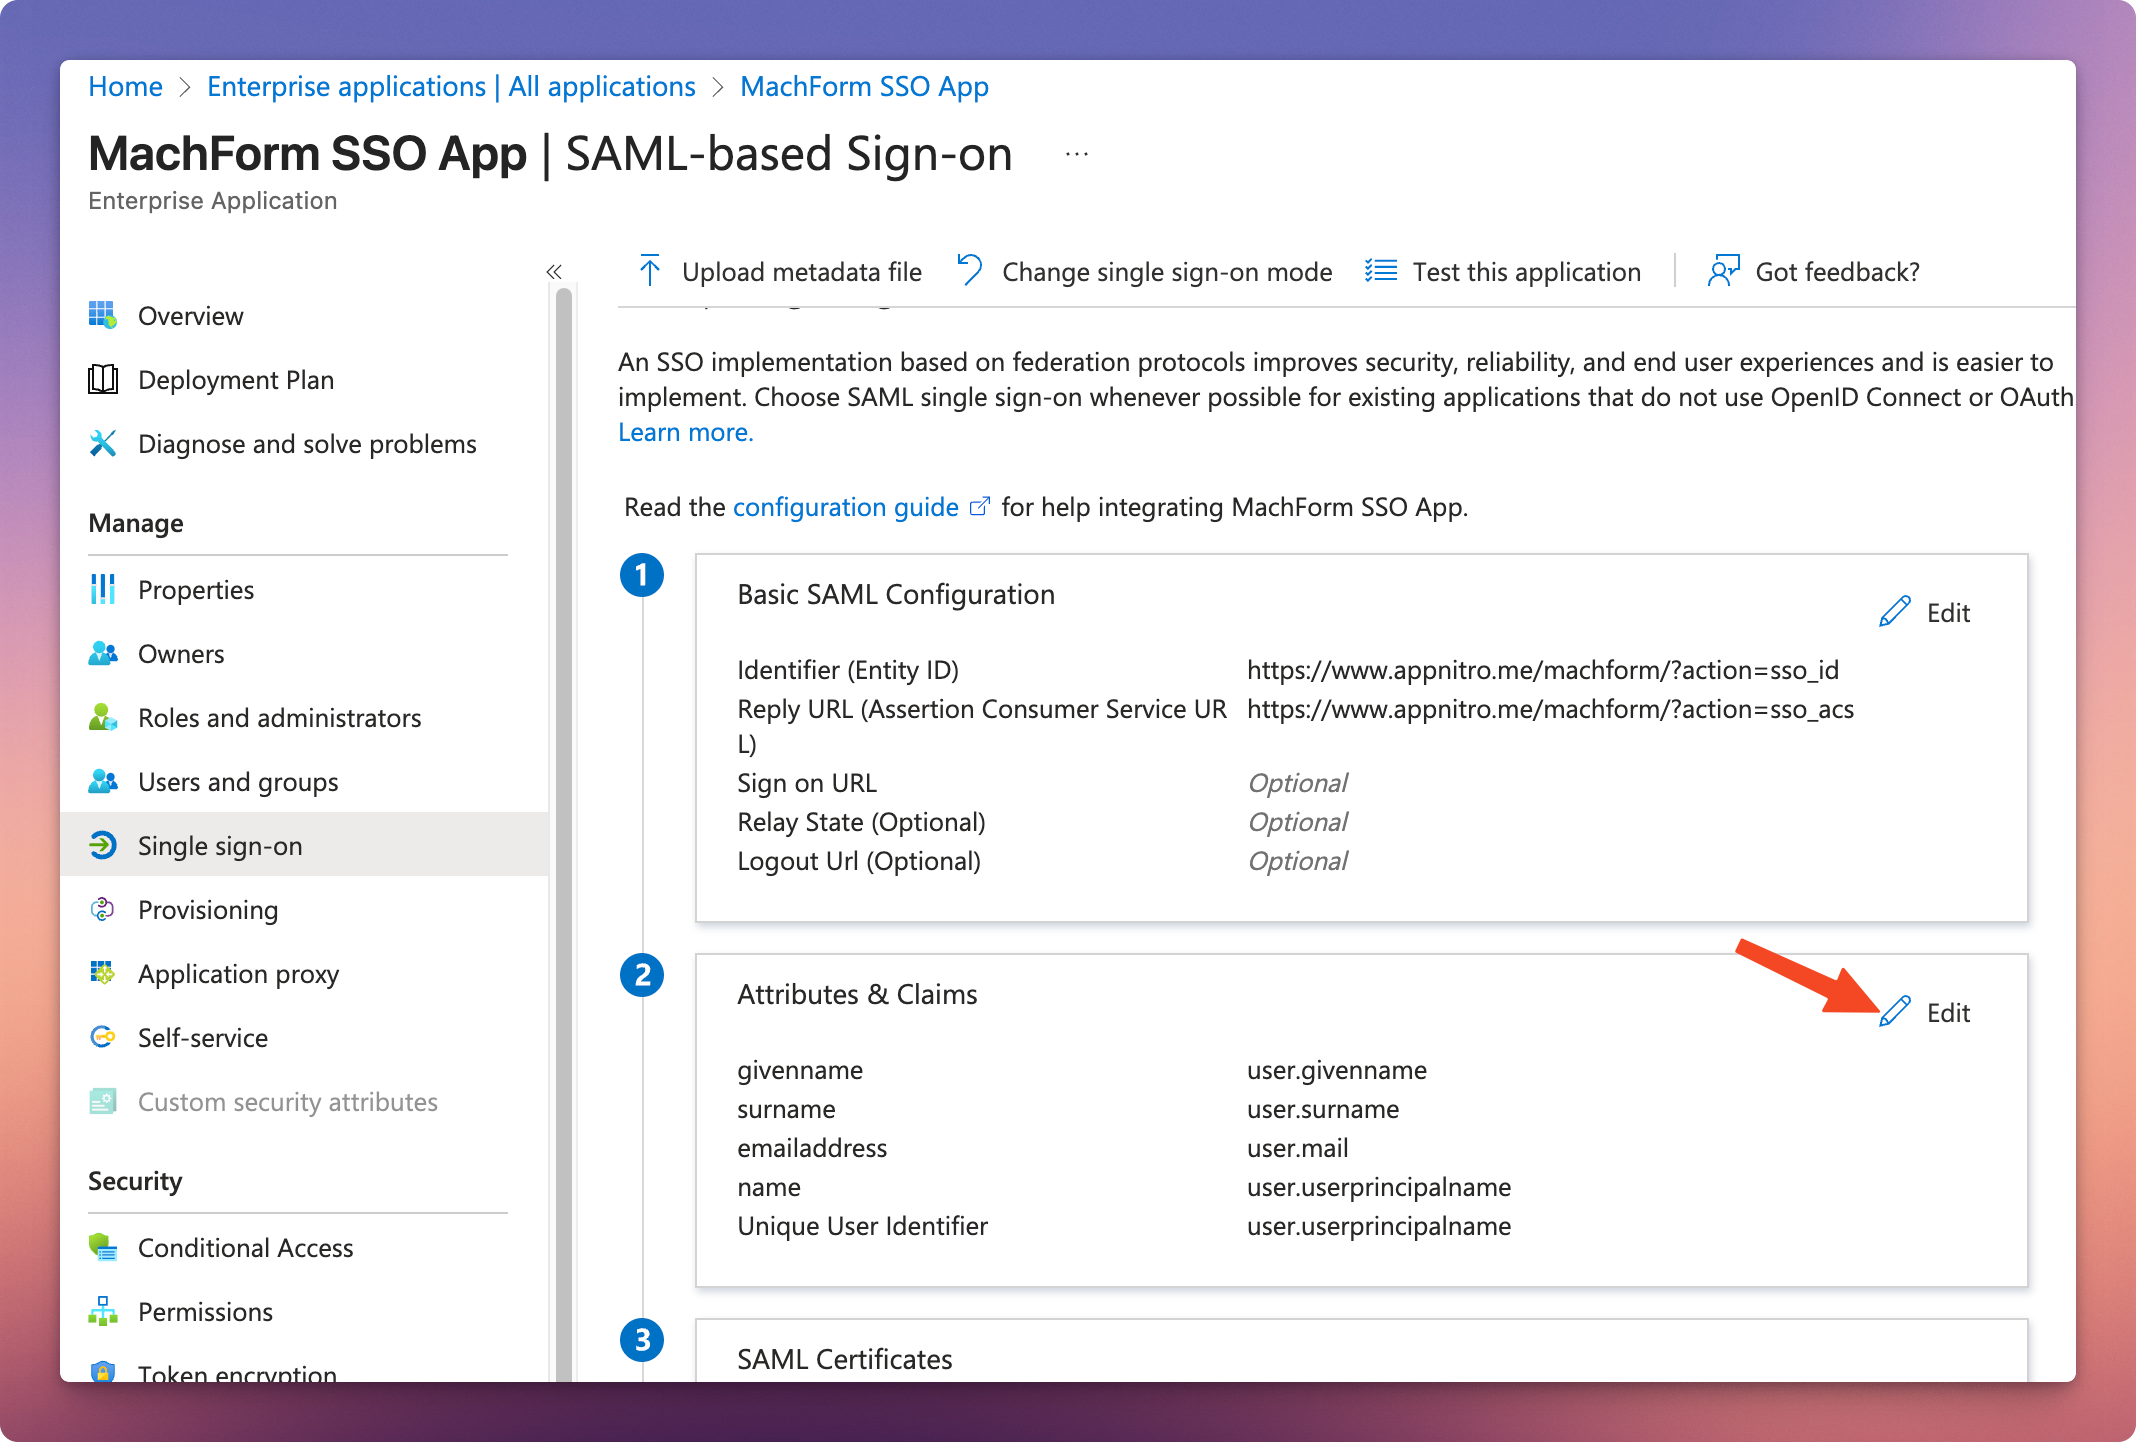
4. On the Set up Single Sign-On with SAML page, under the Basic SAML Configuration section, click Edit.
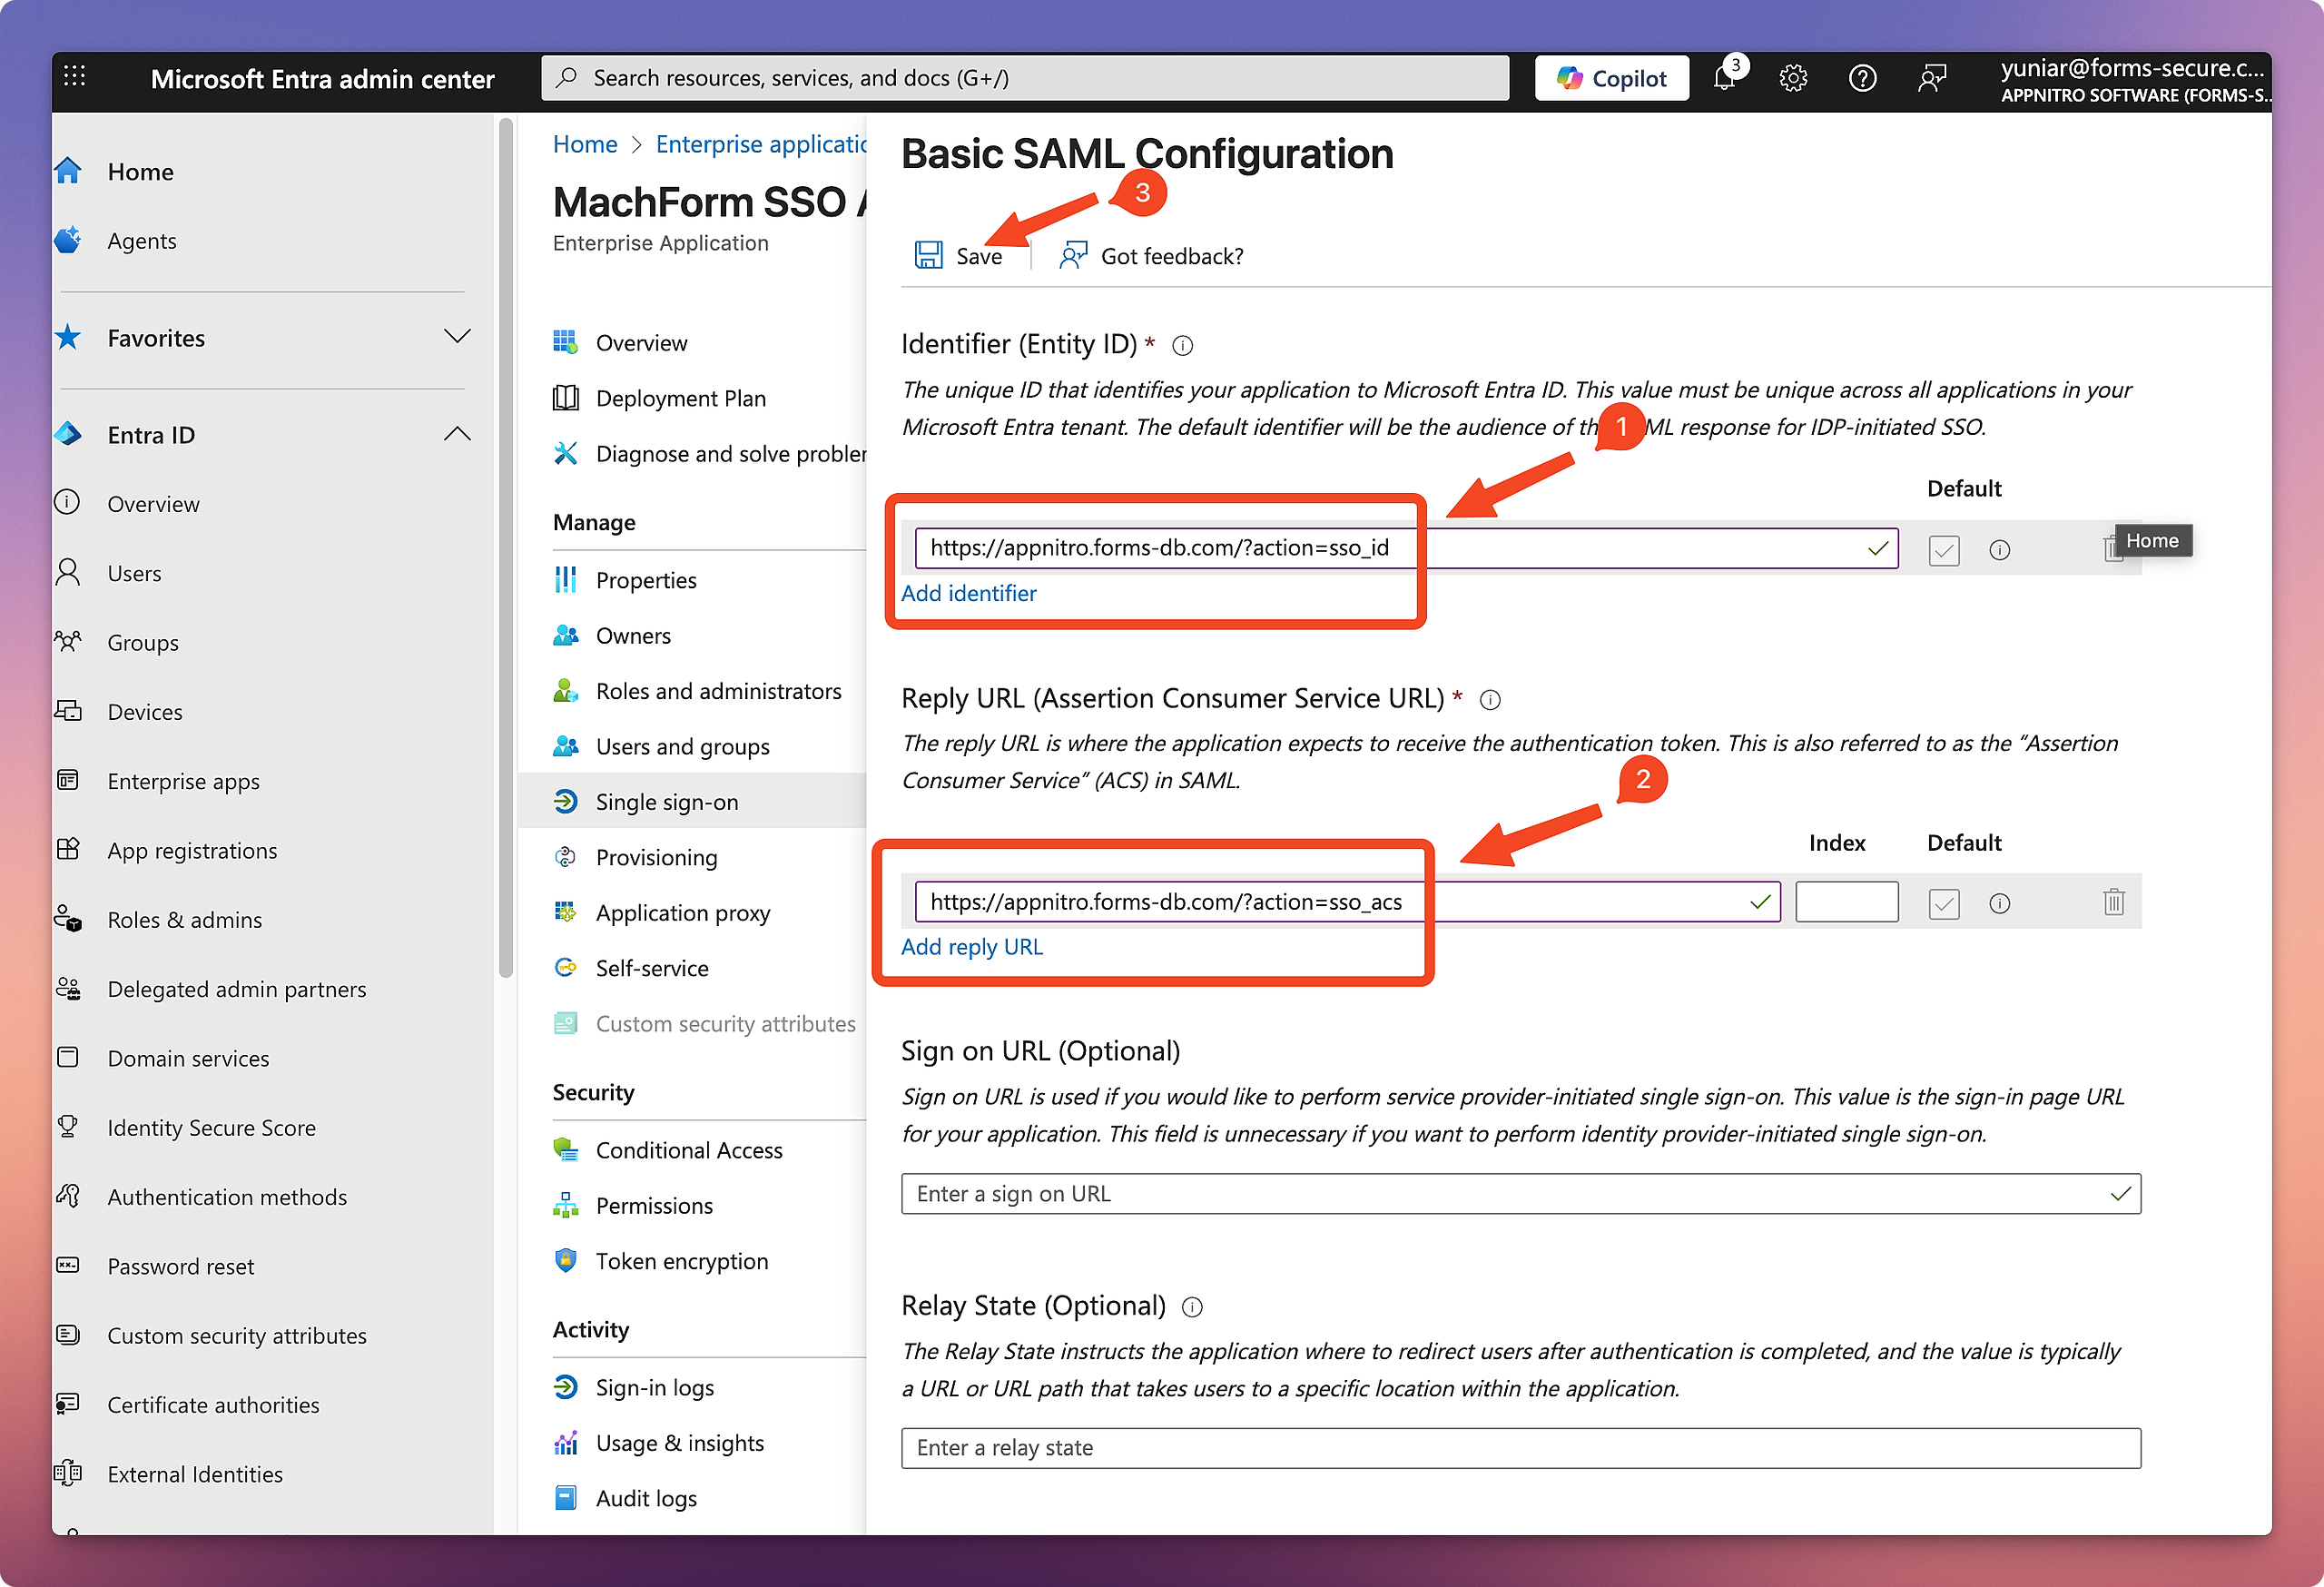
5. Fill in your MachForm Service Provider Metadata. Click the Save button, and then click on the X icon in the top-right corner to close the window.
6. Under the Attributes & Claims section, click Edit.
7. In the Required Claim section, click Unique User Identifier (Name ID).
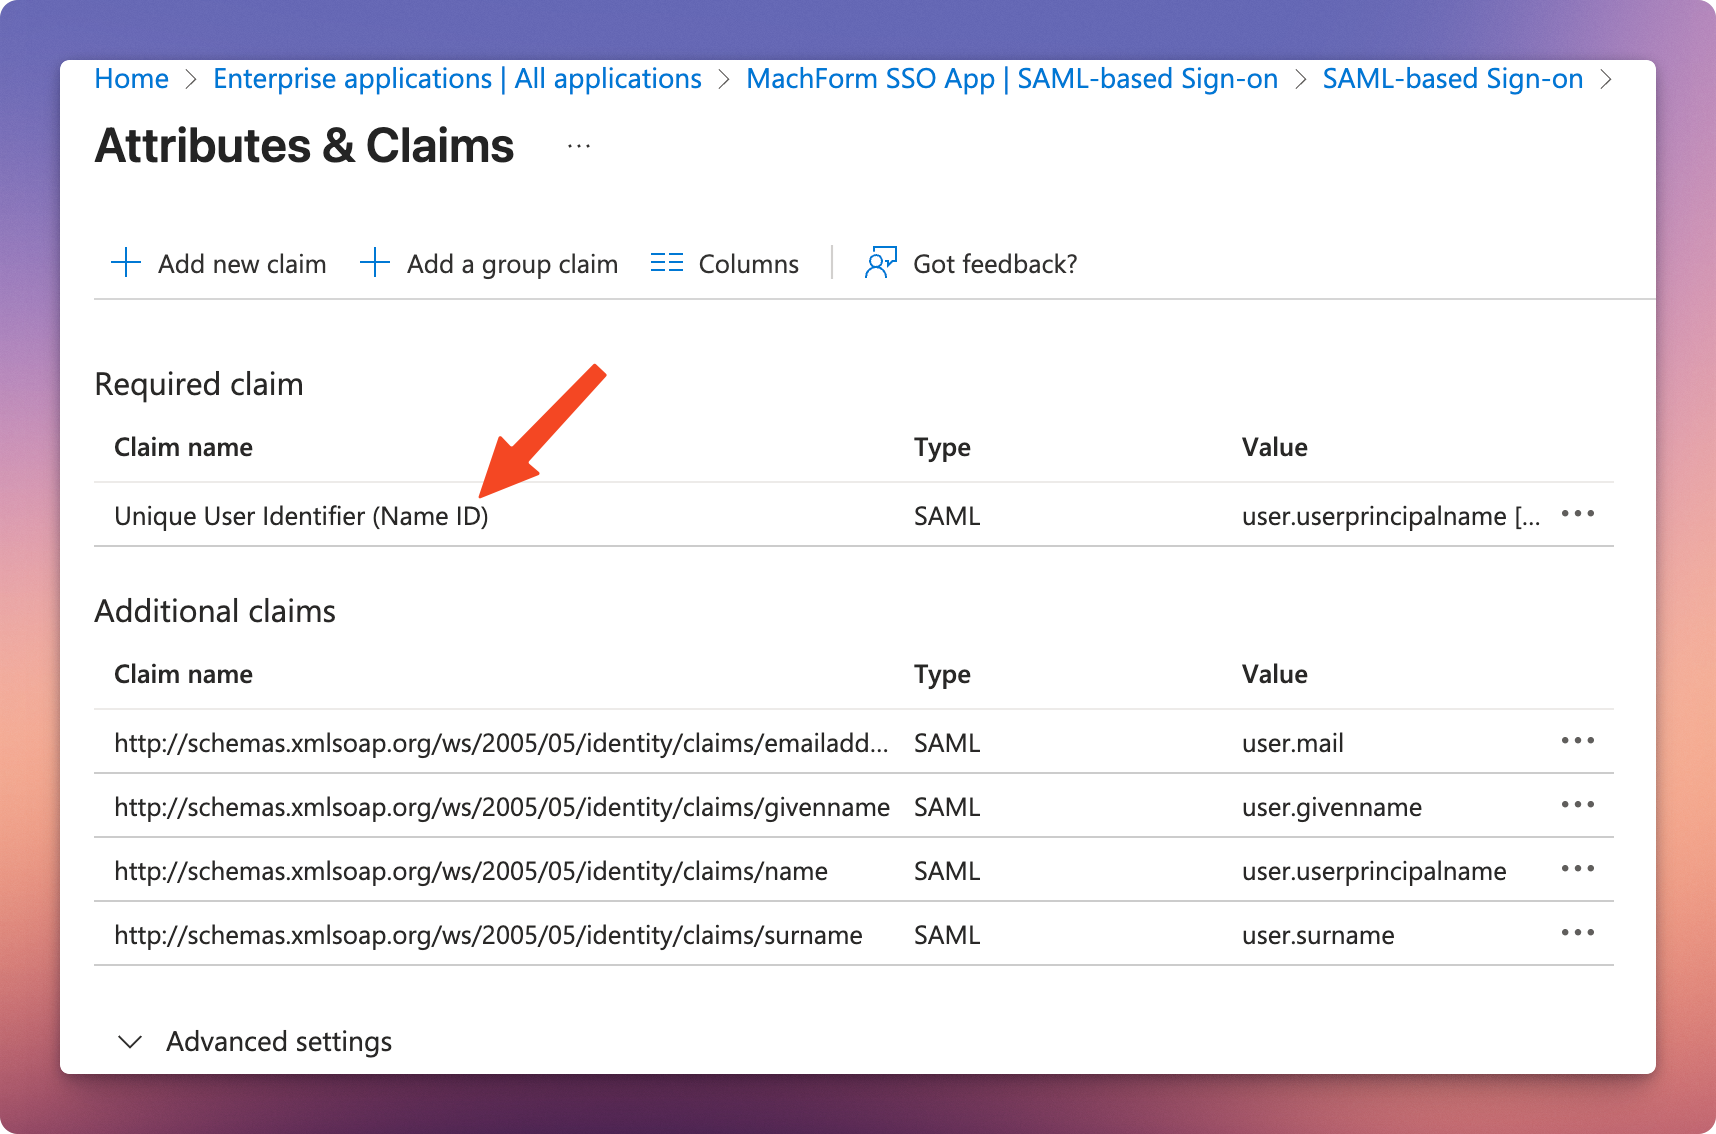
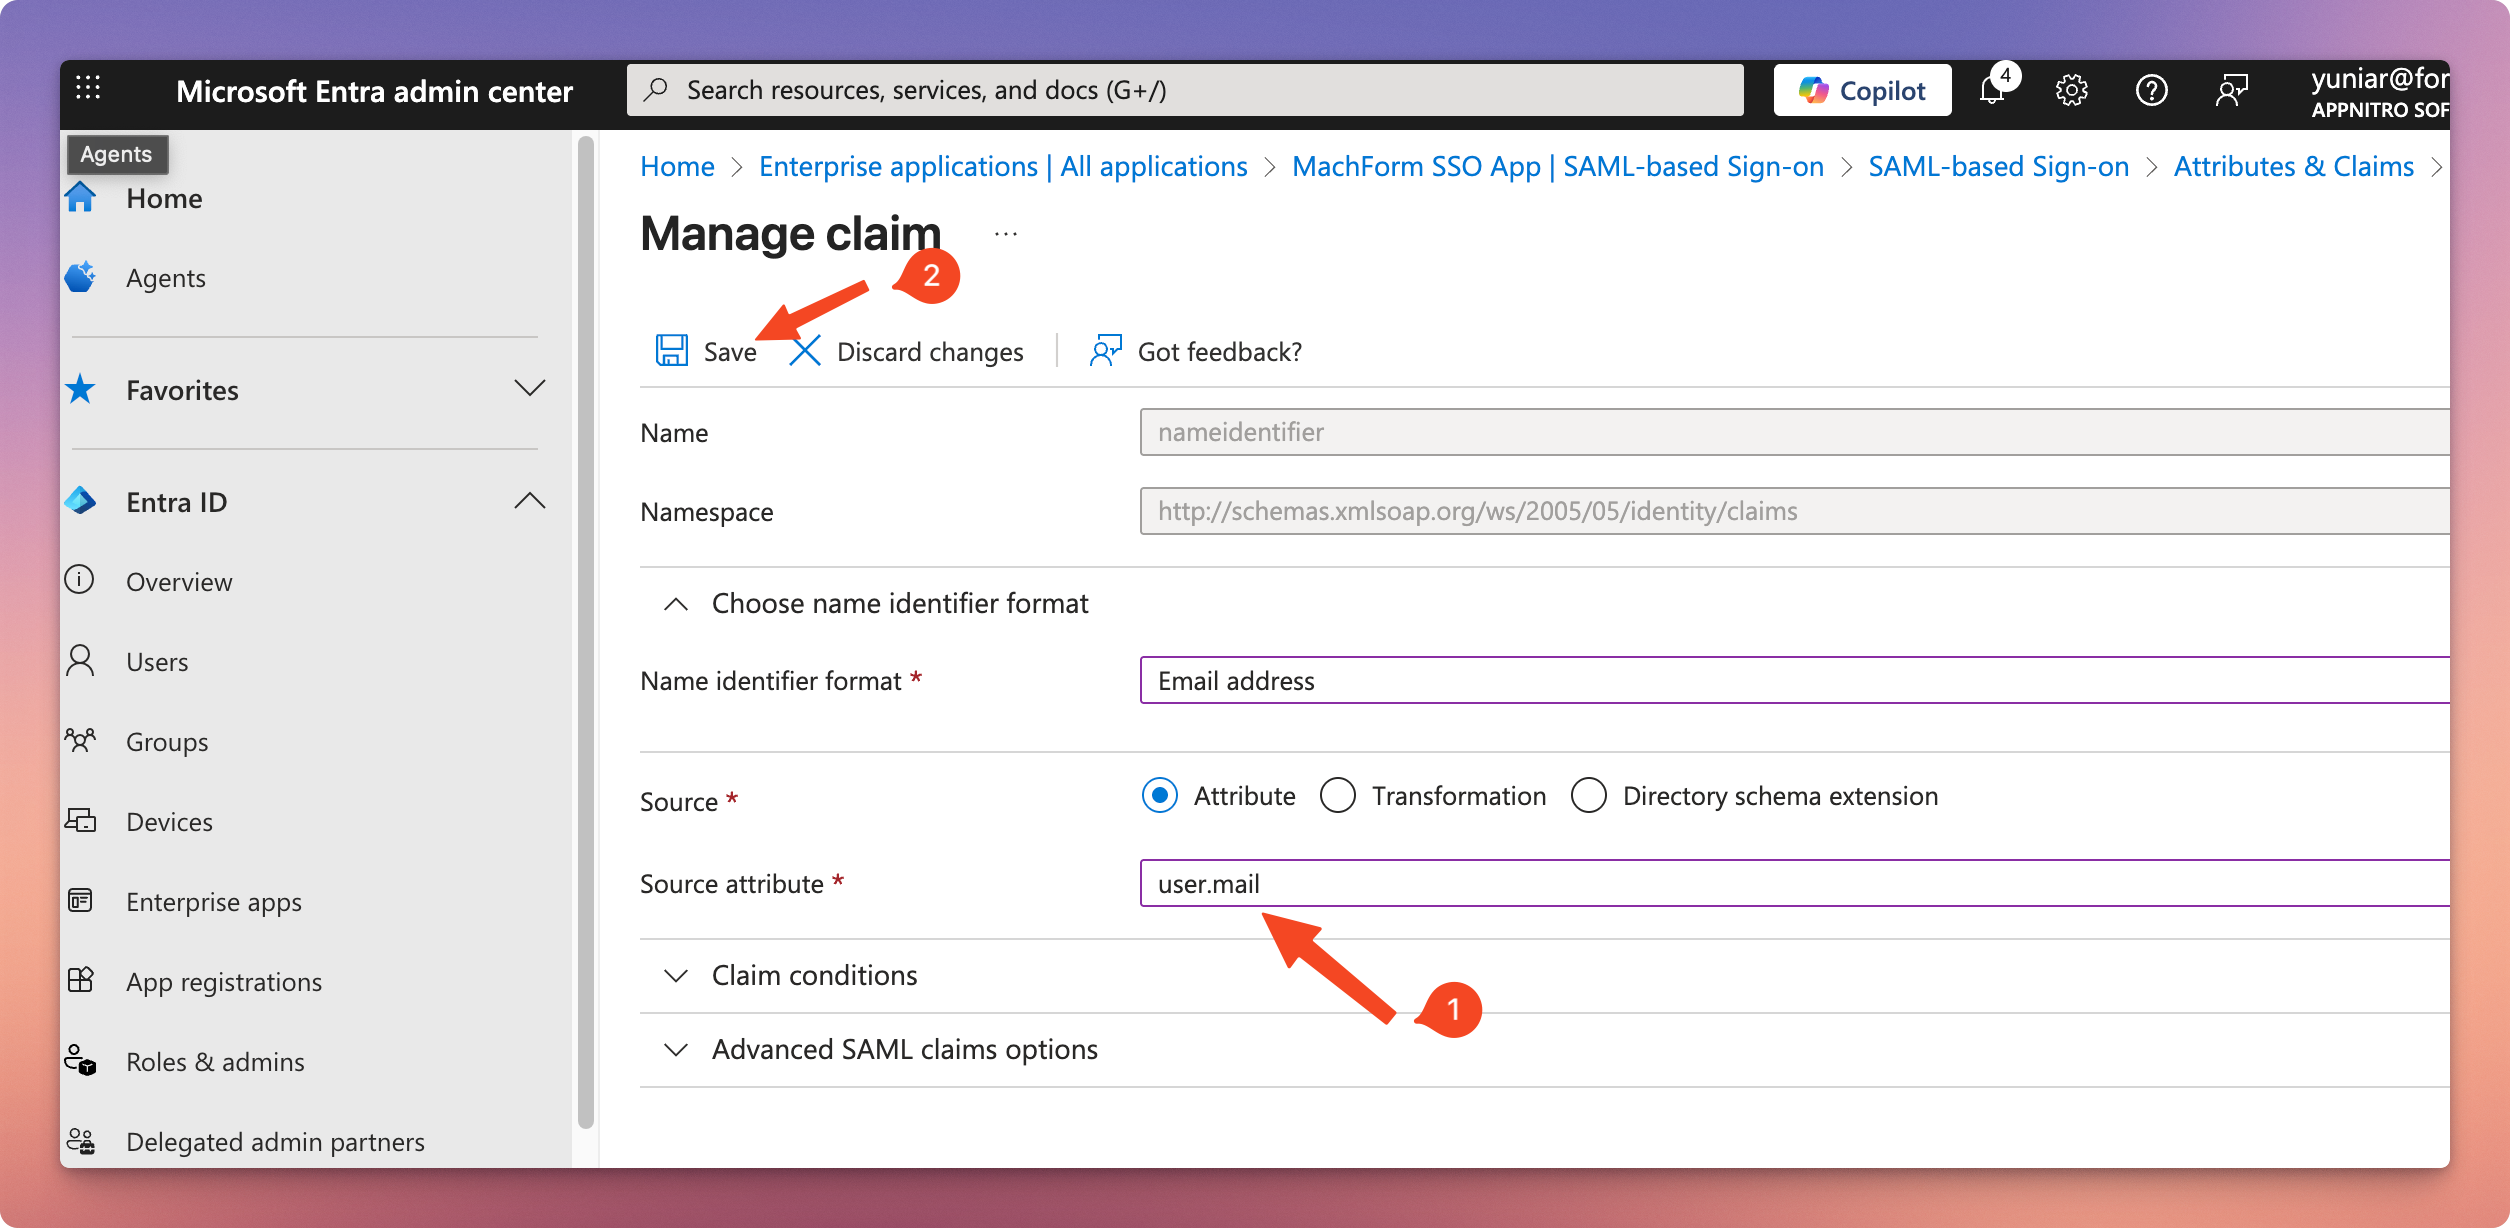
8. On the Manage claim page, in the Source attribute dropdown menu, select user.mail, then click the Save button. Click the X icon in the top-right corner to close the window.
Step 2: Collect IdP Information
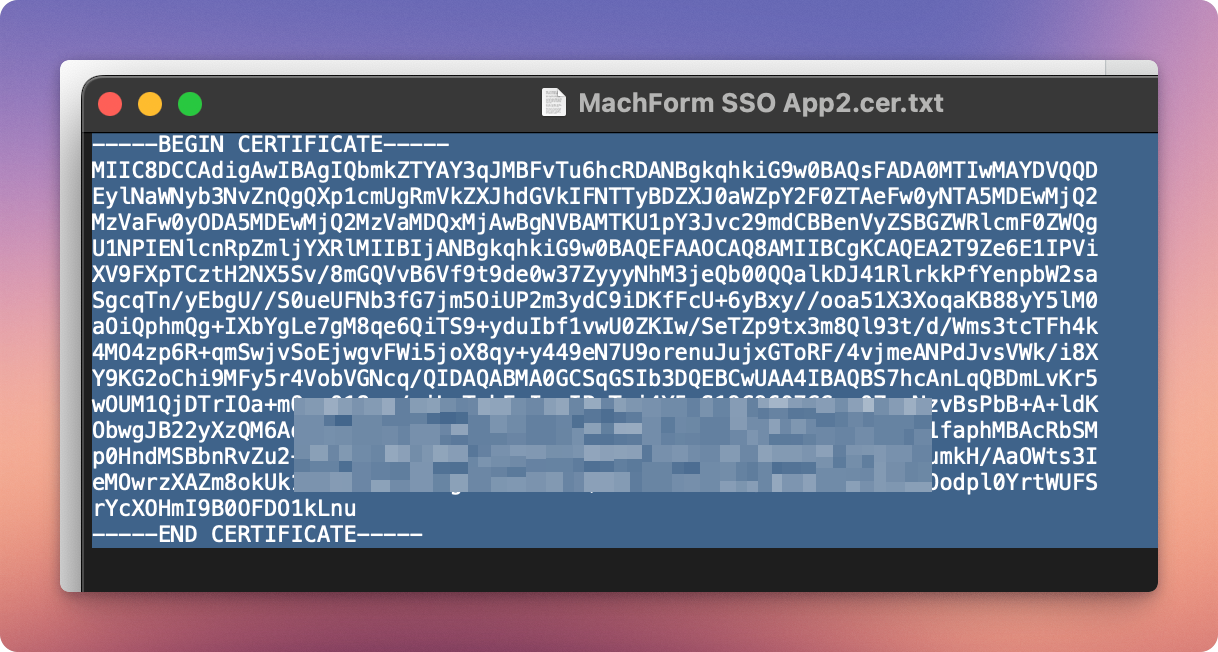
1. On the Single Sign-On page, scroll down until you see the SAML Certificate section and your IdP information details. Use this information to complete the SSO setup in MachForm later.
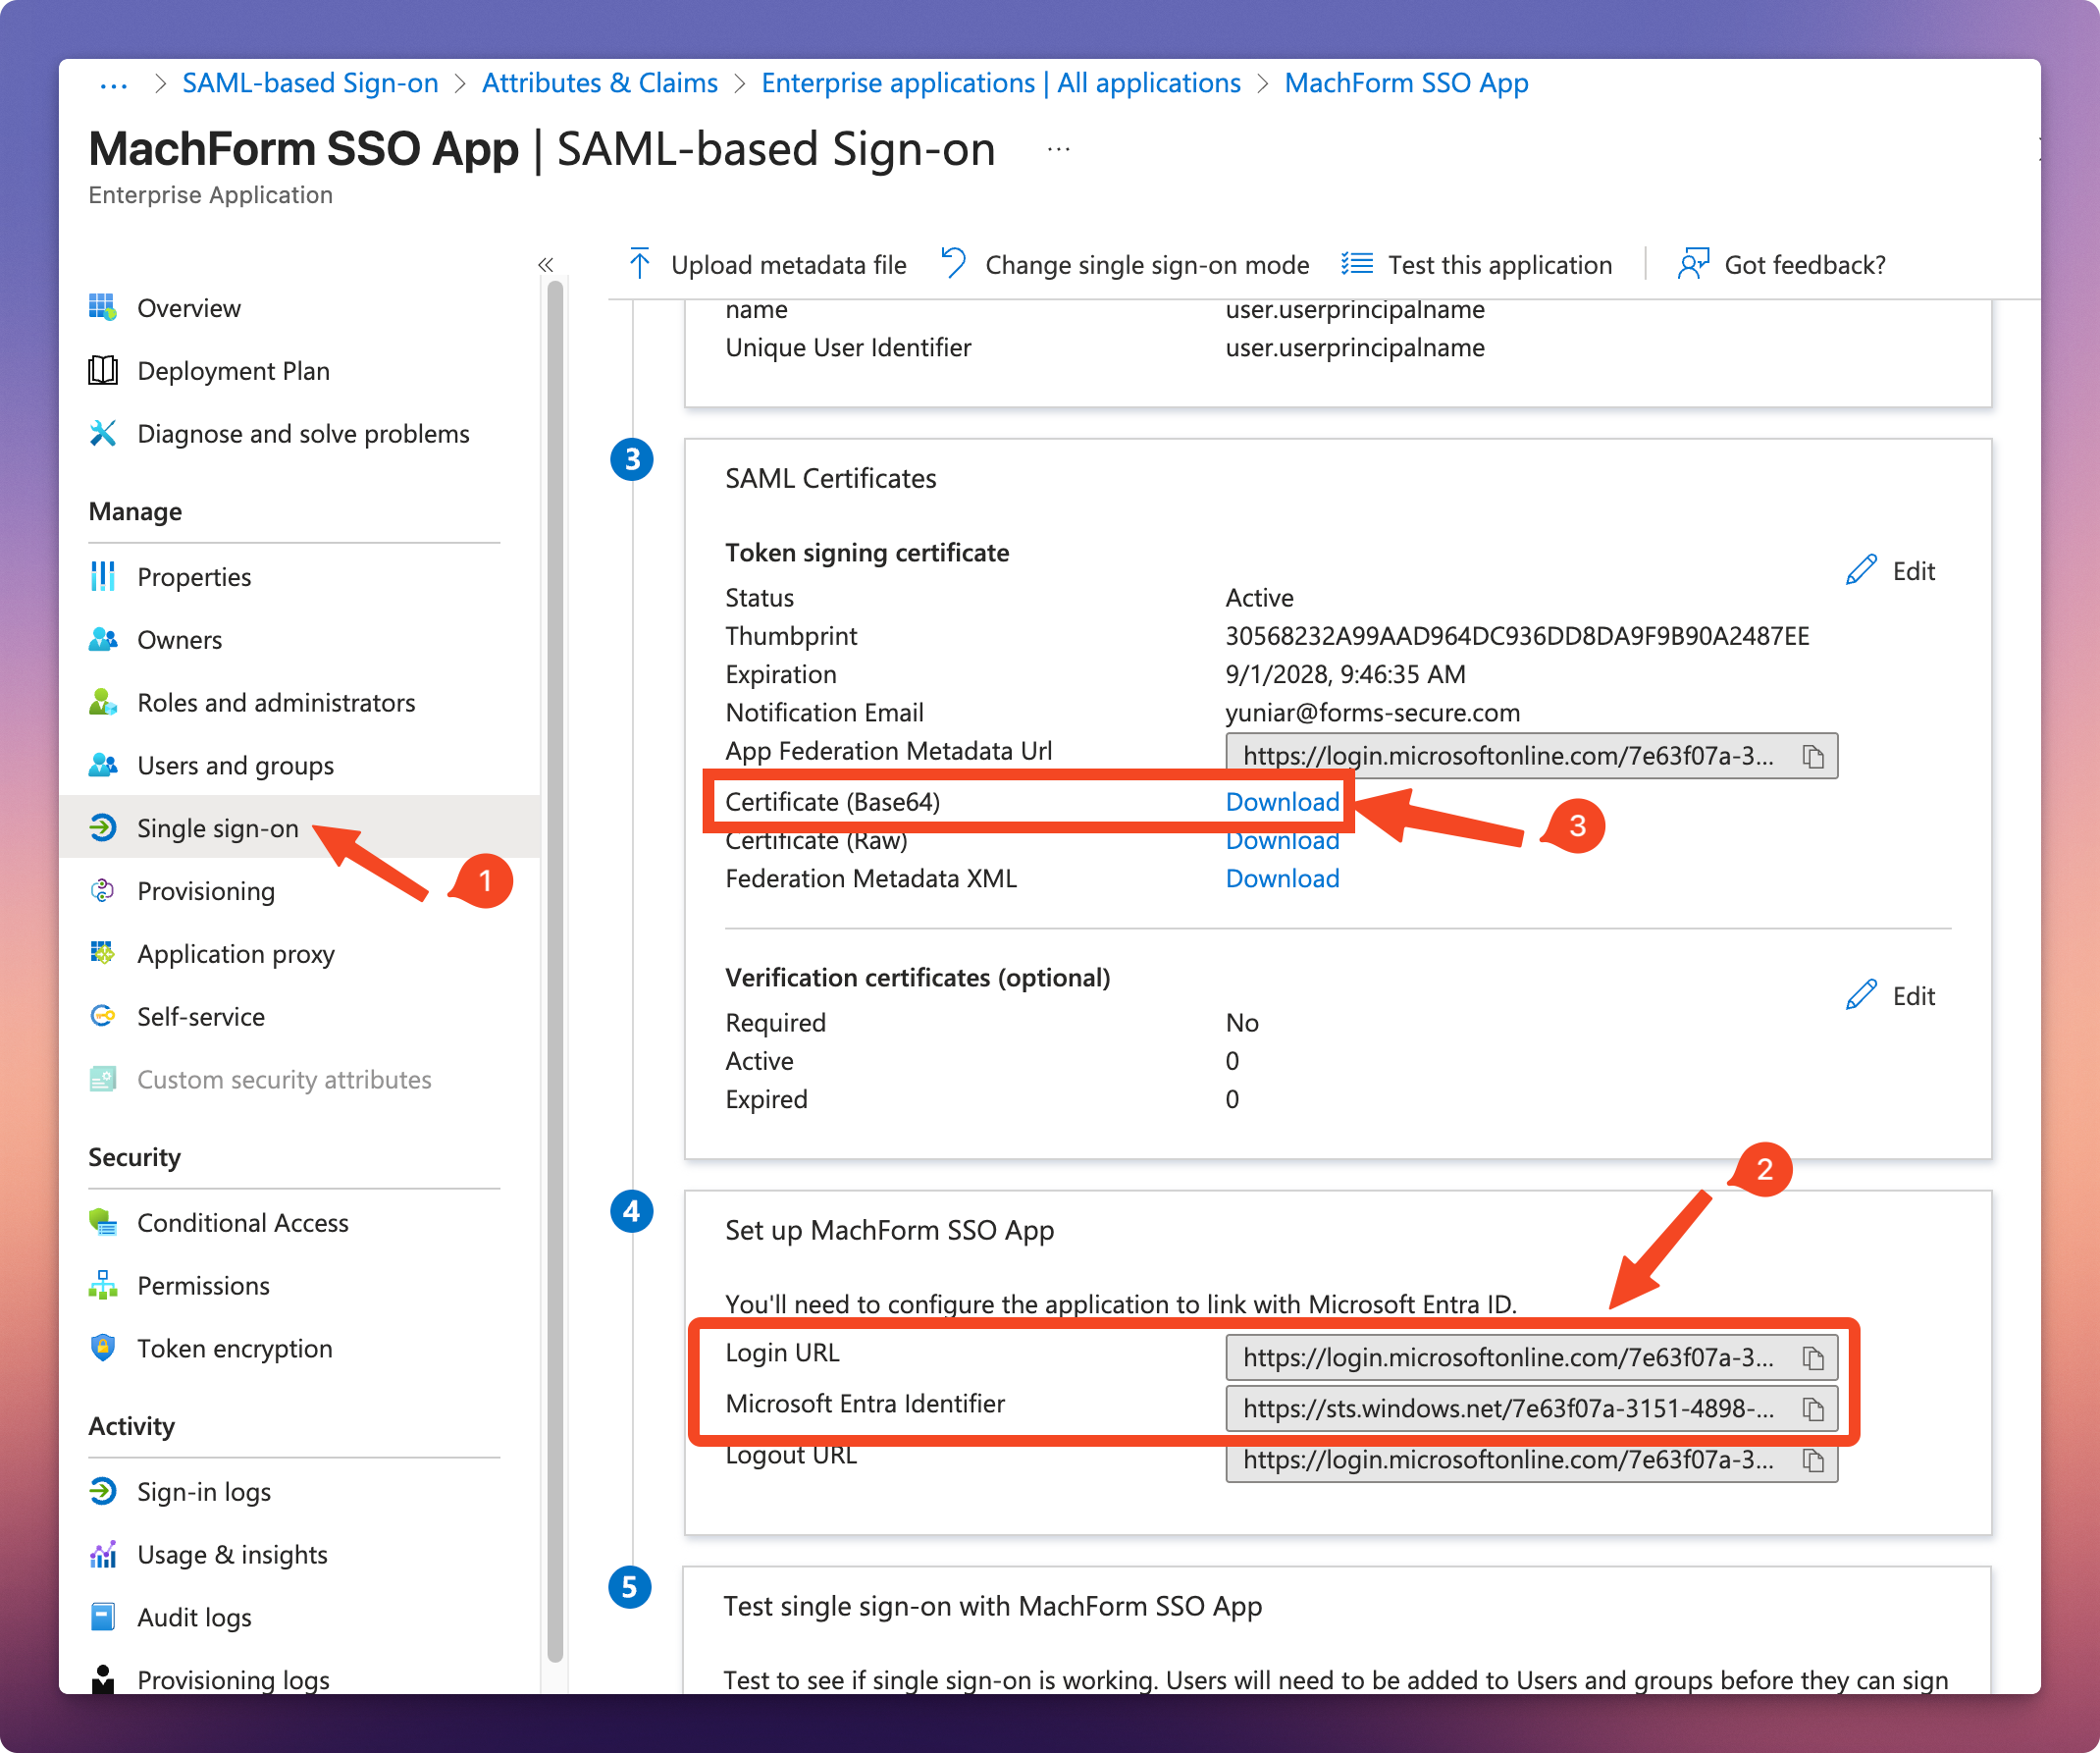
2. To copy your Certificate (Base64) click the Download link and then save the file to your computer (e.g. MachForm-SSO.cer). You can rename the file to a TXT file (e.g. MachForm-SSO.cer.txt) and then open it using a text editor (such as Notepad on Windows or TextEdit on Mac).
Step 3: Assign User Access to the SAML App
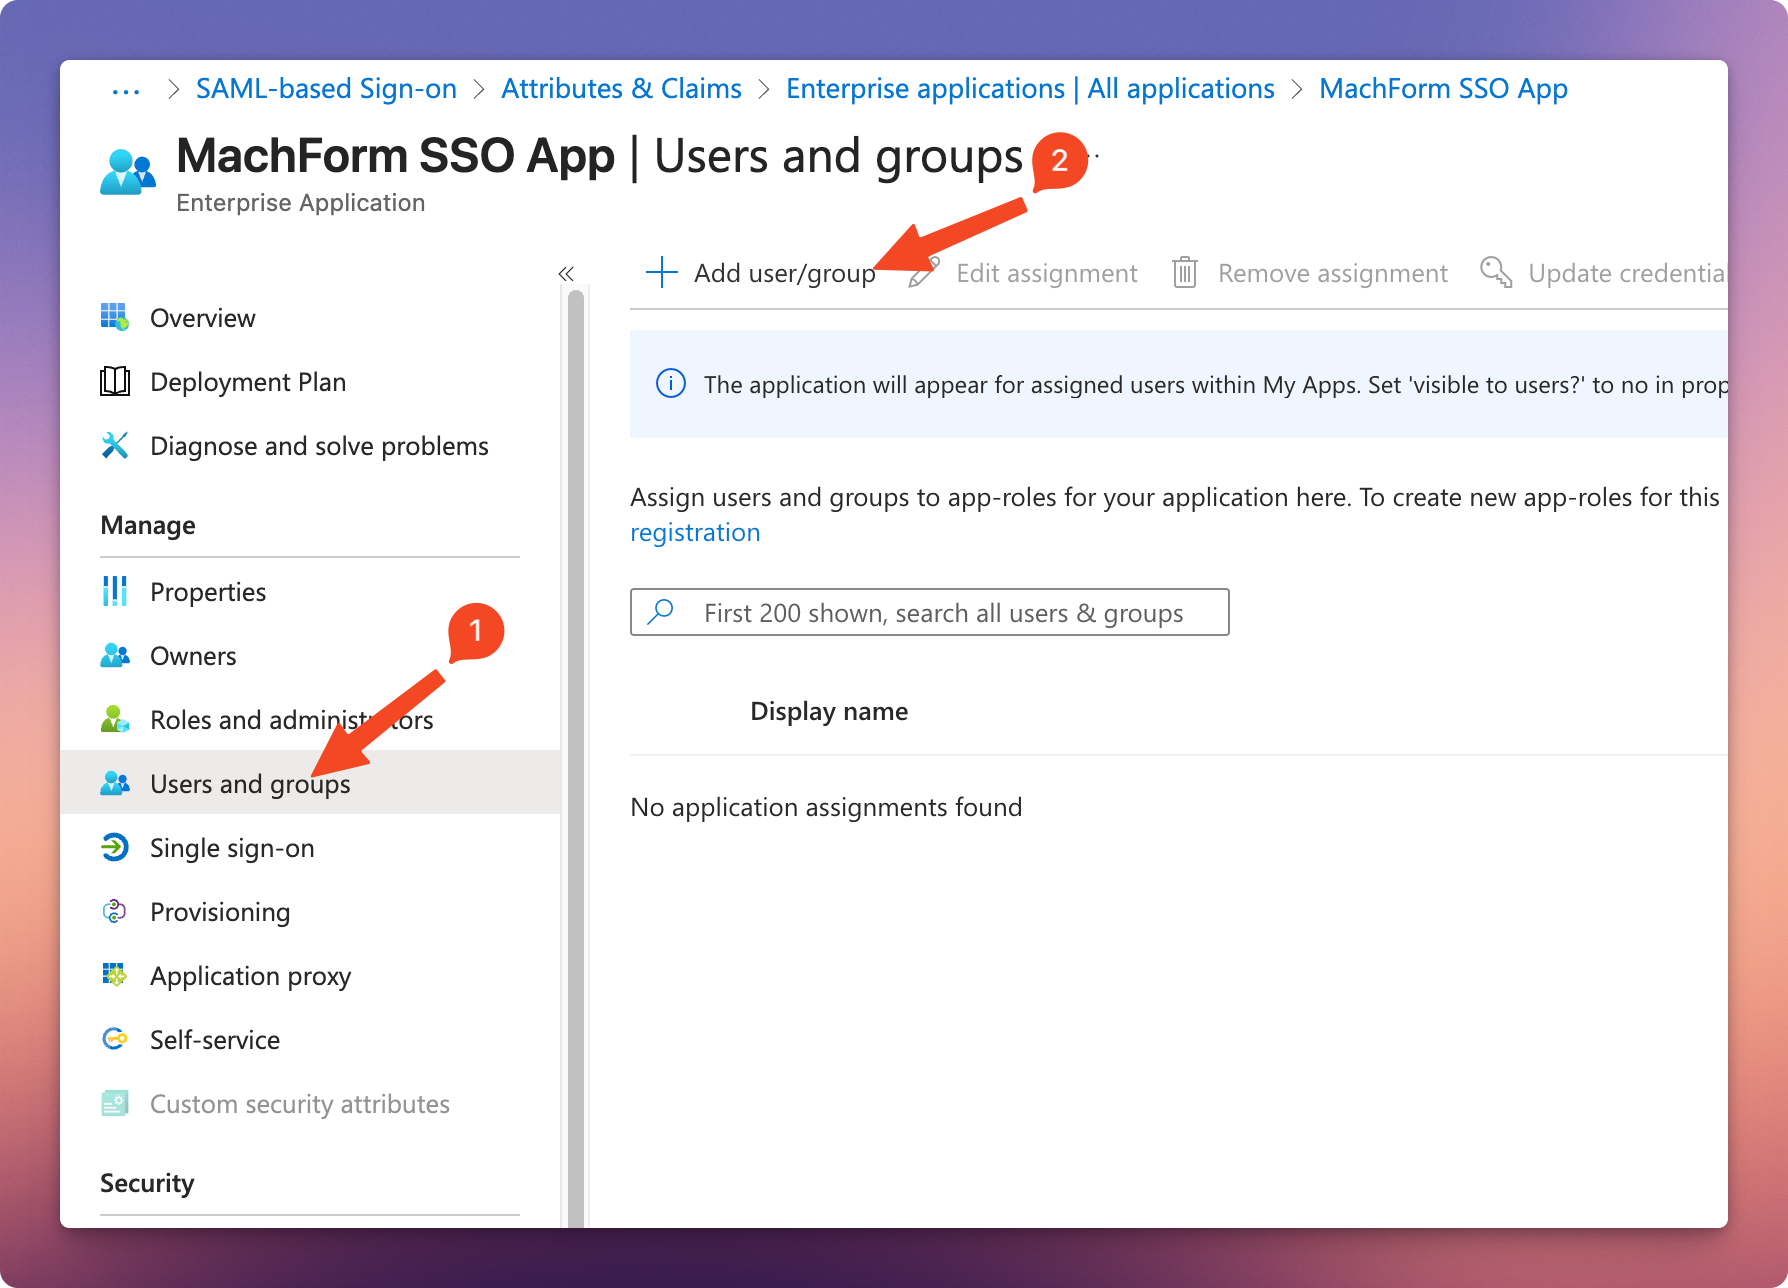
1. Click Users and groups under the Manage section of the app, then click on Add user/group.
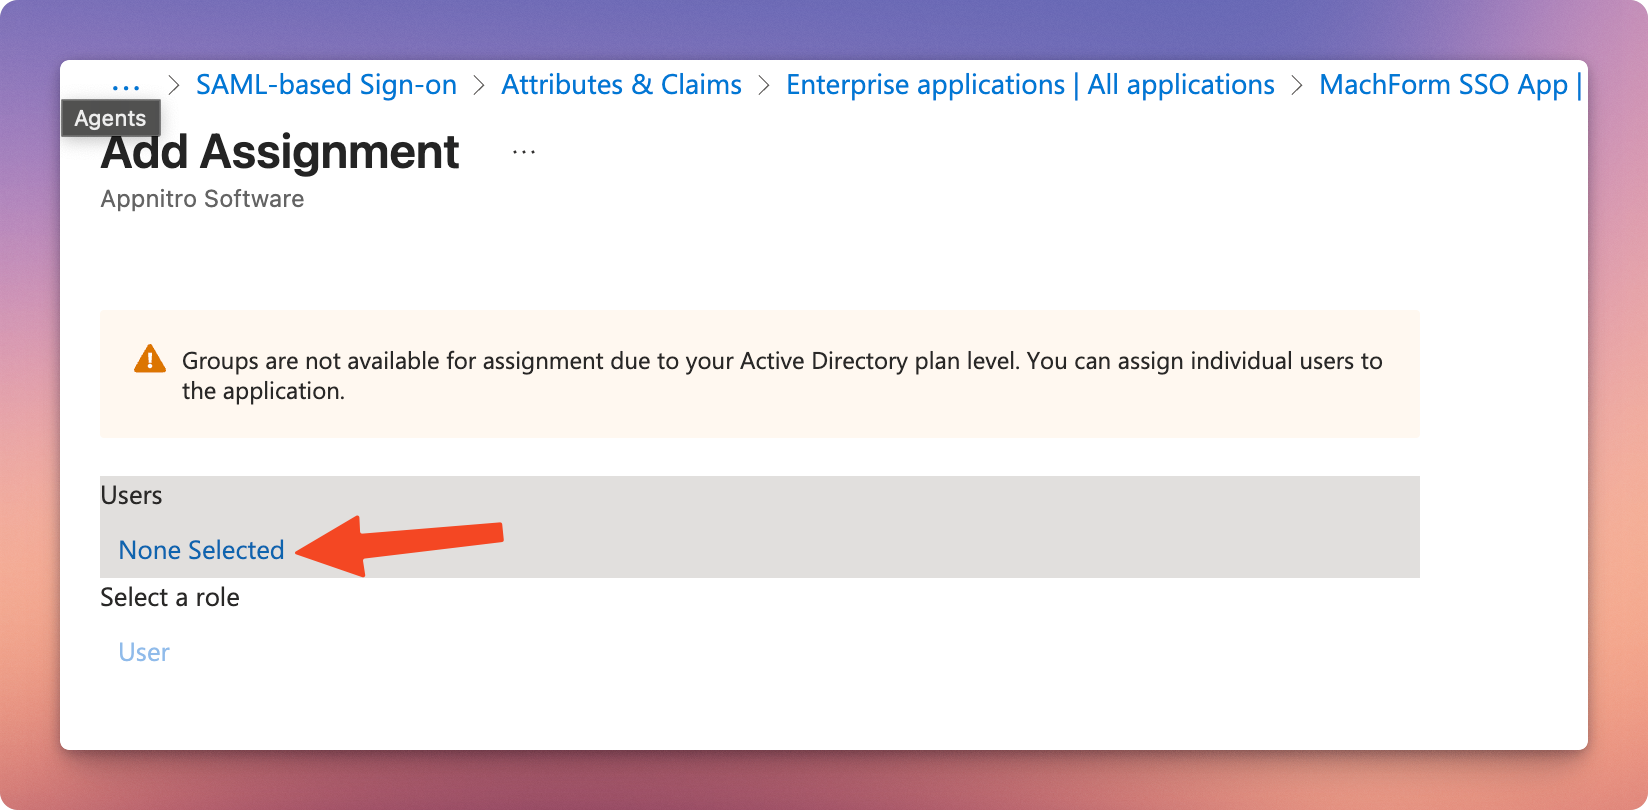
2. On the Add Assignment page click on None selected.
3. In the Users and Groups window that opens, under the All tab, select a user or group from the list.
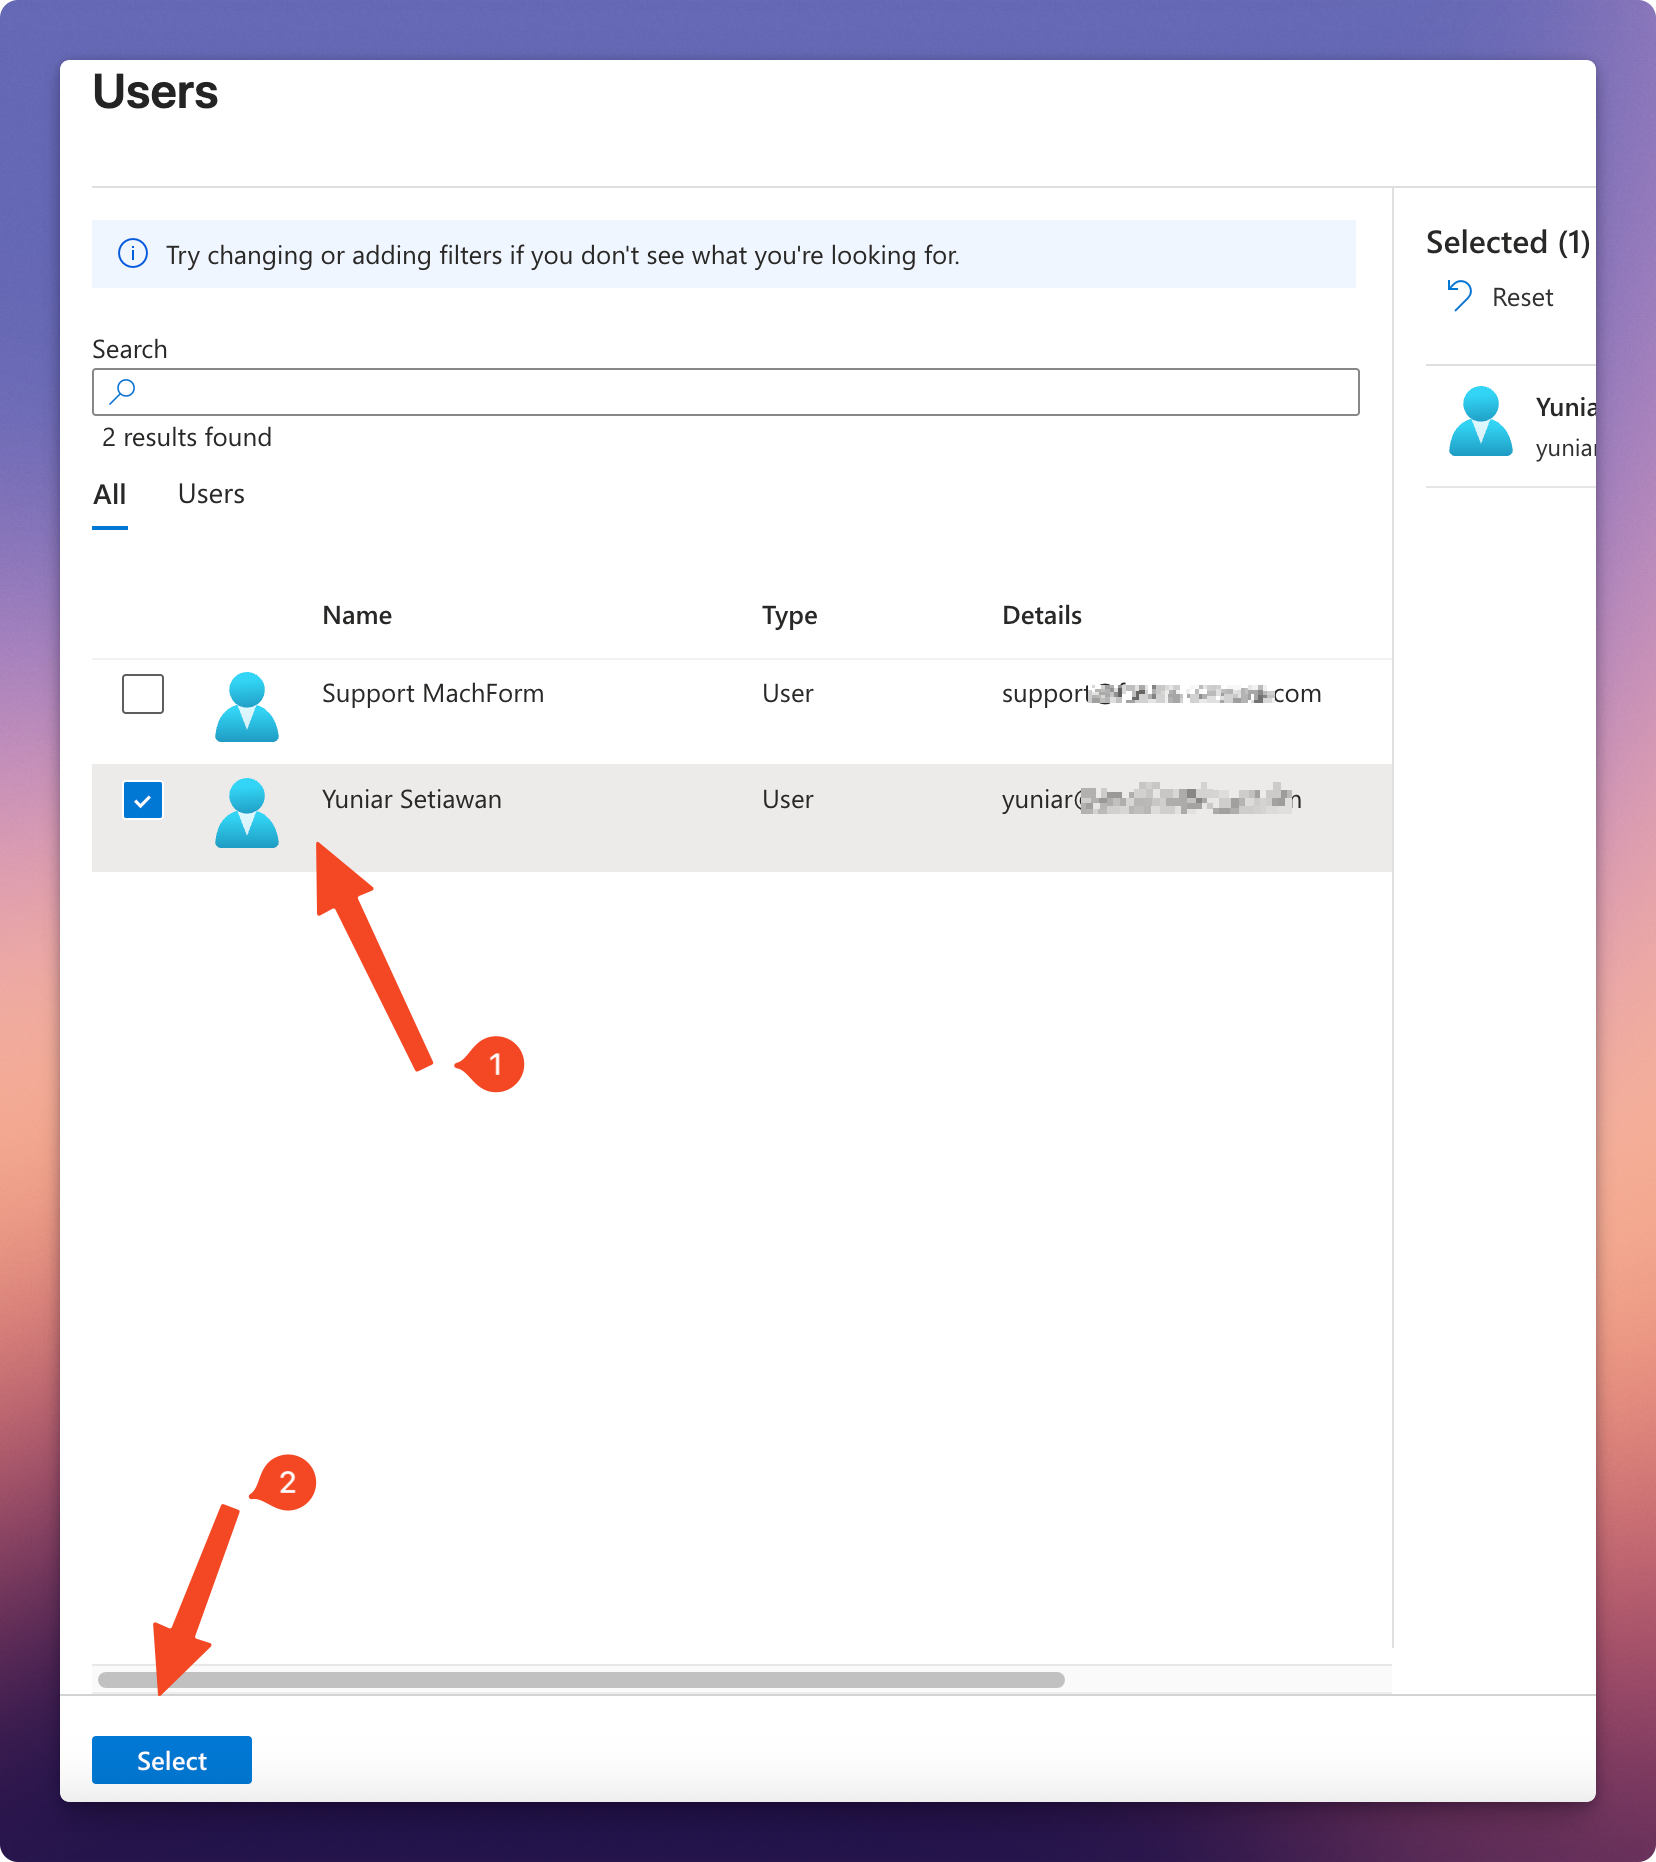
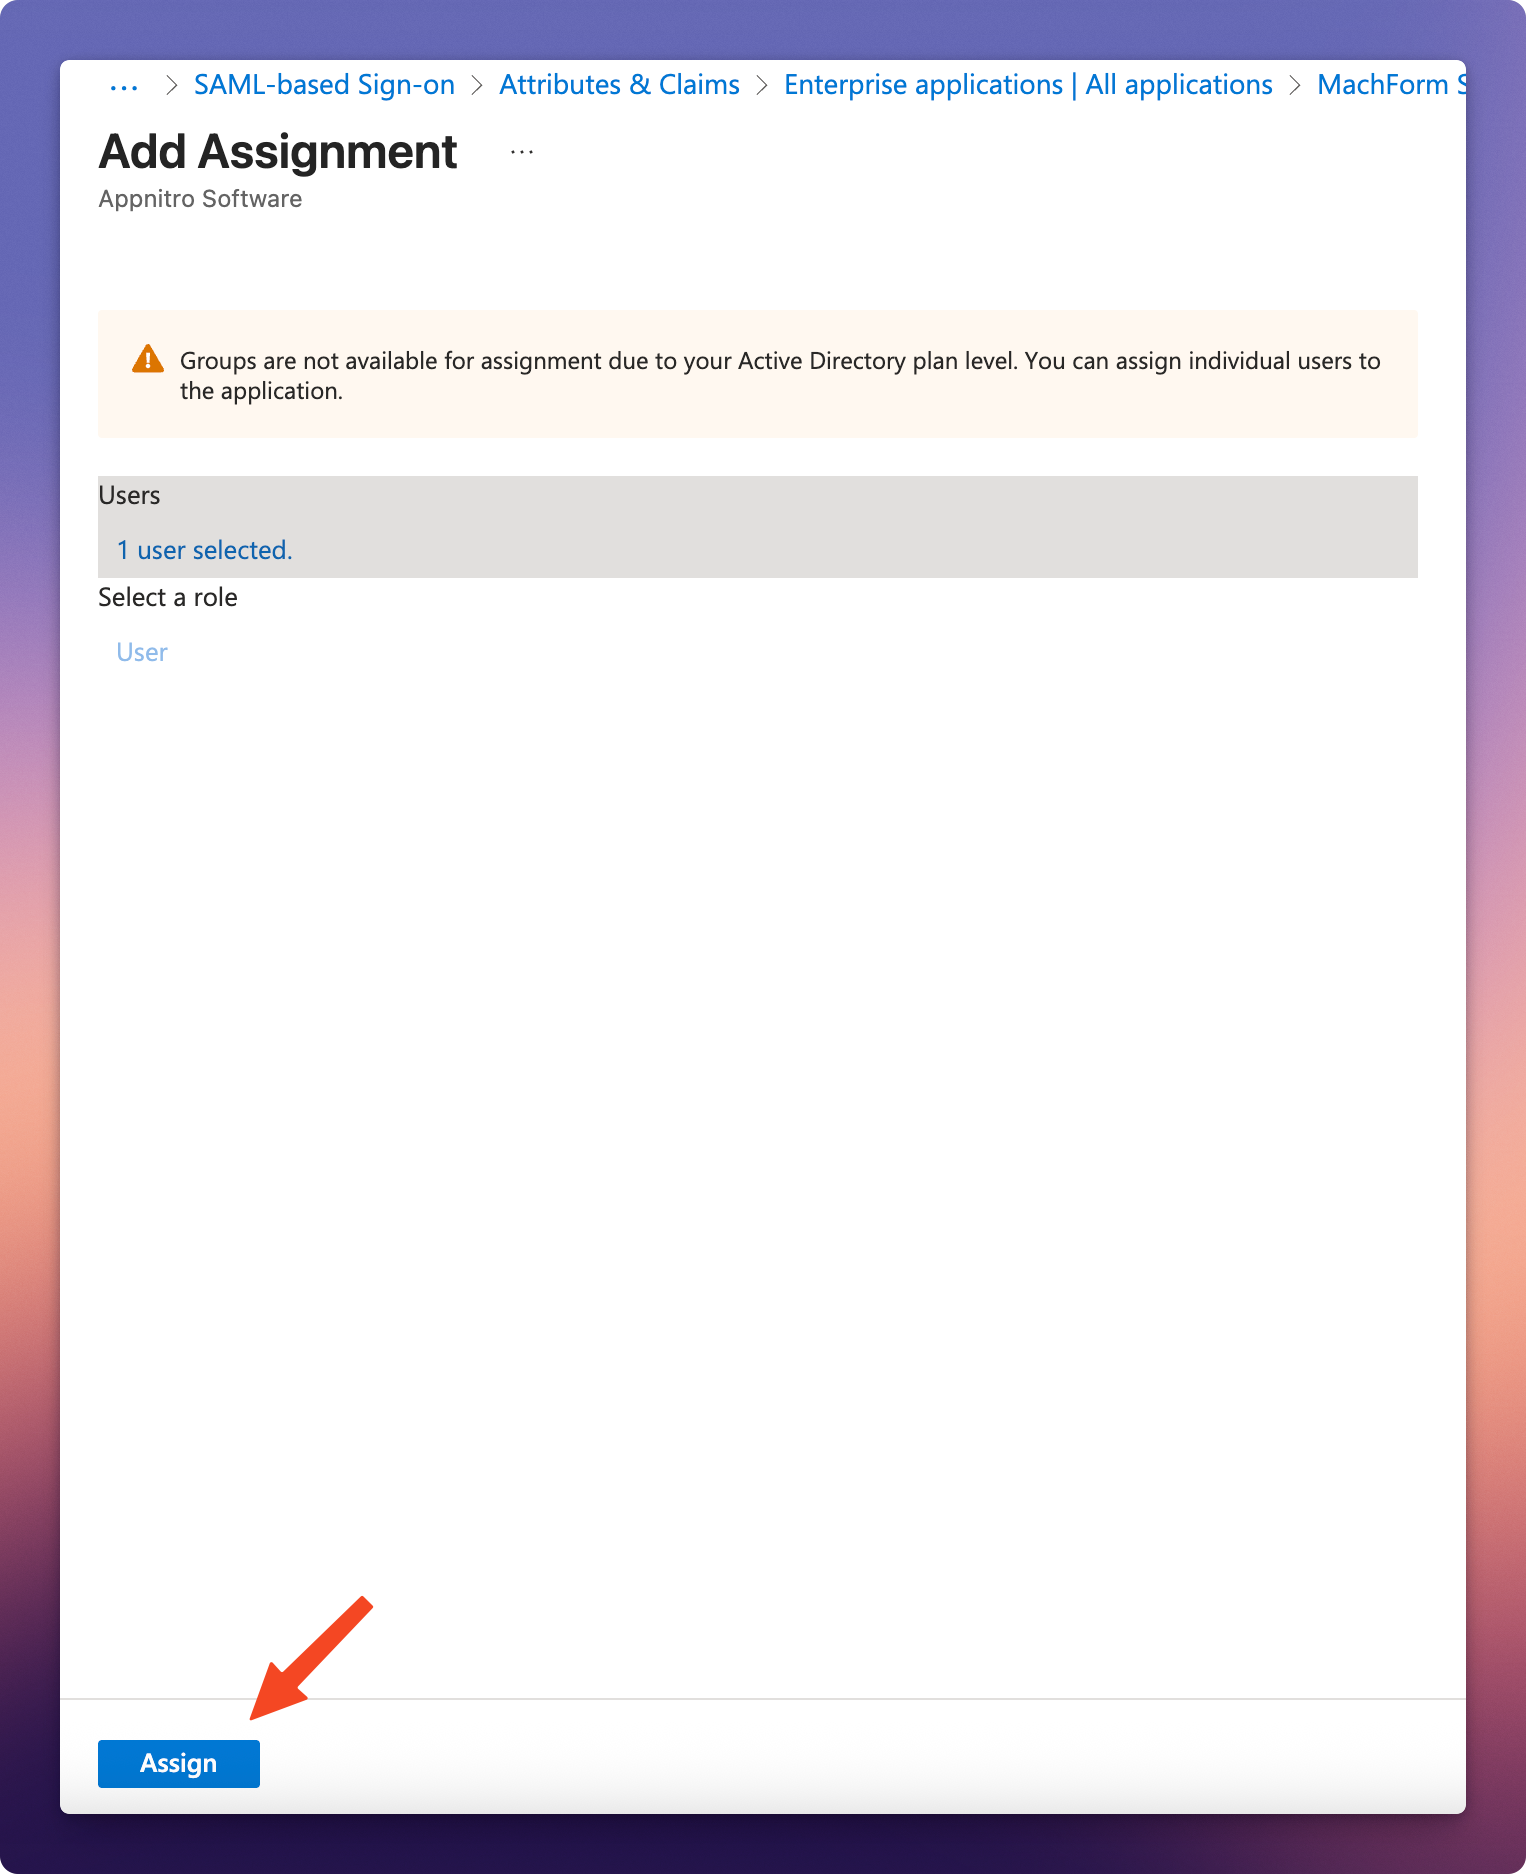
4. On the bottom-left side of the Add Assignment page, click Assign, and you're done.
You can now continue to Step 4 in How to Set Up MachForm with Single Sign-On (SSO).