Overview
This page provides specific instructions for setting up MachForm Single Sign-On (SSO) with Okta SSO.
If you found this page directly, please note that it is a continuation of the main How to Set Up MachForm with Single Sign-On (SSO). Before proceeding, we recommend reviewing the main manual to understand the overall configuration steps and prerequisites. This page focuses only on the Okta SSO setup portion.
Step 1: Create Okta SAML App
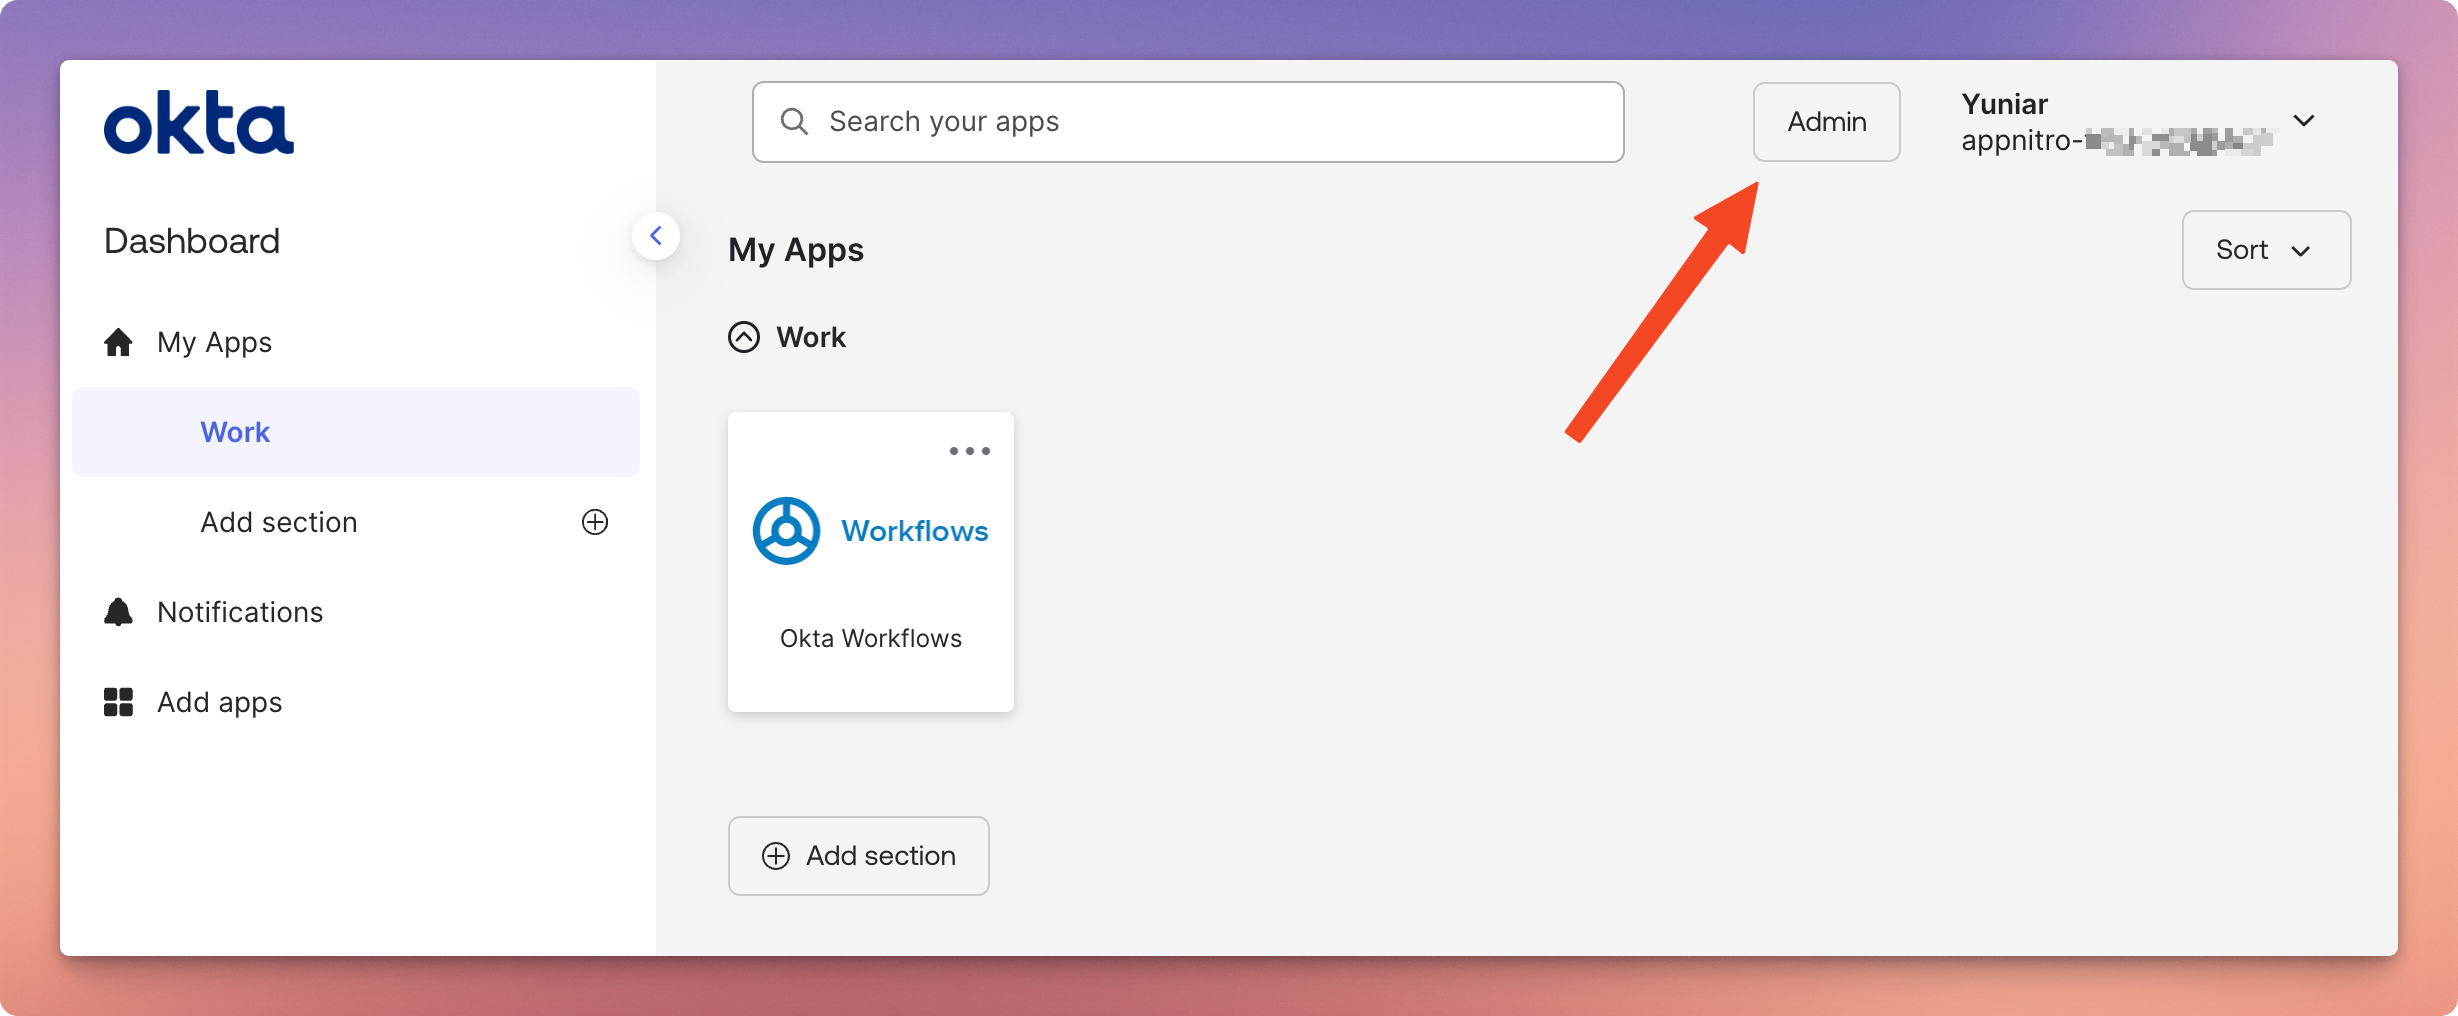
1. Log in to your Okta Admin account and click on Admin in the top-right corner of the page.
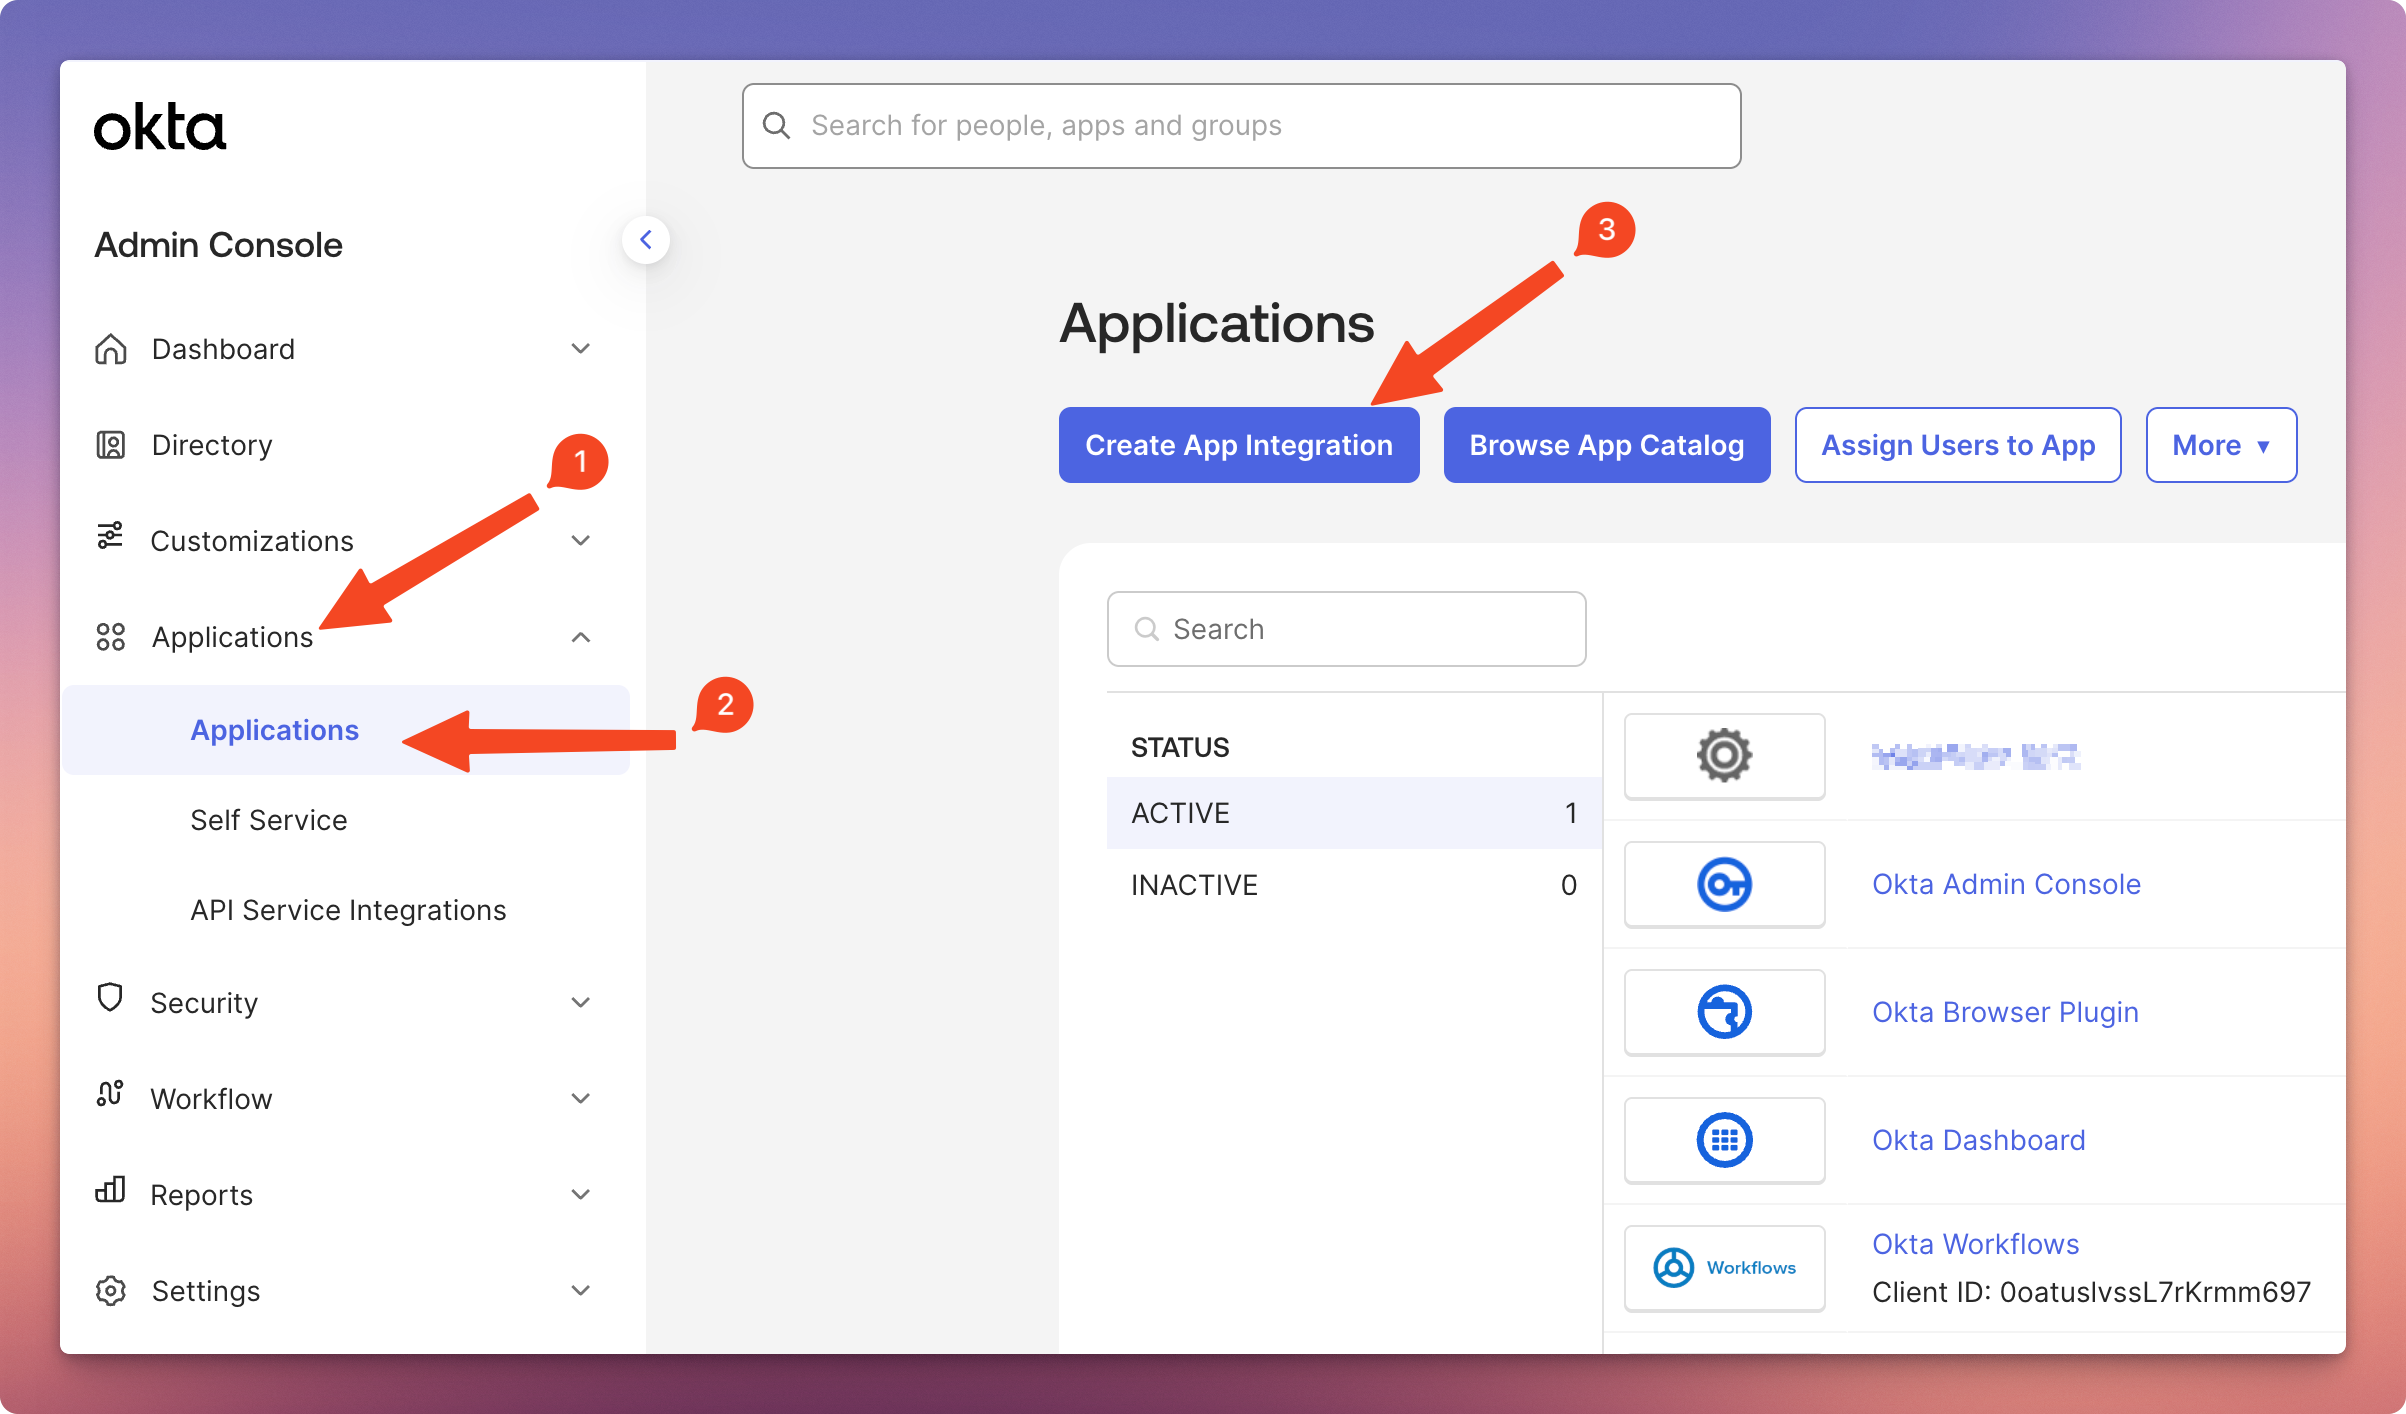
2. Click Applications in the left navigation sidebar and then click the Create App Integration button.
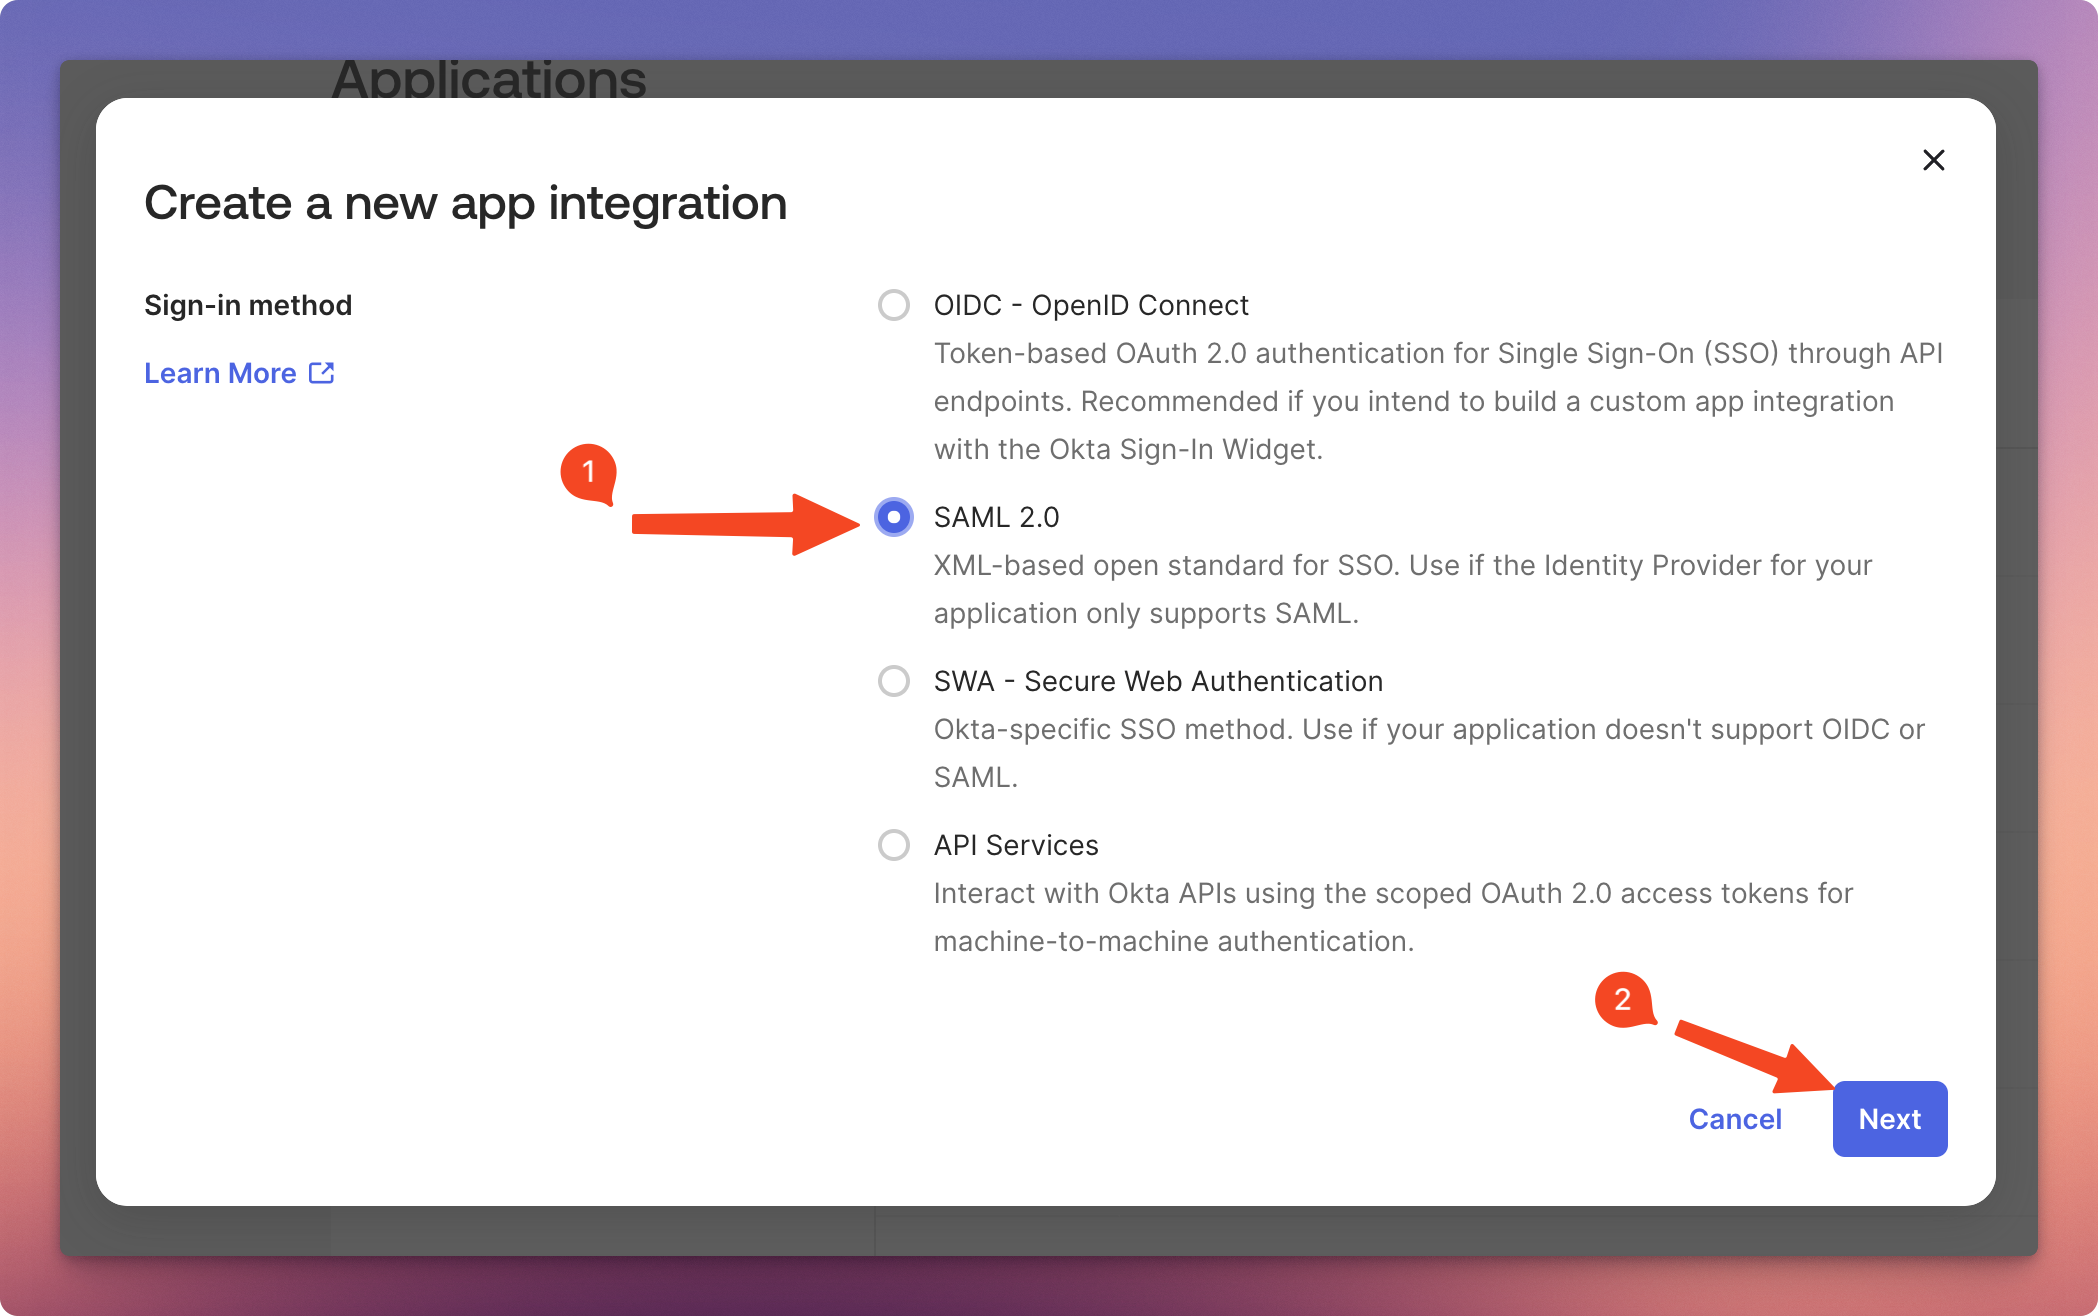
3. In the Create a new app integration window, select SAML 2.0 and click Next.
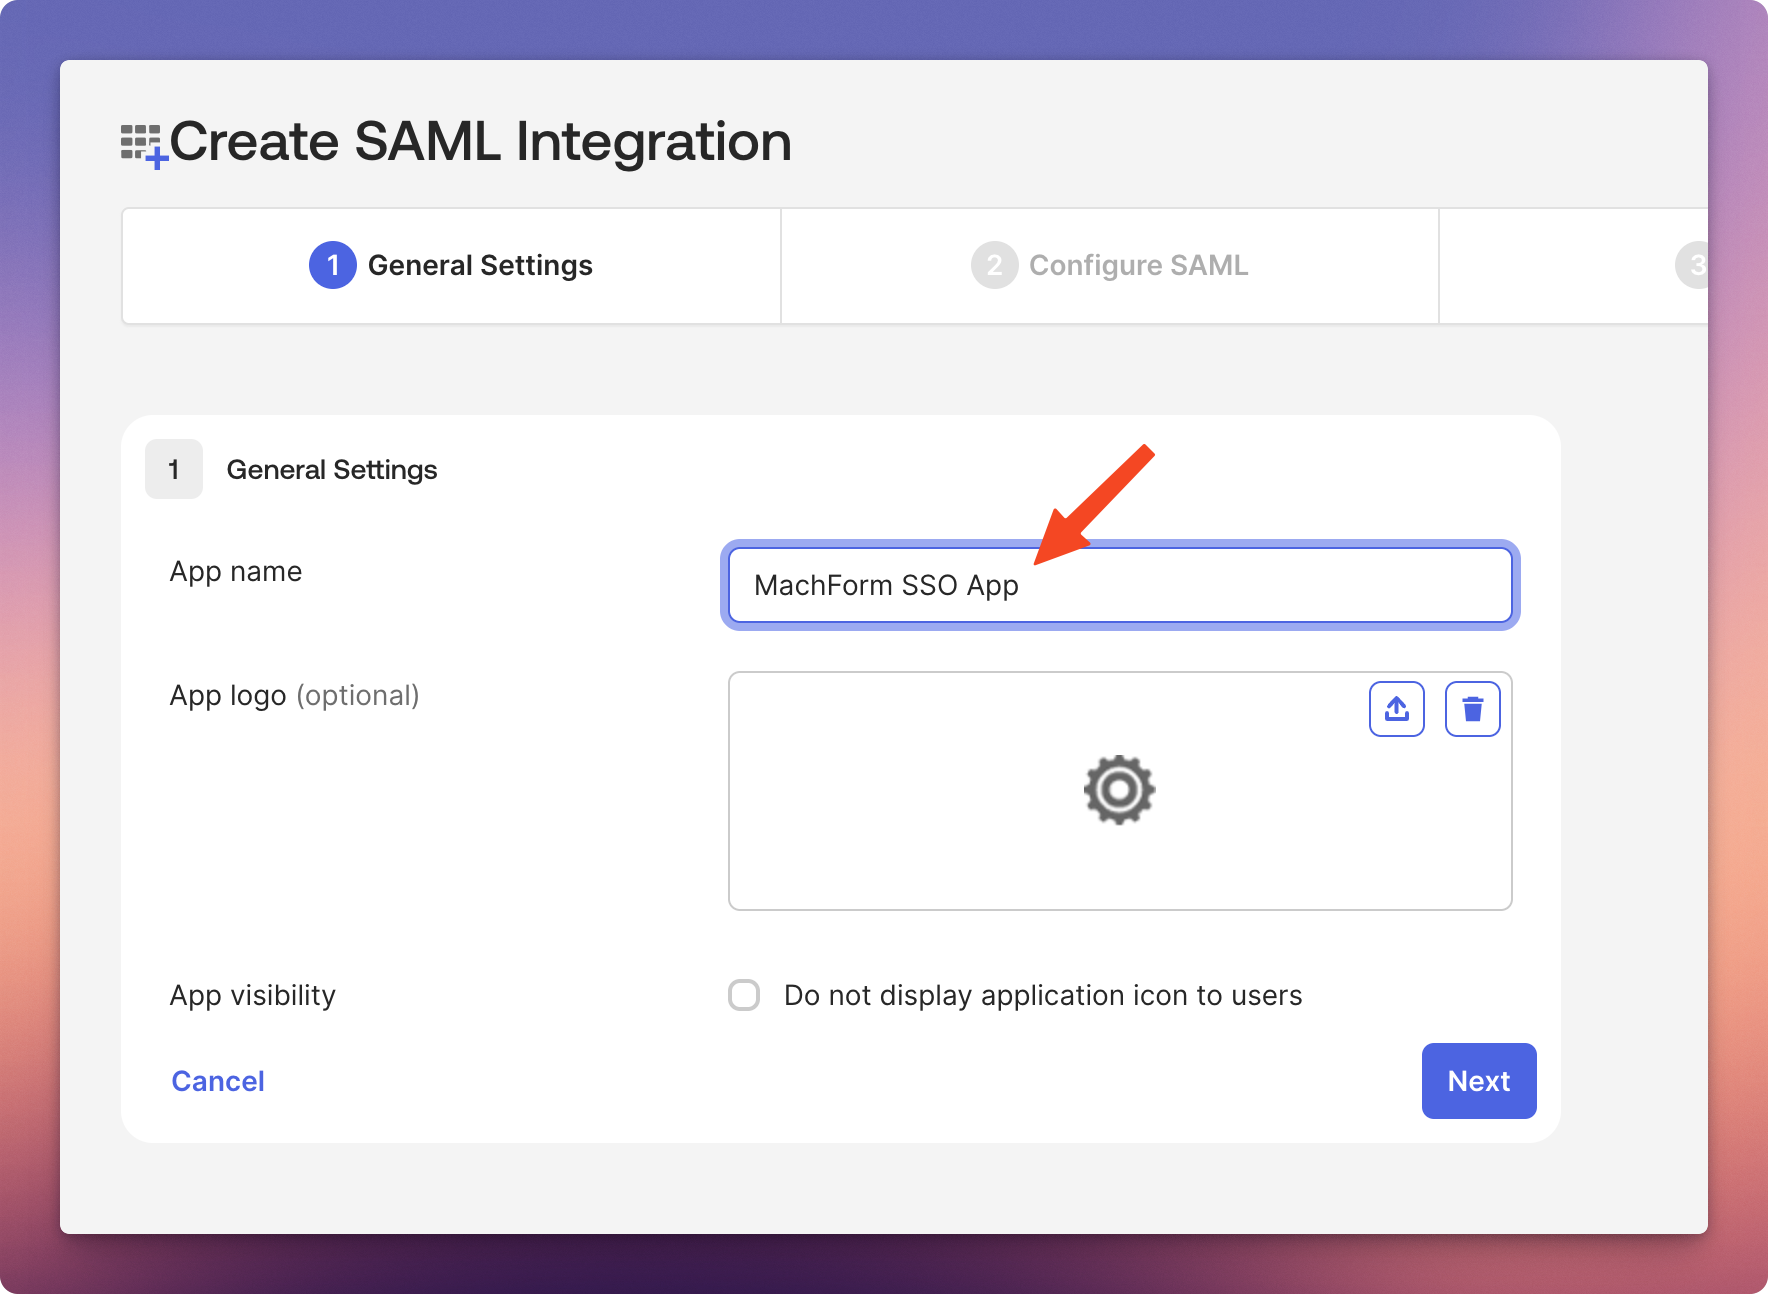
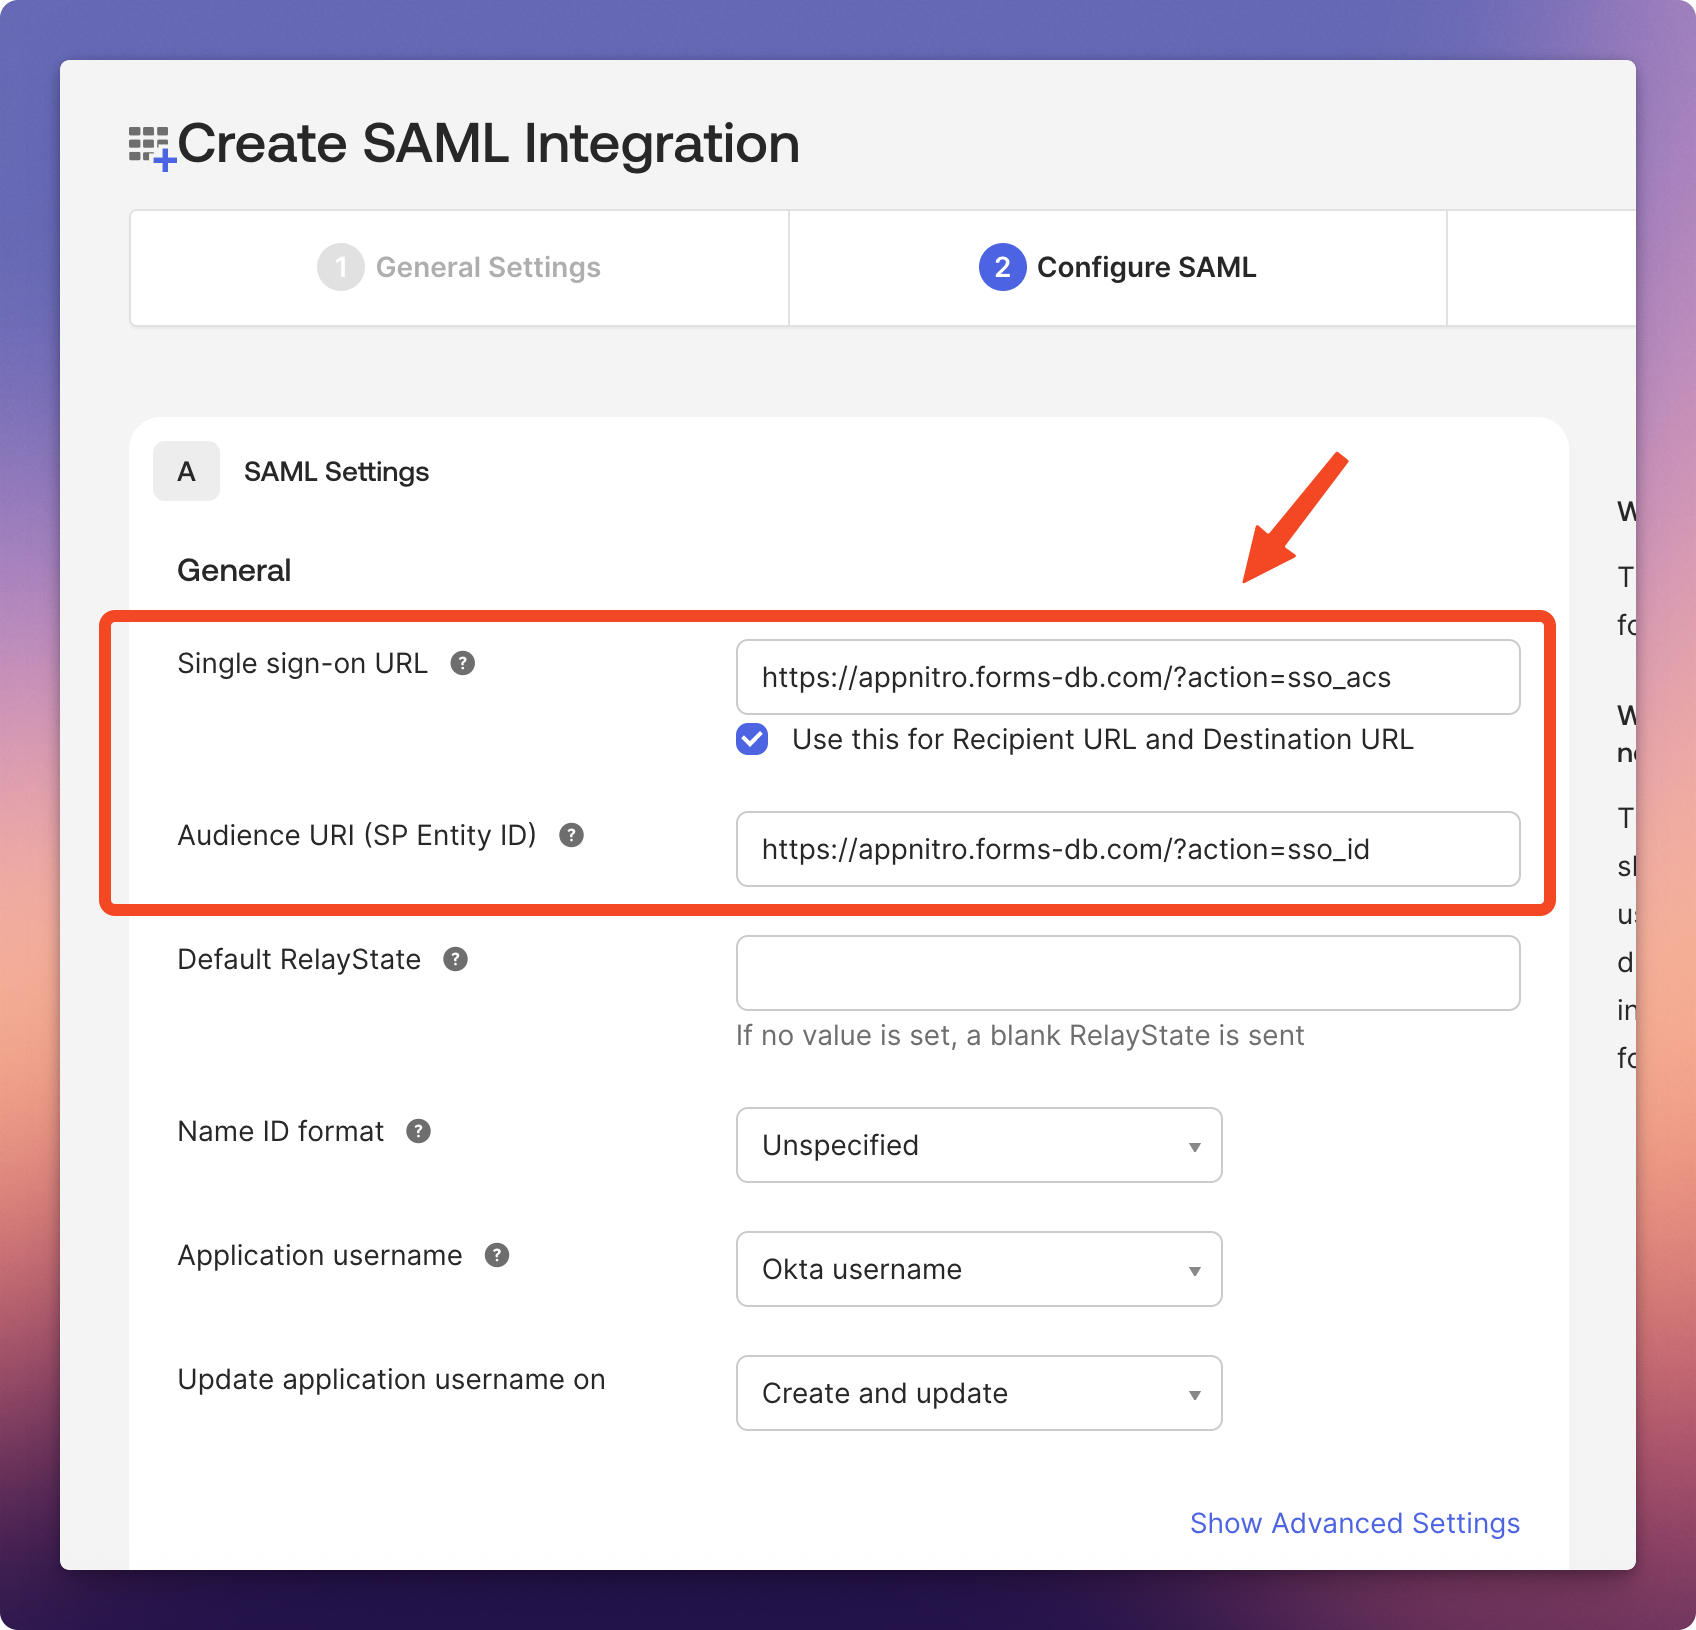
4. On the Create SAML Integration page, enter your app name and click Next.
5. Under the Configure SAML tab, fill in your MachForm Service Provider Metadata
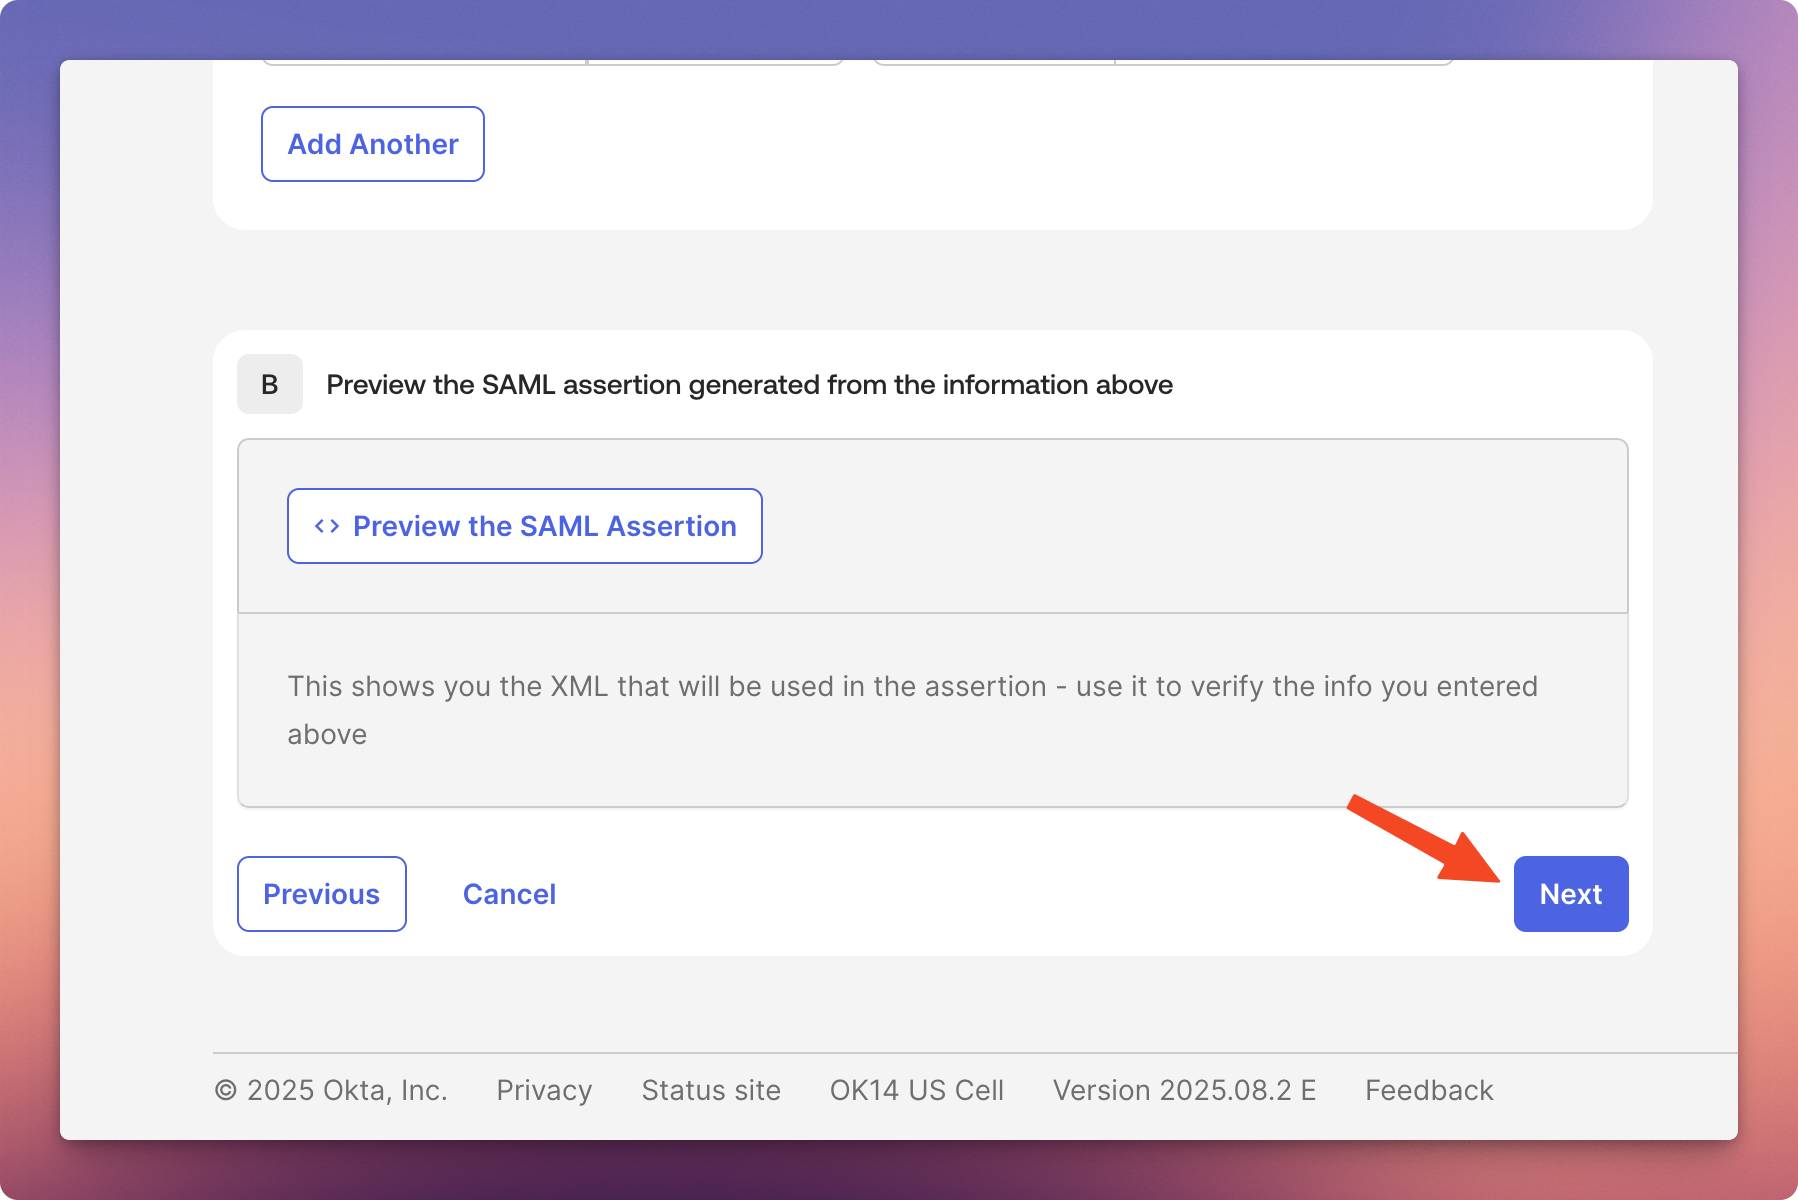
6. Scroll down to the bottom of the page and click Next.
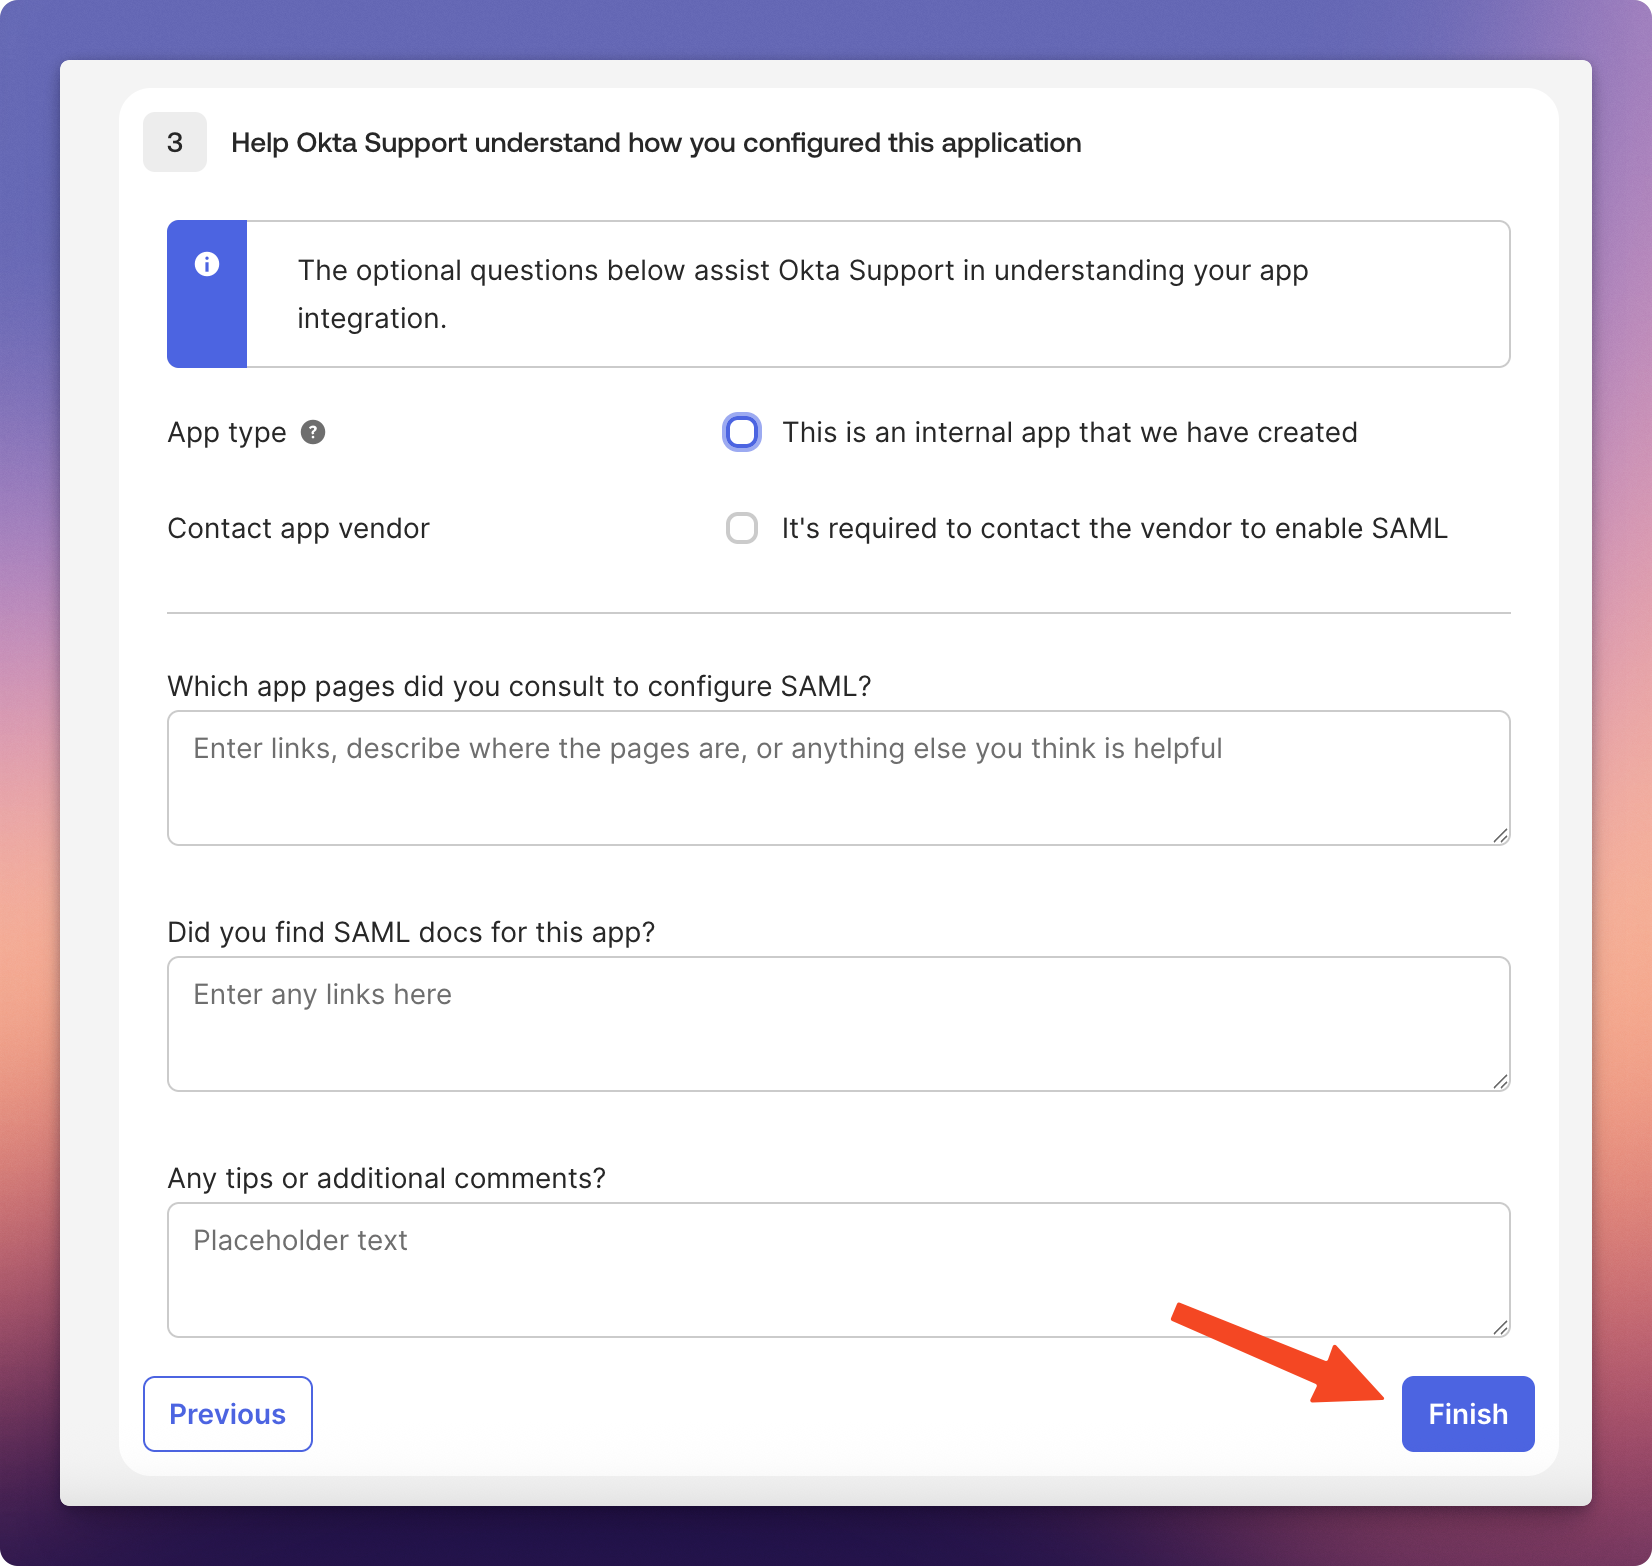
7. Finally, under the Feedback tab, click Finish.
Step 2: Collect IdP Information
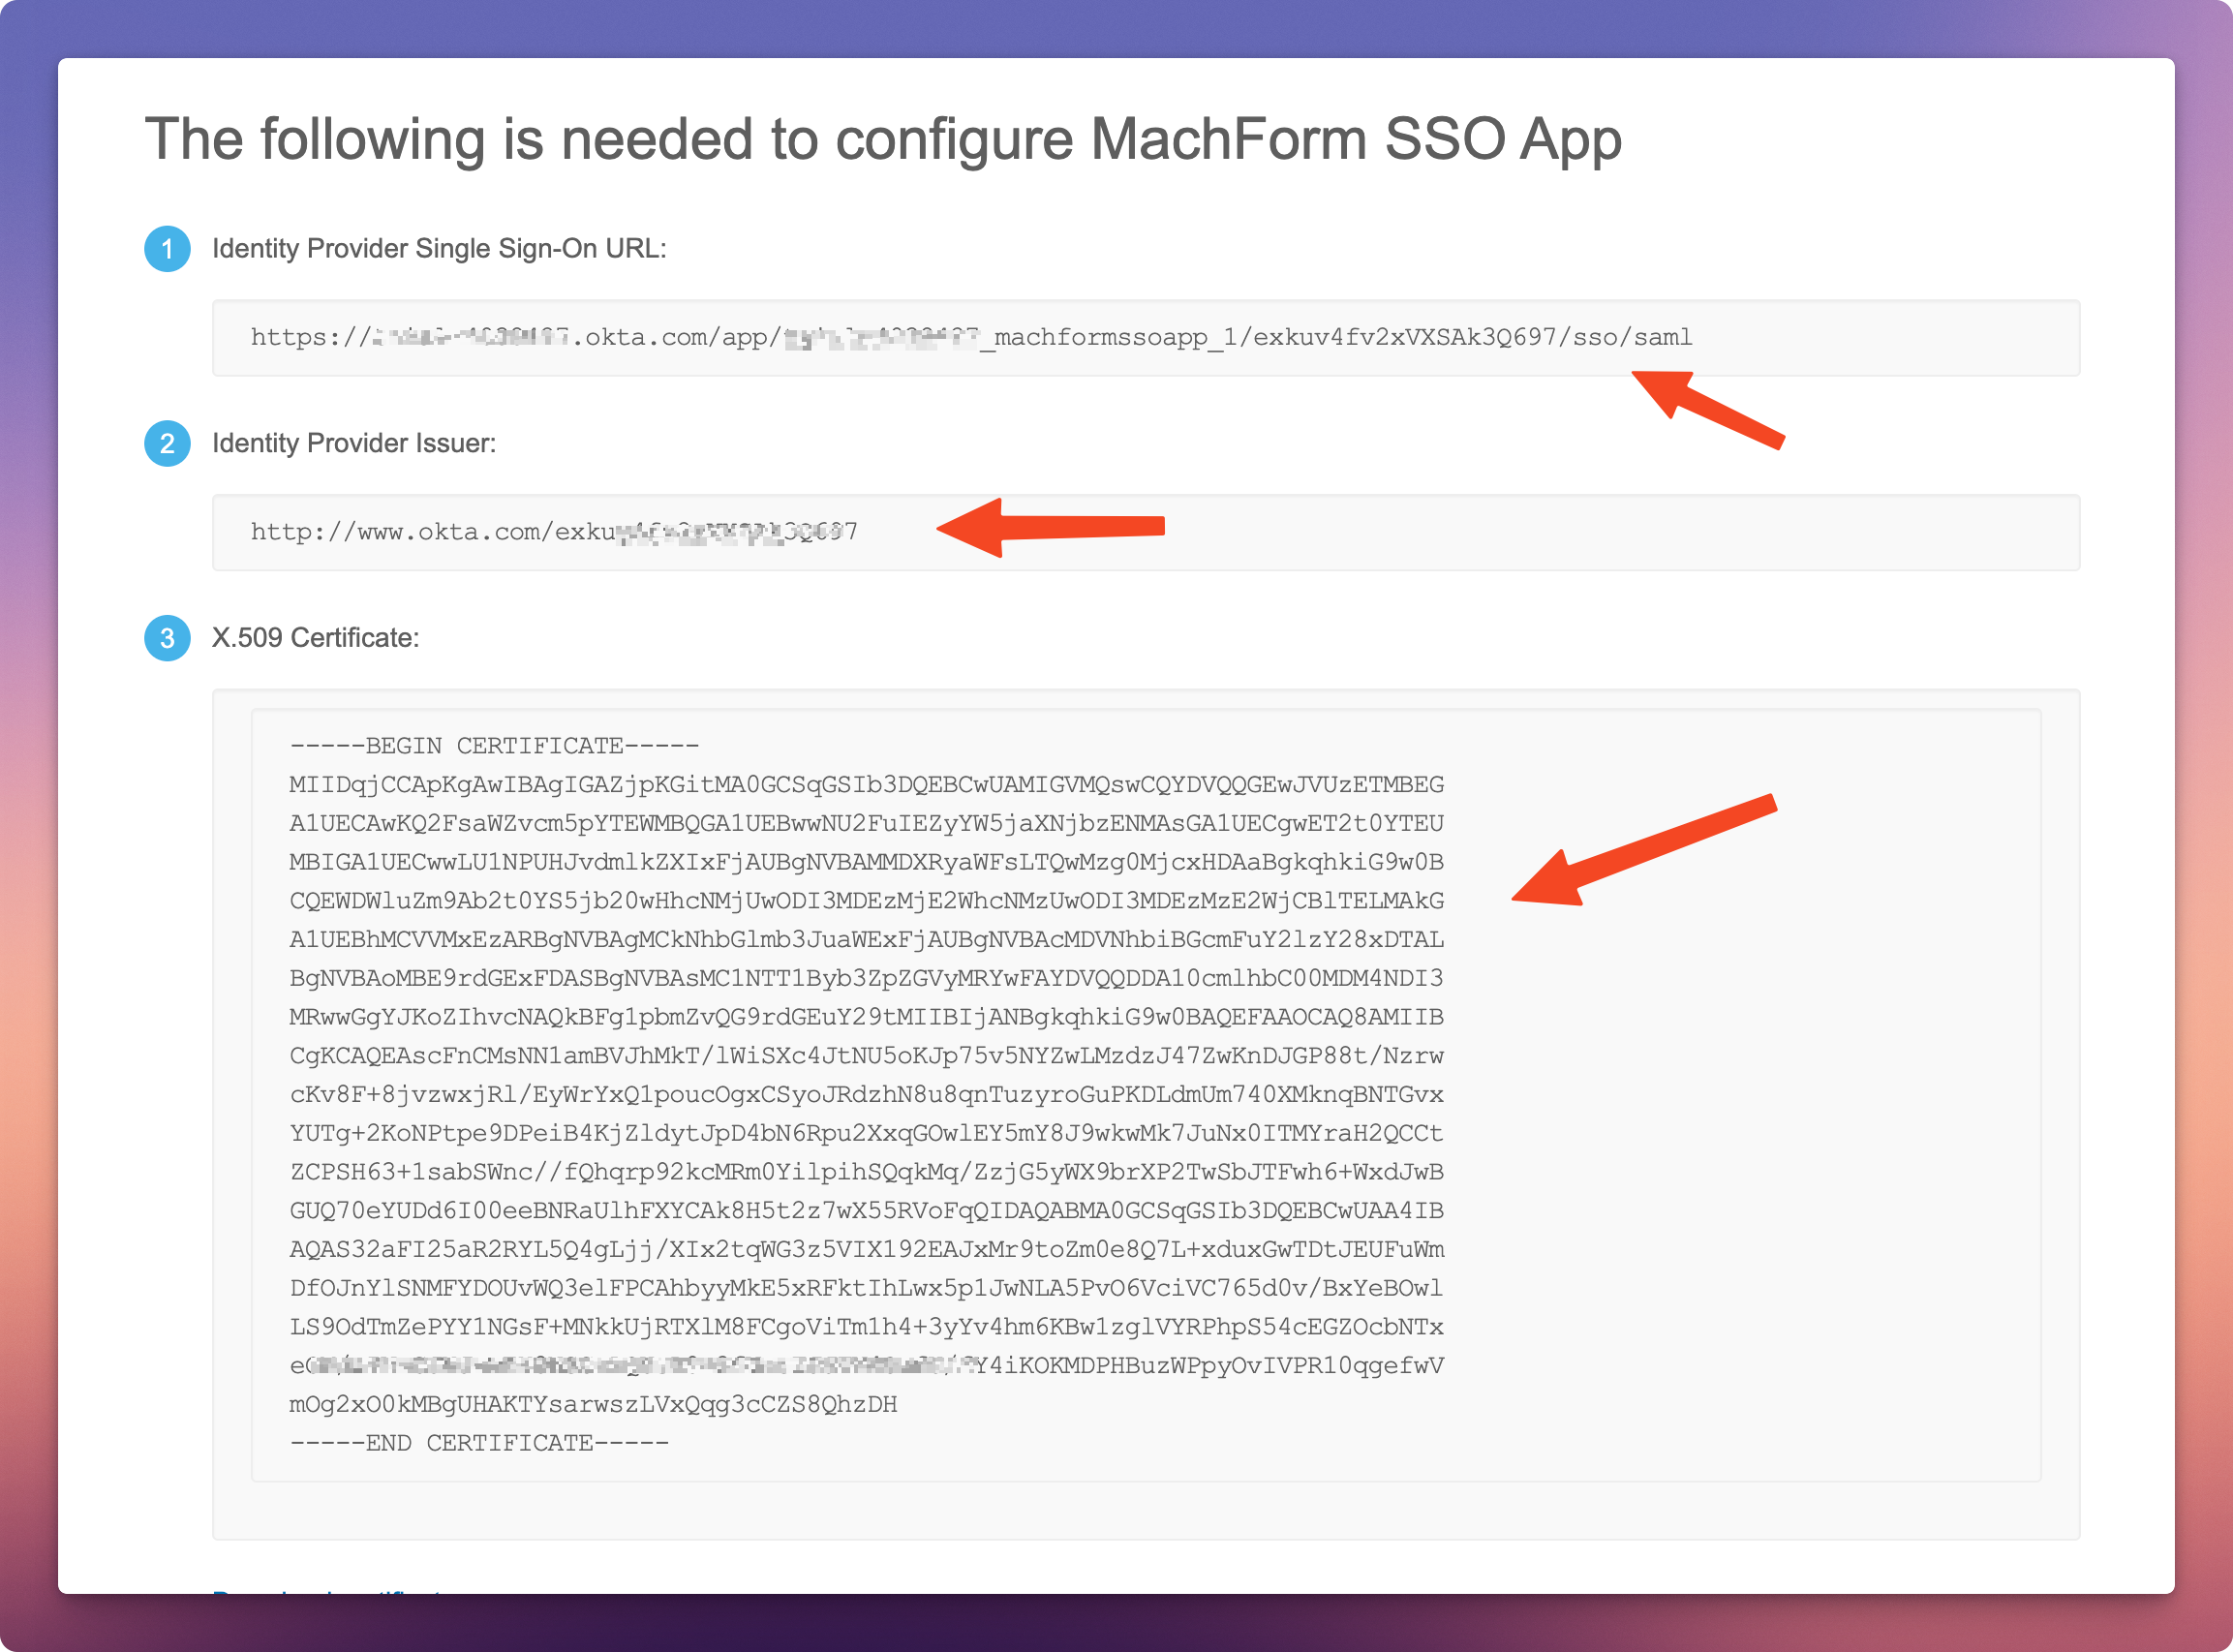
1. After completing the app creation, you'll be redirected to the Sign On tab. At the bottom-right corner of the page, click the View SAML Setup Instructions link.
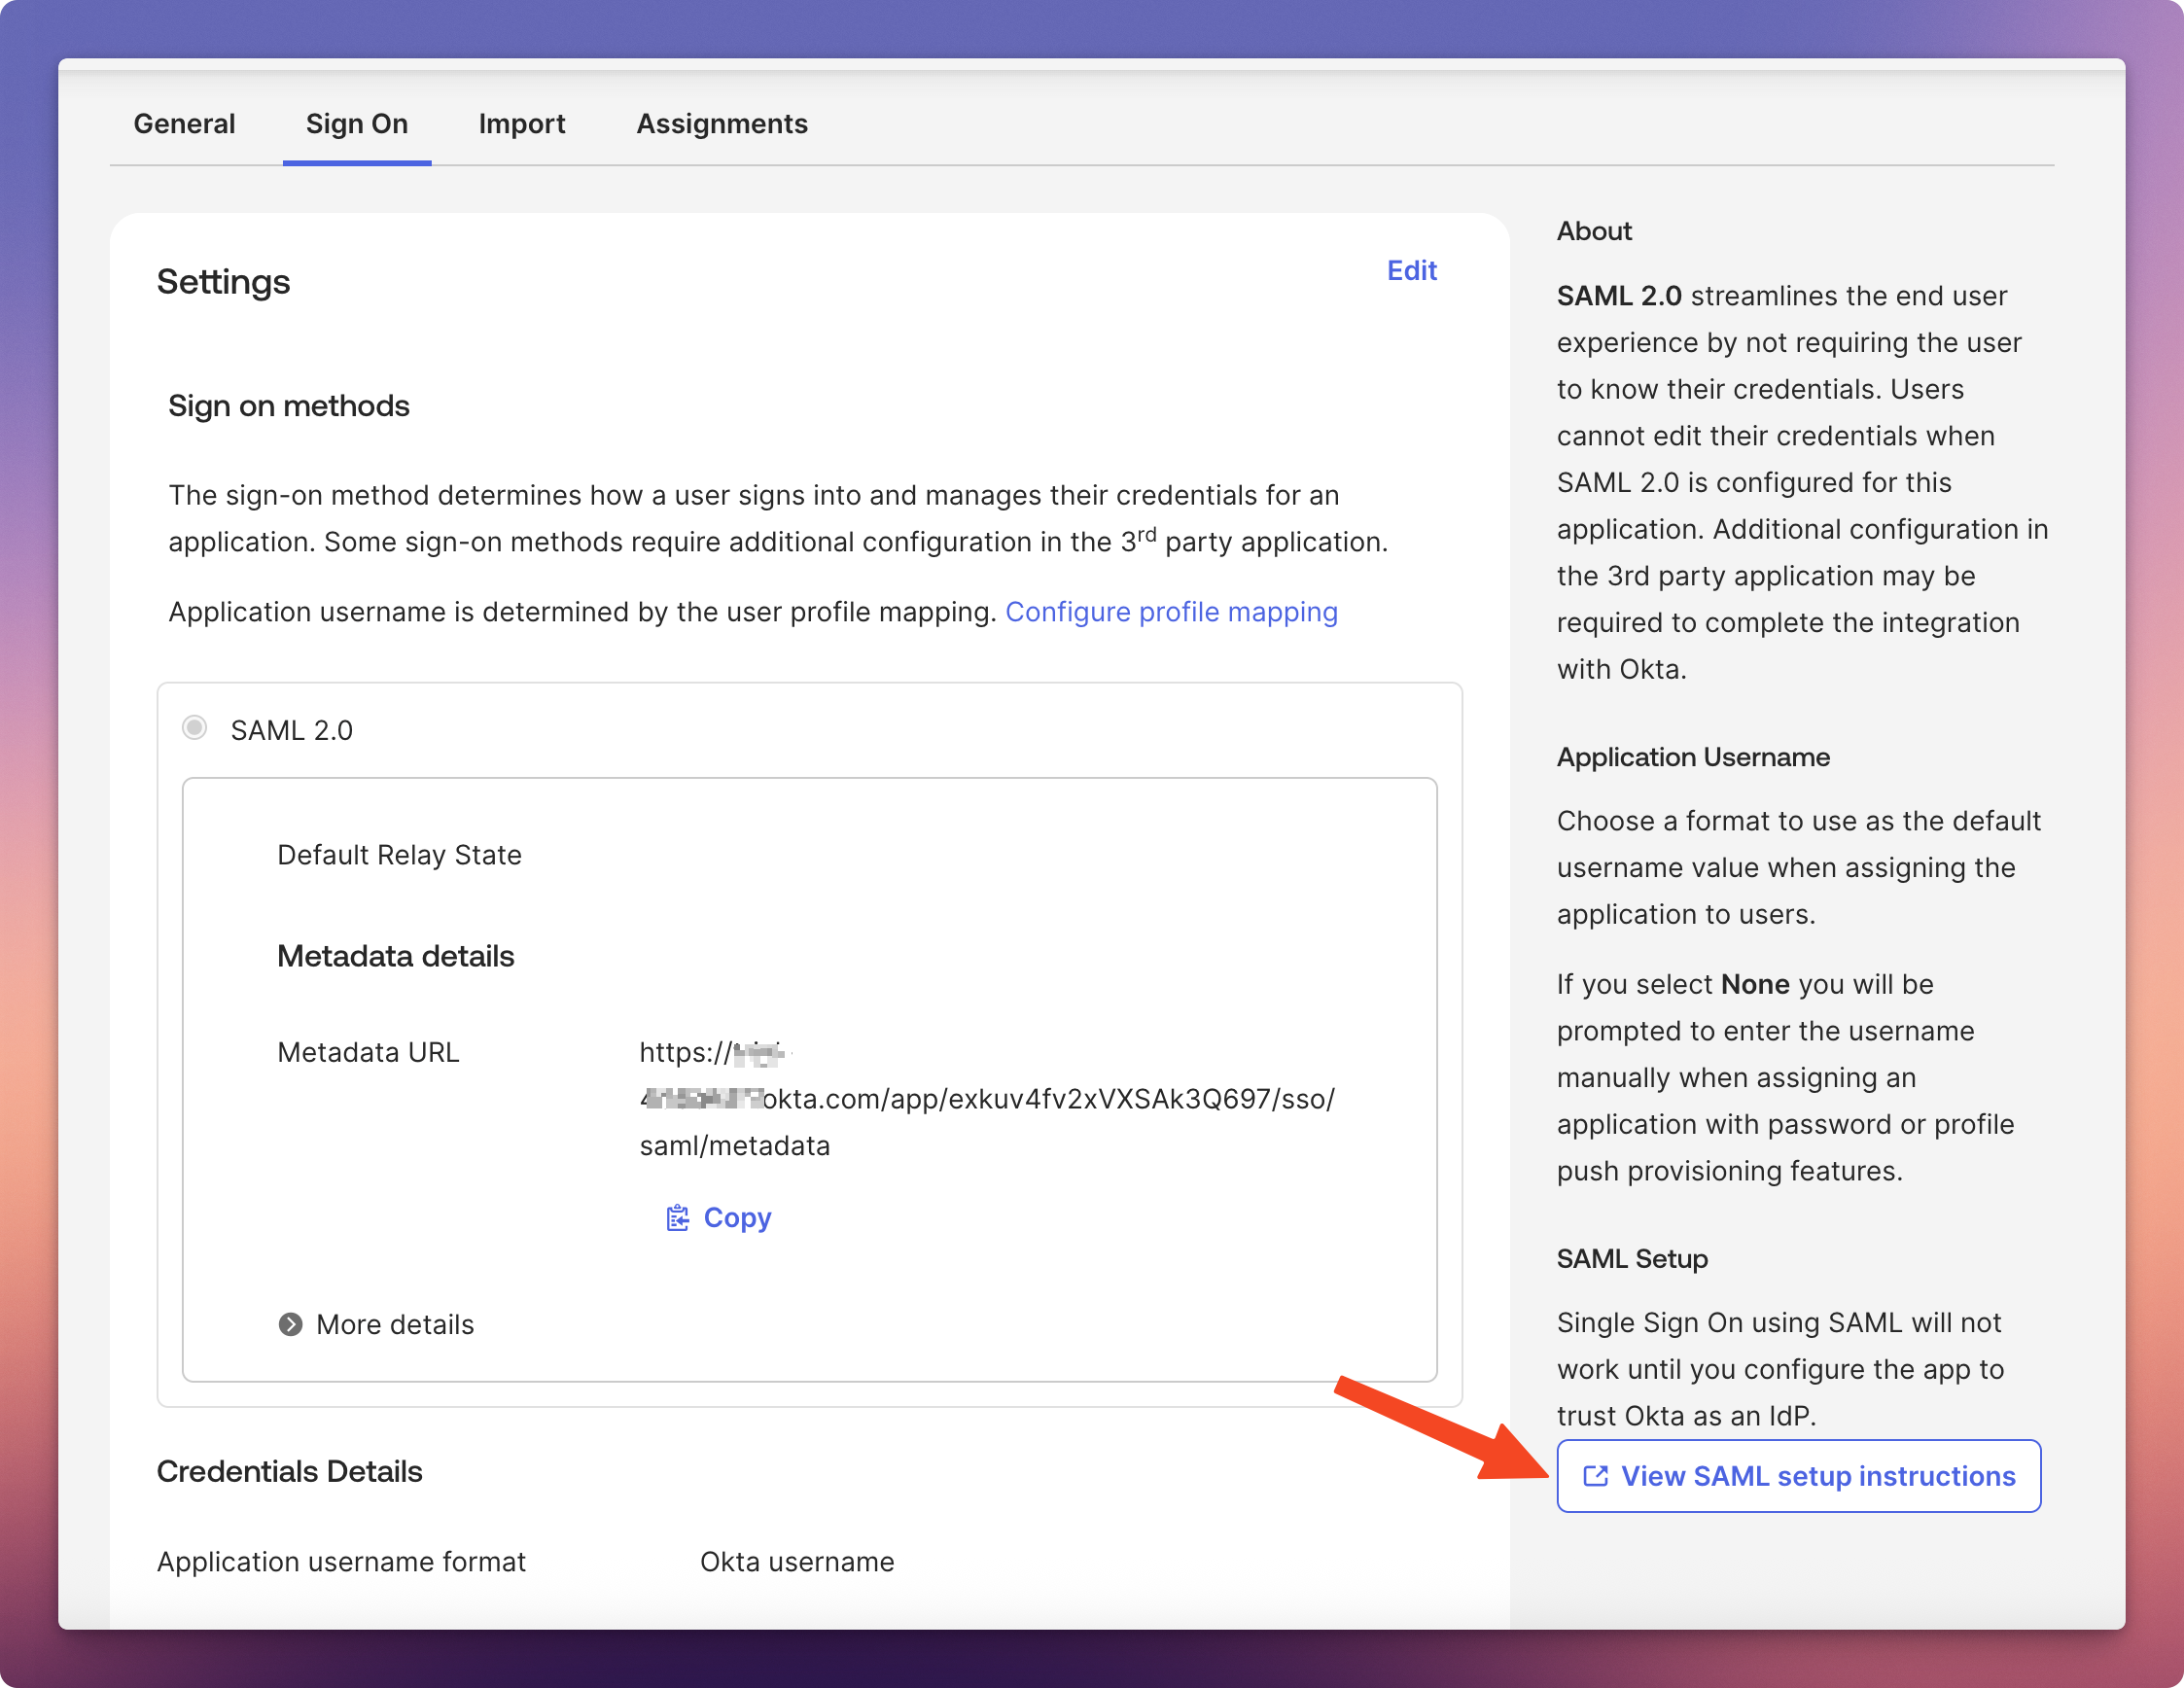
2. You'll see your IdP information details. Use this information to complete the SSO setup in MachForm later.
Step 3: Assign User Access to the SAML App
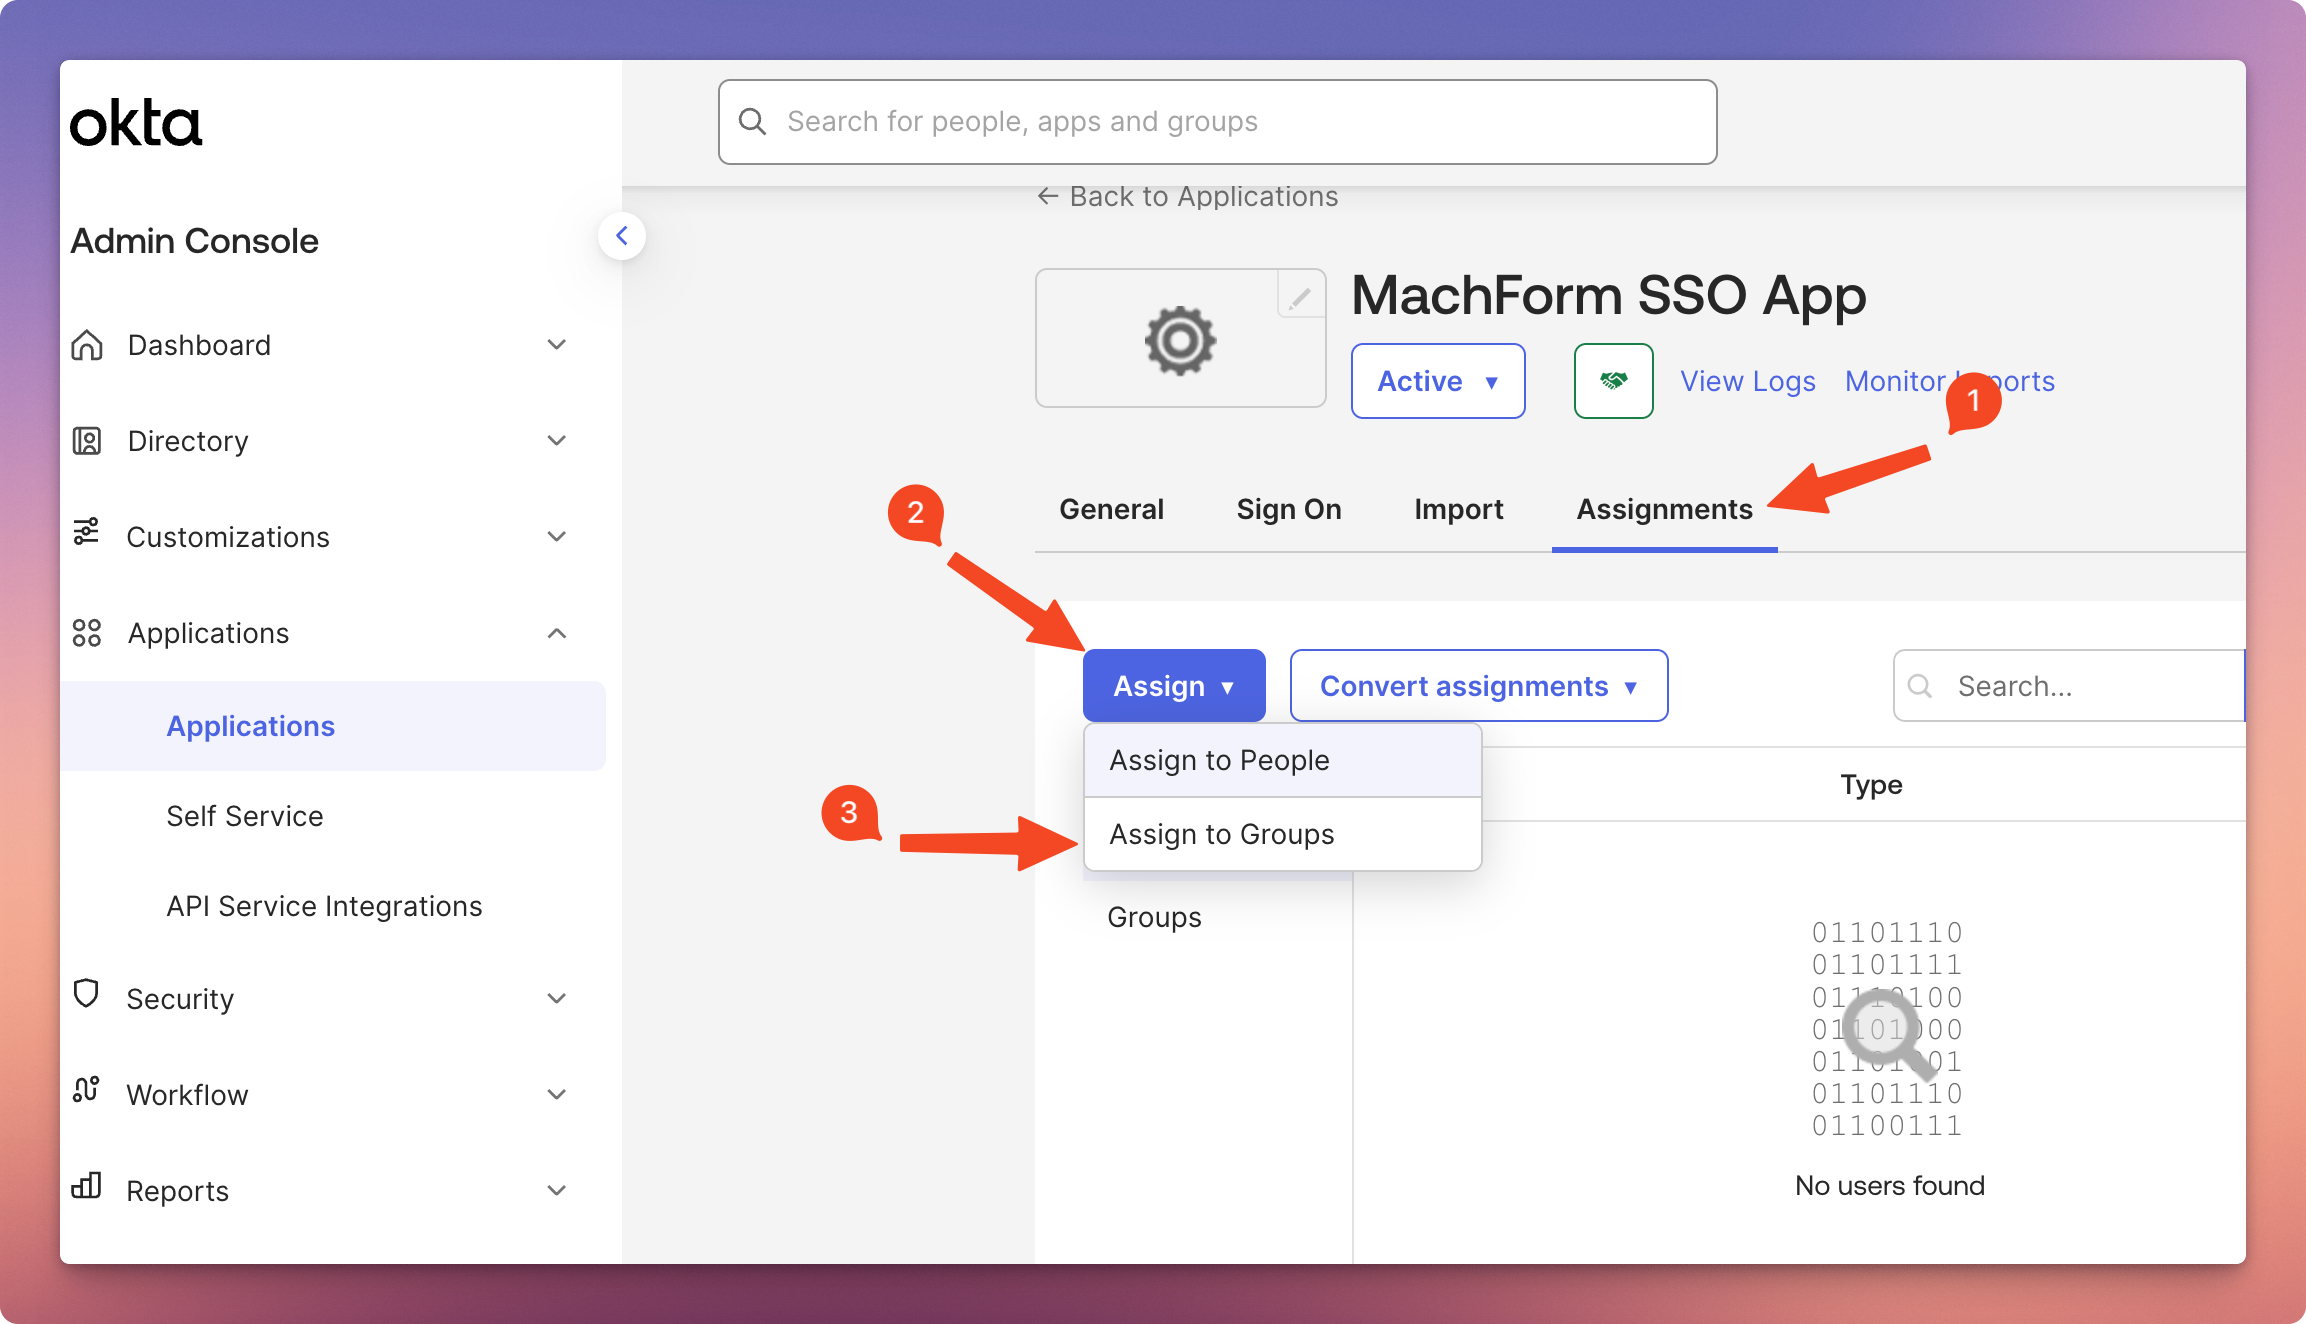
1. Open the Assignments tab of the SAML app. Click Assign, and then choose Assign to Groups.
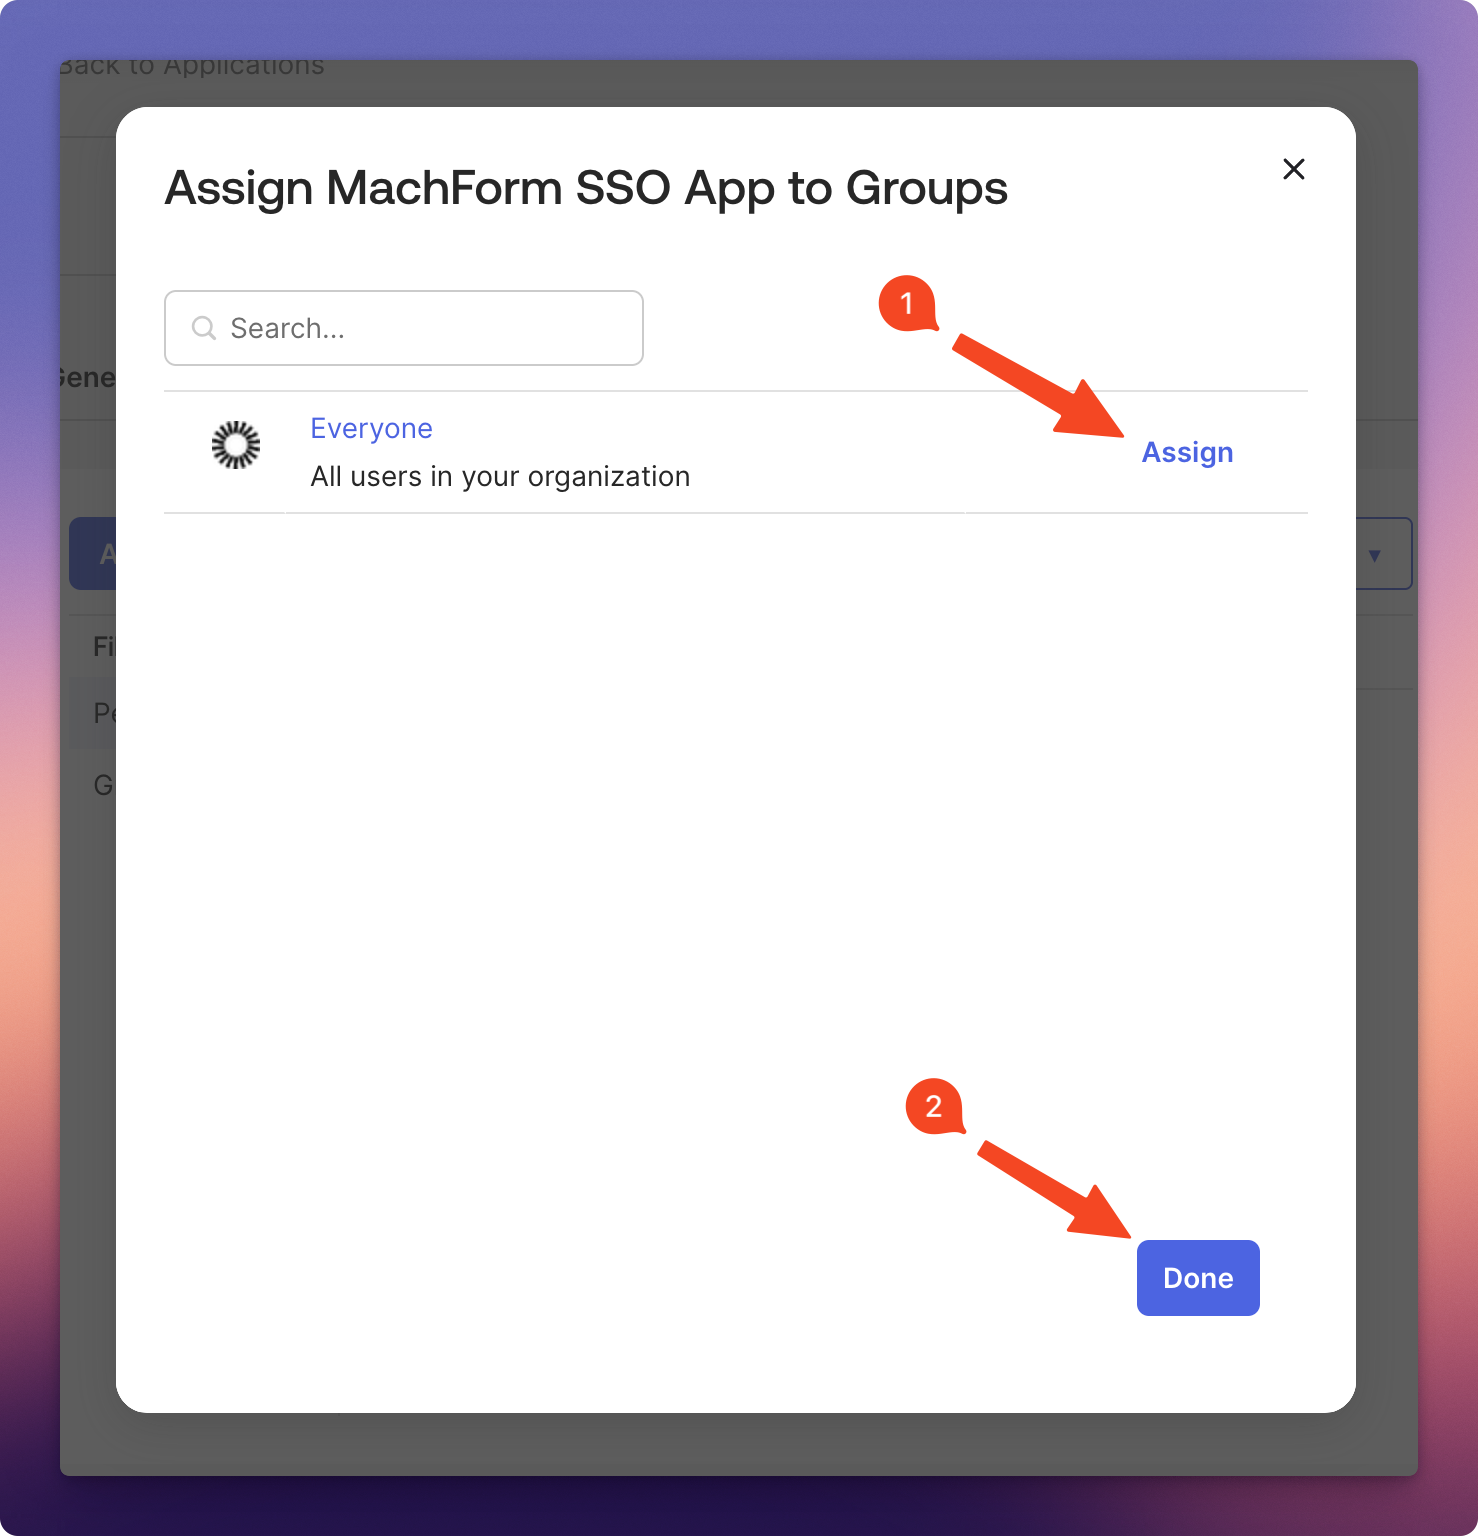
2. Click the Assign link next to Everyone, and then click Done. This will allow all users in your organization to use the SAML app. You can also assign access to specific groups or individual users instead.
You can now continue to Step 4 in How to Set Up MachForm with Single Sign-On (SSO).